Happy Sunday! And boy, oh boy, do I have an awesome recipe to share with you today! This recipe for Spaghetti Squash Turkey Boats is easy to make, incredibly satisfying, and perfect for meal prep for dinner this week.
Cooking Healthy
Meal Makeover: Nut Butter Pumpkin Muffins (Guilt-Free and Gluten-Free)
RecipeCommentMeal Made in Minutes: Pumpkin Pie Protein Overnight Oats
RecipeCommentHappy Sunday, my friends! And this Sunday is especially happy since I am going to finally meet my best friend's new baby boy!! I have been counting down the days until today and have been anxiously awaiting my chance to go visit the little munchkin since he was born three weeks ago!
I have been so focused on this coming weekend that I totally forgot about the first day of Fall! Now it may not feel like Fall here in Tampa, but PUMPKIN is officially in season and I have one of the best breakfast recipes with pumpkin that I am sure you will FALL in love with (pun intended)!
The best part is that this recipe takes minutes to make the night before and your breakfast will be waiting for you when you wake up!
This week's Meal Made in Minutes: Pumpkin Pie Protein Overnight Oats
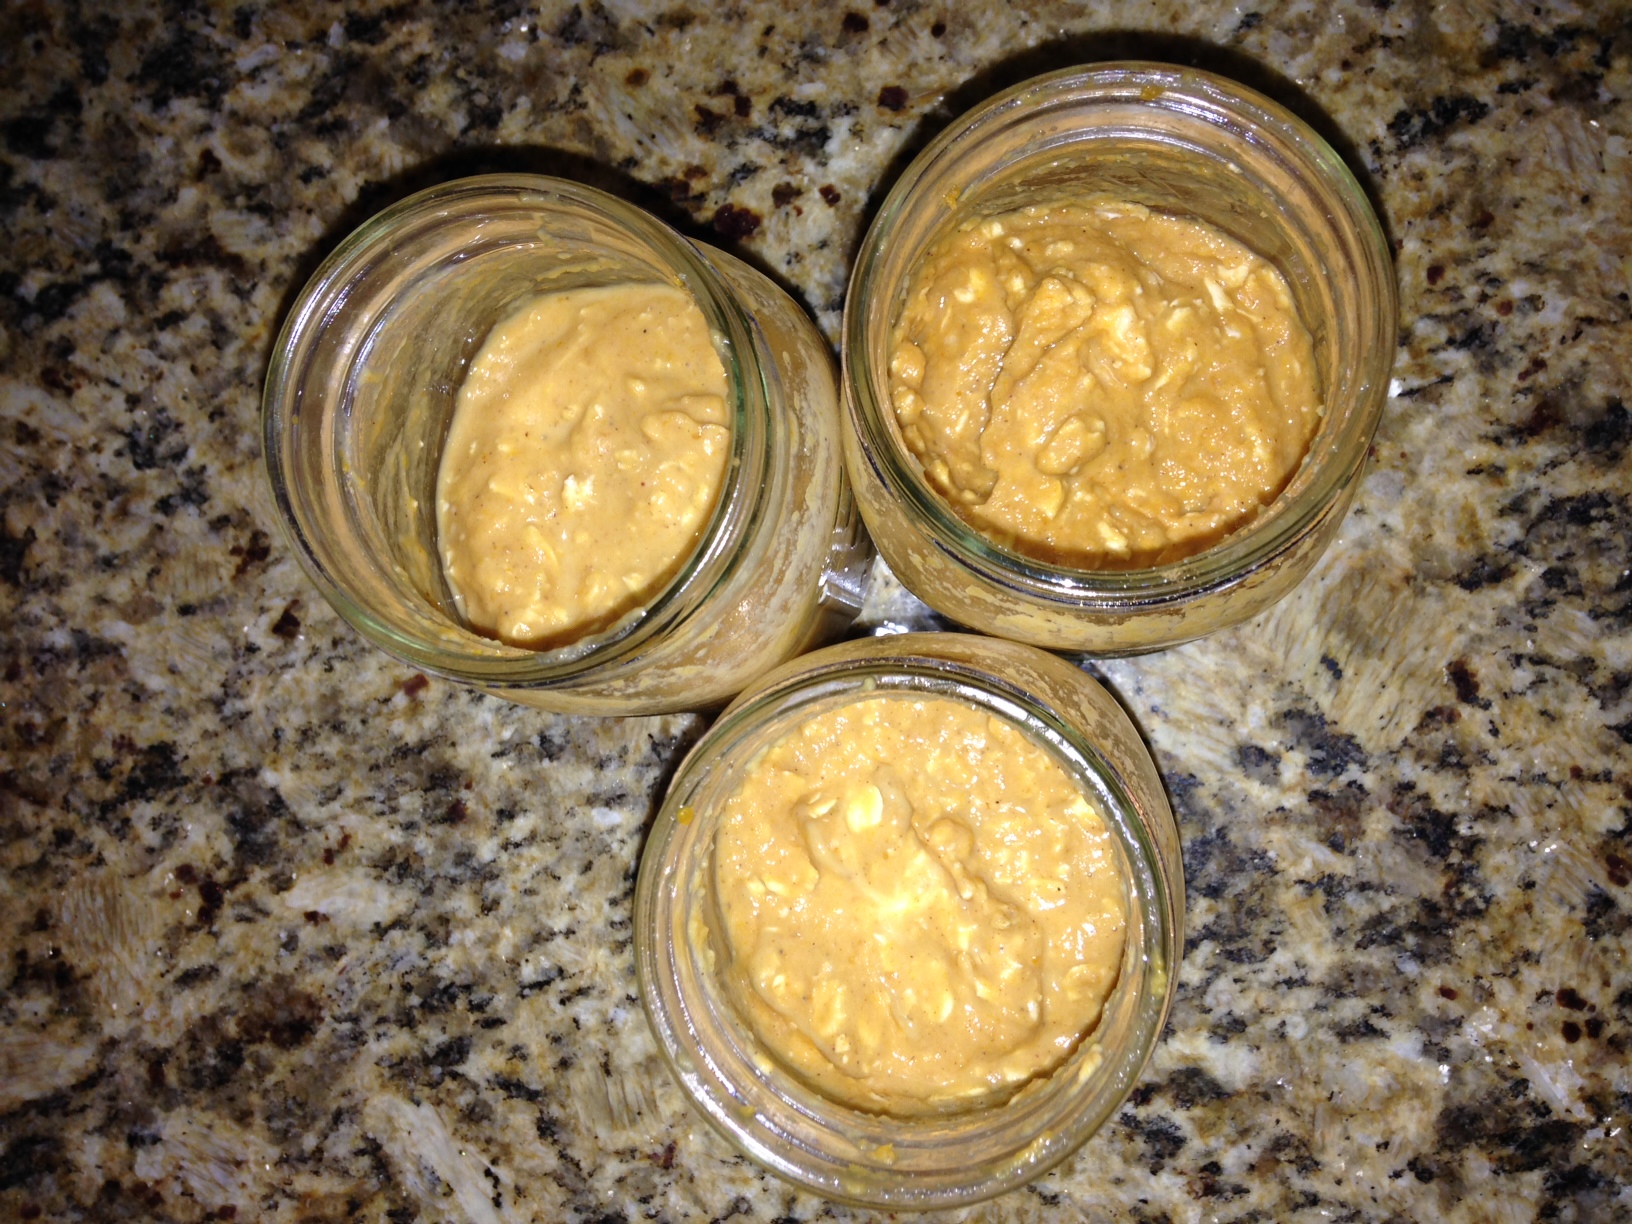
Three batches of Pumpkin Pie Protein Overnight Oats!!
Ingredients:
- 1/3 cup Rolled Oats (I used Gluten-Free Rolled Oats)
- 2 tbsp. (1/2 scoop) Vanilla protein powder (I used Bio Chem Vegan Vanilla)
- 1/8 tsp All Spice
- 1/8 tsp Nutmeg
- 1/8 tsp Cinnamon
- 1 packet Stevia (or 1 tbsp natural sweetener of choice, like Maple Syrup, Honey, Agave...)
- 1/4 cup pure pumpkin puree (I used Libby's 100%)
- 1/4 tsp vanilla extract
- 2/3 cup Unsweetened Vanilla Almond Milk (I used Almond Breeze)
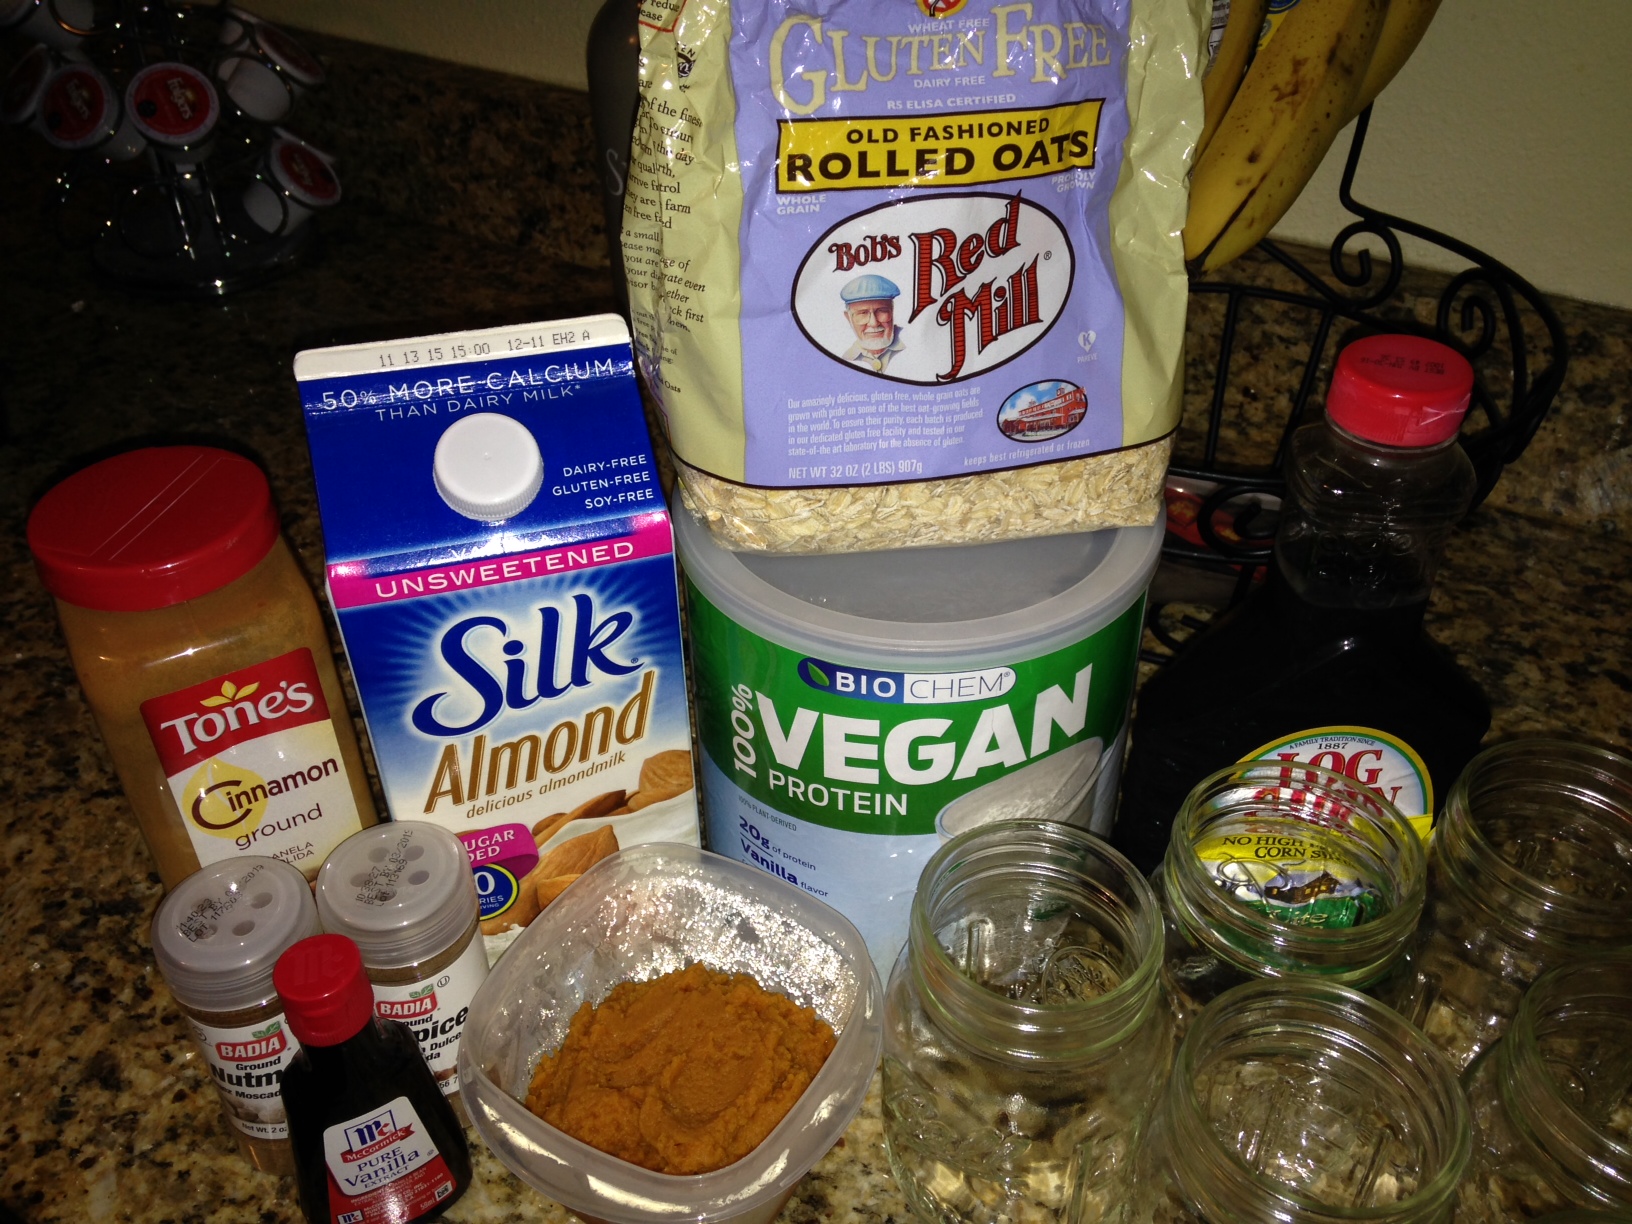
All of the essential ingredients!
Instructions:
- Combine all ingredients in a Mason Jar (or Tupperware with a lid) in the exact order listed above and mix well with a spoon (or place lid on the container and shake well to combine all ingredients).
- Place in the refrigerator overnight (or for at least 4 hours) and enjoy a delicious Fall breakfast!
That's it! Such a simple recipe and incredibly delicious and satisfying. Not only will you have a convenient breakfast on-the-go, but you will be fueled for the busy day ahead with this protein-packed breakfast that is loaded with long-lasting complex carbohydrates and antioxidants! Just look at the nutrition facts for one serving!

Not to mention, this recipe provides you with 100% of your daily Vitamin A needs (thank to the Pure Pumpkin Puree)!
I like to warm mine up in the microwave (30 seconds, stir, then 30 more seconds) add a splash of almond milk, and top the oats with banana slices and 1 tsp natural nut butter (for some added healthy fats)!
It seriously tastes like Fall in a jar :-)
Enjoy your (healthy) Pumpkin Pie for breakfast and have a wonderful week ahead!
Meal Made in Minutes: Chicken and Brown Rice Salad
Recipe, NutritionCommentAnother weekend has come and gone and this weekend was especially busy! Luckily, I thoroughly enjoy having a busy schedule and I spent my time volunteering at the Children's Cancer Center and celebrated a friend's birthday with a group of close friends! Let's not forget about the time dedicated to College Football on Saturday night and watching the New England Patriots on Sunday afternoon, along with my weekly household chores and meal prepping!
Since I had a lot on my plate this weekend, I did not have a lot of time in the kitchen so whipping up this SUPER EASY recipe for this week's meal made in minutes was just perfect! Let me introduce to you my version of homemade chicken salad that has some extra ingredients for longer-lasting energy and is the perfect combination of lean protein, complex carbohydrates, and healthy fasts.
This week's Meal Made in Minutes: Chicken and Brown Rice Salad
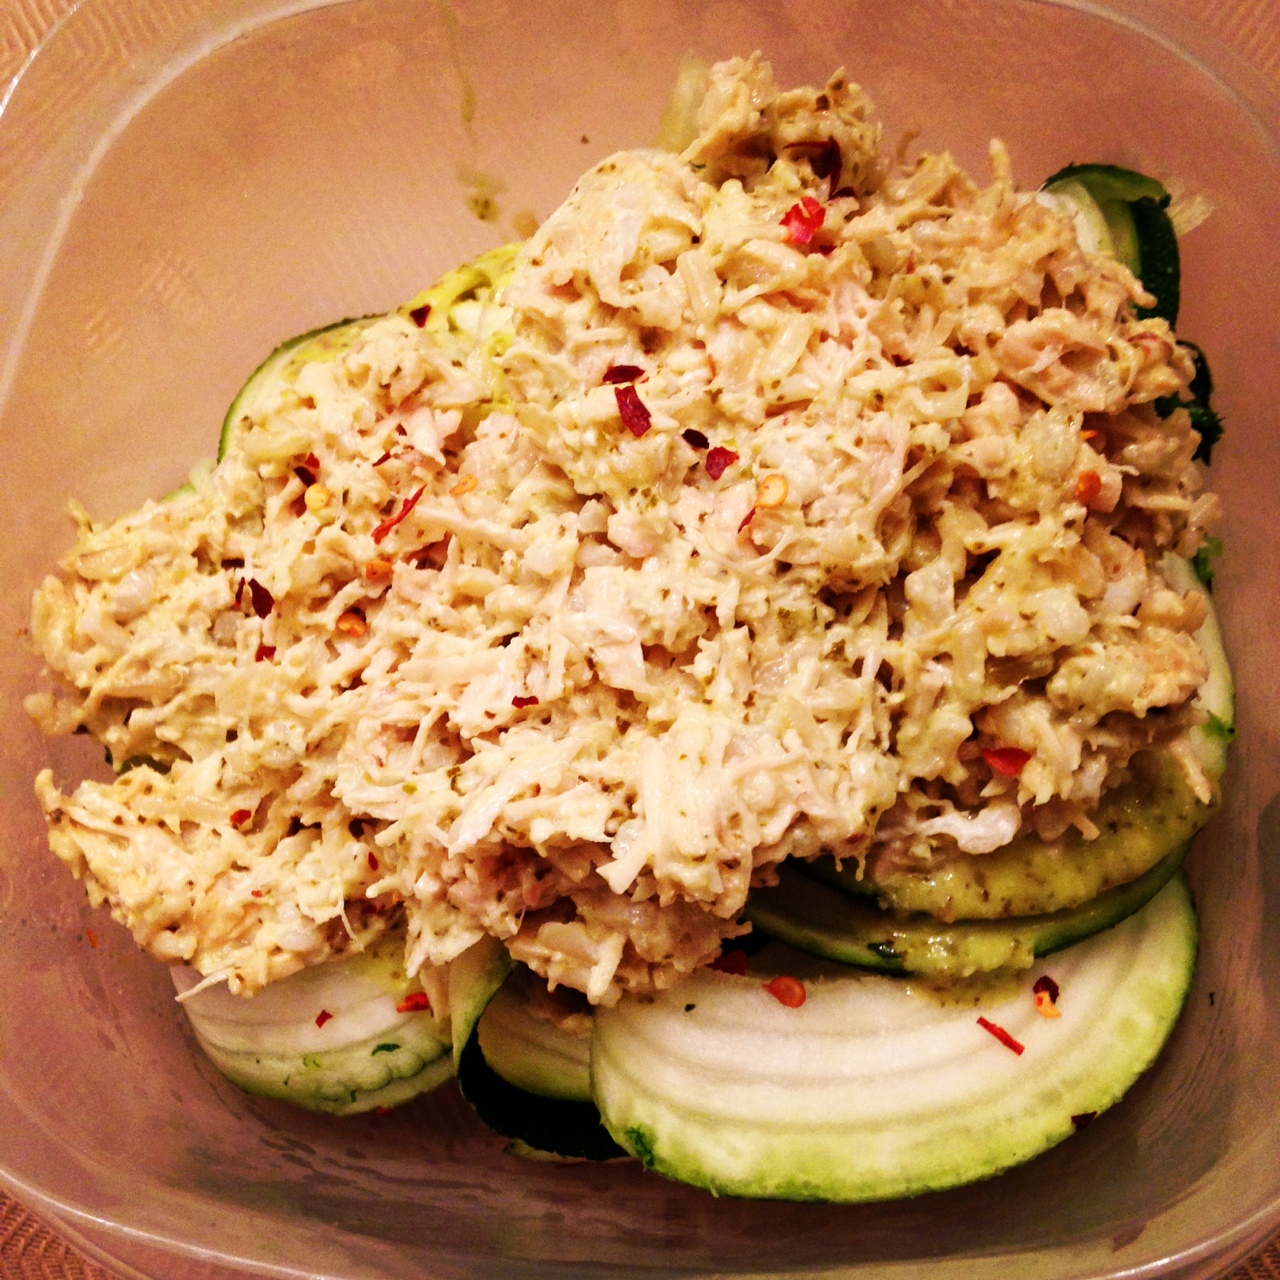
Chicken and Brown Rice Salad (on top a bed of Zoodles!)
Ingredients: (Serves 1)
- 4-5oz cooked chicken breast (or Organic canned chicken breast, white meat only)
- 1/3 c cooked brown rice (I used Minute Whole Grain Brown Rice)
- 2 Tbsp crumbled Goat cheese
- 2 Tbsp Pesto sauce (or 1/4 cup plain Greek yogurt mixed with lemon juice and Dill, to taste)
- Red Chili flakes (to taste)
- Ground black pepper (to taste)
Instructions:
- Shred the cooked chicken breast (or drain the canned chicken and run under cool water in a strainer).
- In a medium mixing bowl, add cooked brown rice and shredded chicken breast and mix together. Then add the Pesto sauce or plain Greek yogurt (mixed with lemon juice and Dill seasoning) and Goat cheese, mix well.
- Season the chicken salad with Red Chili flakes and ground pepper, to taste, and mix well to combine all ingredients!
- BOOM, you're done in 3 steps!
This hearty chicken salad can be eaten alone with a handful of whole-grain crackers for some added crunch; placed on top of a large salad or a plate of Zoodles for extra antioxidants; or eaten as a sandwich when placed between two slices of whole-grain (or gluten-free) bread and paired with some raw veggies on the side for a complete and satisfying lunch to power you through a hectic weekday at work! I personally love this chicken salad with a bed of Zoodles and Pesto sauce (see picture above), but it honestly goes with any combination of vegetables and tastes great with the Greek yogurt mixture!
Hope you enjoy your hearty chicken salad this week and have a great week ahead!!
Meal made in minutes: Shrimp with Quinoa, Spinach, and Feta Salad
RecipeCommentIt's Sunday Funday again, and I have had so much "fun" catching up on my Clinical course work for my Internship that I failed to post this delicious recipe last weekend. I originally planned to make this meal on Sunday to have leftovers for a few days of the beginning of the work-week, but my father-in-law was able to join us for dinner and spending quality time with him was way better than any leftovers ever could be. Nevertheless, this delicious meal only took 20 minutes for me to make and about 10 minutes for the guys to devour!
This week's Meal Made in Minutes: Shrimp with Quinoa, Spinach, and Feta Salad

Paired with a side salad for a complete, balanced meal!
Ingredients: (serves 2-4 people)
1 cup dry Quinoa (Ancient Harvest pre-washed Quinoa)
1 package Athenos Reduced-Fat Sundried Tomato and Basil Feta
4 cups loosely-packed Spinach (stems removed)
2 Tbsp Light Italian dressing
Garlic Salt (to taste)
36 Medium Shrimp (Peeled and deveined, frozen and thawed out)
Old Bay seasoning (to taste)
Olive Oil spray
Instructions:
- Cook Quinoa according to package directions (about 15 minutes)
- While Quinoa is cooking, remove the (thawed) shrimp from the refrigerator and run under cold water, set aside.
- Break off the stems of the spinach leaves and break the leaves into smaller pieces, then measure out about 4 cups of loosely-packed spinach.
- When Quinoa is done, turn off the heat and fluff with a fork. Season with garlic salt (to taste) and add the spinach leaves - mix well so that the leaves are fully incorporated into the Quinoa (the heat from the Quinoa will cause the spinach leaves to wilt nicely). Then add the crumbled feta cheese and mix well (the cheese will melt into the Quinoa and spinach nicely). Lastly, add the Italian dressing and mix well. Put the cover back on the pot and let mixture stay warm.
- Lastly, spray a large saucepan with Olive Oil spray and sauté the shrimp for 2-4 minutes (flipping over the shrimp half way) until they are heated all the way through.
- Divide the Quinoa, Spinach, and Feta Salad between 2-4 plates and top with about 9 shrimp for each serving.
- BOOM, you're done! Enjoy!

Quinoa, Spinach, and Feta mixture (staying warm in the pot)
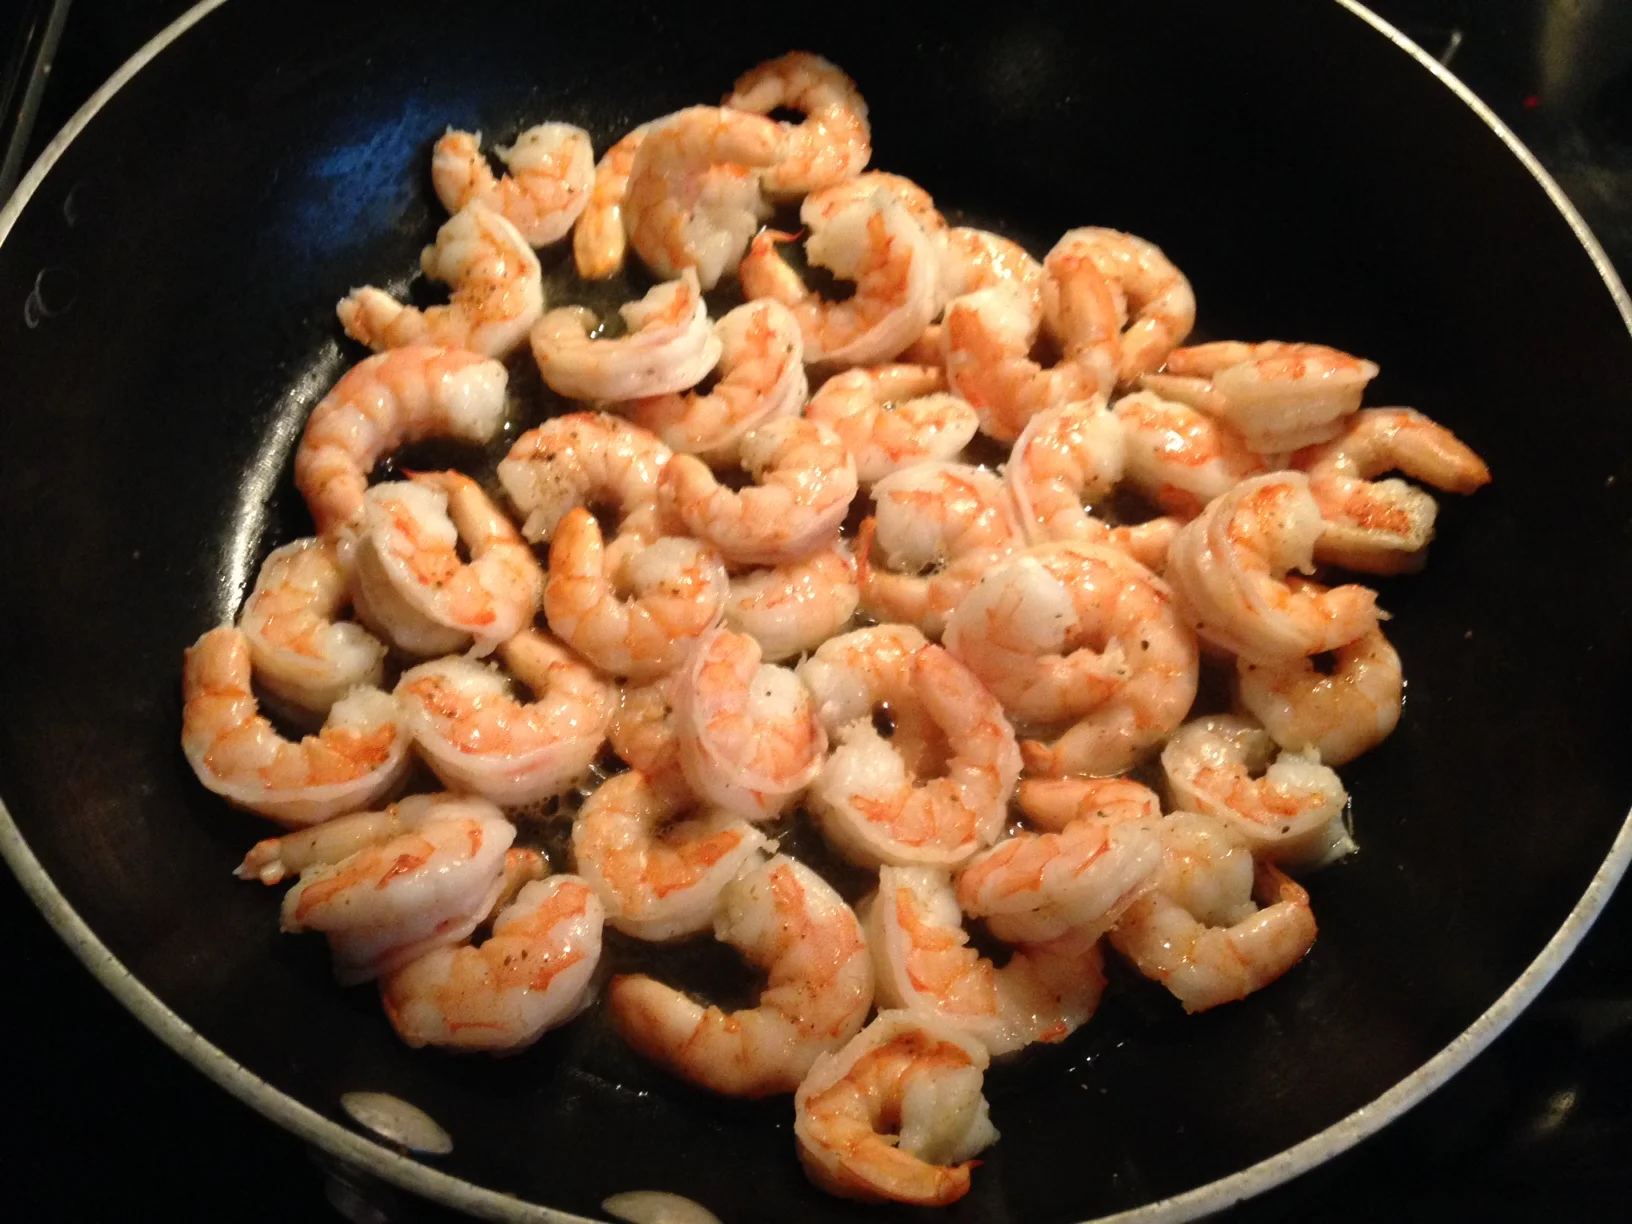
Perfectly cooked shrimp, perfectly seasoned with Old Bay!
I must say that I impressed myself with this meal and even the guys loved it! There wasn't a bite left! The best part was how healthy this balanced meal was with only 233 calories, 6g of fat (1.5g saturated fat), 34g carbohydrates, and 10.5g protein in one serving of the Quinoa, Spinach, and Feta salad! Adding the 9 shrimp brought this meal to 333 calories and 31g protein!

Nutrition facts for 1 serving of Quinoa, Spinach, and Feta Salad
I truly enjoyed making this meal and enjoyed the company even more! I hope you take the 20 minutes needed to prepare this meal and spend as much time as you can enjoying this meal with family and friends.
Have a great Sunday and wonderful week ahead!
Meal made in Minutes: Turkey and Tomato Salsa (over brown rice and / or zoodles)
Nutrition, RecipeCommentSunday Funday this week consisted of catching up on laundry, fitting in a quick HIIT cardio session, and then spending the rest of the day working on Clinical assignments and meal prepping for the week. While Clinical Module assignments are NOT my favorite, preparing this week's Meal Made in Minutes brightened up my day and made my house smell delicious!
The best part of meal prep today was that it only took me 15 minutes to make everything and I will have healthy options for lunch and dinner for the next 2-3 days! Now, that's a win-win situation!
This week's Meal made in Minutes: Turkey and Tomato Salsa over brown rice and / or zoodles

Turkey and Tomato Salsa over Zoodles! It's what's for dinner!
Ingredients:
* Turkey and Tomato Salsa (serves 6)
- 1.25 lb extra lean ground turkey
- 1 16-oz jar of salsa
- 1 28-oz can of No Salt Added Diced Tomatoes
- 1 tsp cumin
- 1 tsp chili powder
- Grated Parmesan cheese (optional topping)
- Red Chili flakes (optional topping)
* Brown Rice (serves 4-6)
- 2 cups dry Minute Instant Whole Grain Brown rice
* Zoodles (serves 4-6)
- 4-6 small zucchinis

Turkey and Tomato Salsa ingredients (minus the spices and toppings)
Instructions:
- In a medium-sized pot, bring water to a boil and cook the Minute rice per package instructions.
- While rice is cooking, cook the ground turkey in a large sauce pan (cook thoroughly until no pink is present, about 8-10 minutes).
- While the turkey is cooking, pour the salsa and diced tomatoes into a large pot and heat on medium heat.
- When the rice is done, remove the pot from the heat and fluff with a fork. When the turkey is done, turn off the heat and add in the cumin and chili powder (mix spices in well) and then add the cooked turkey to the large pot with the salsa and tomatoes (mix well and continue to heat on medium).
- Clean and spiralize the zucchini.
- Remove the Turkey and Tomato Salsa from the heat and let cool.
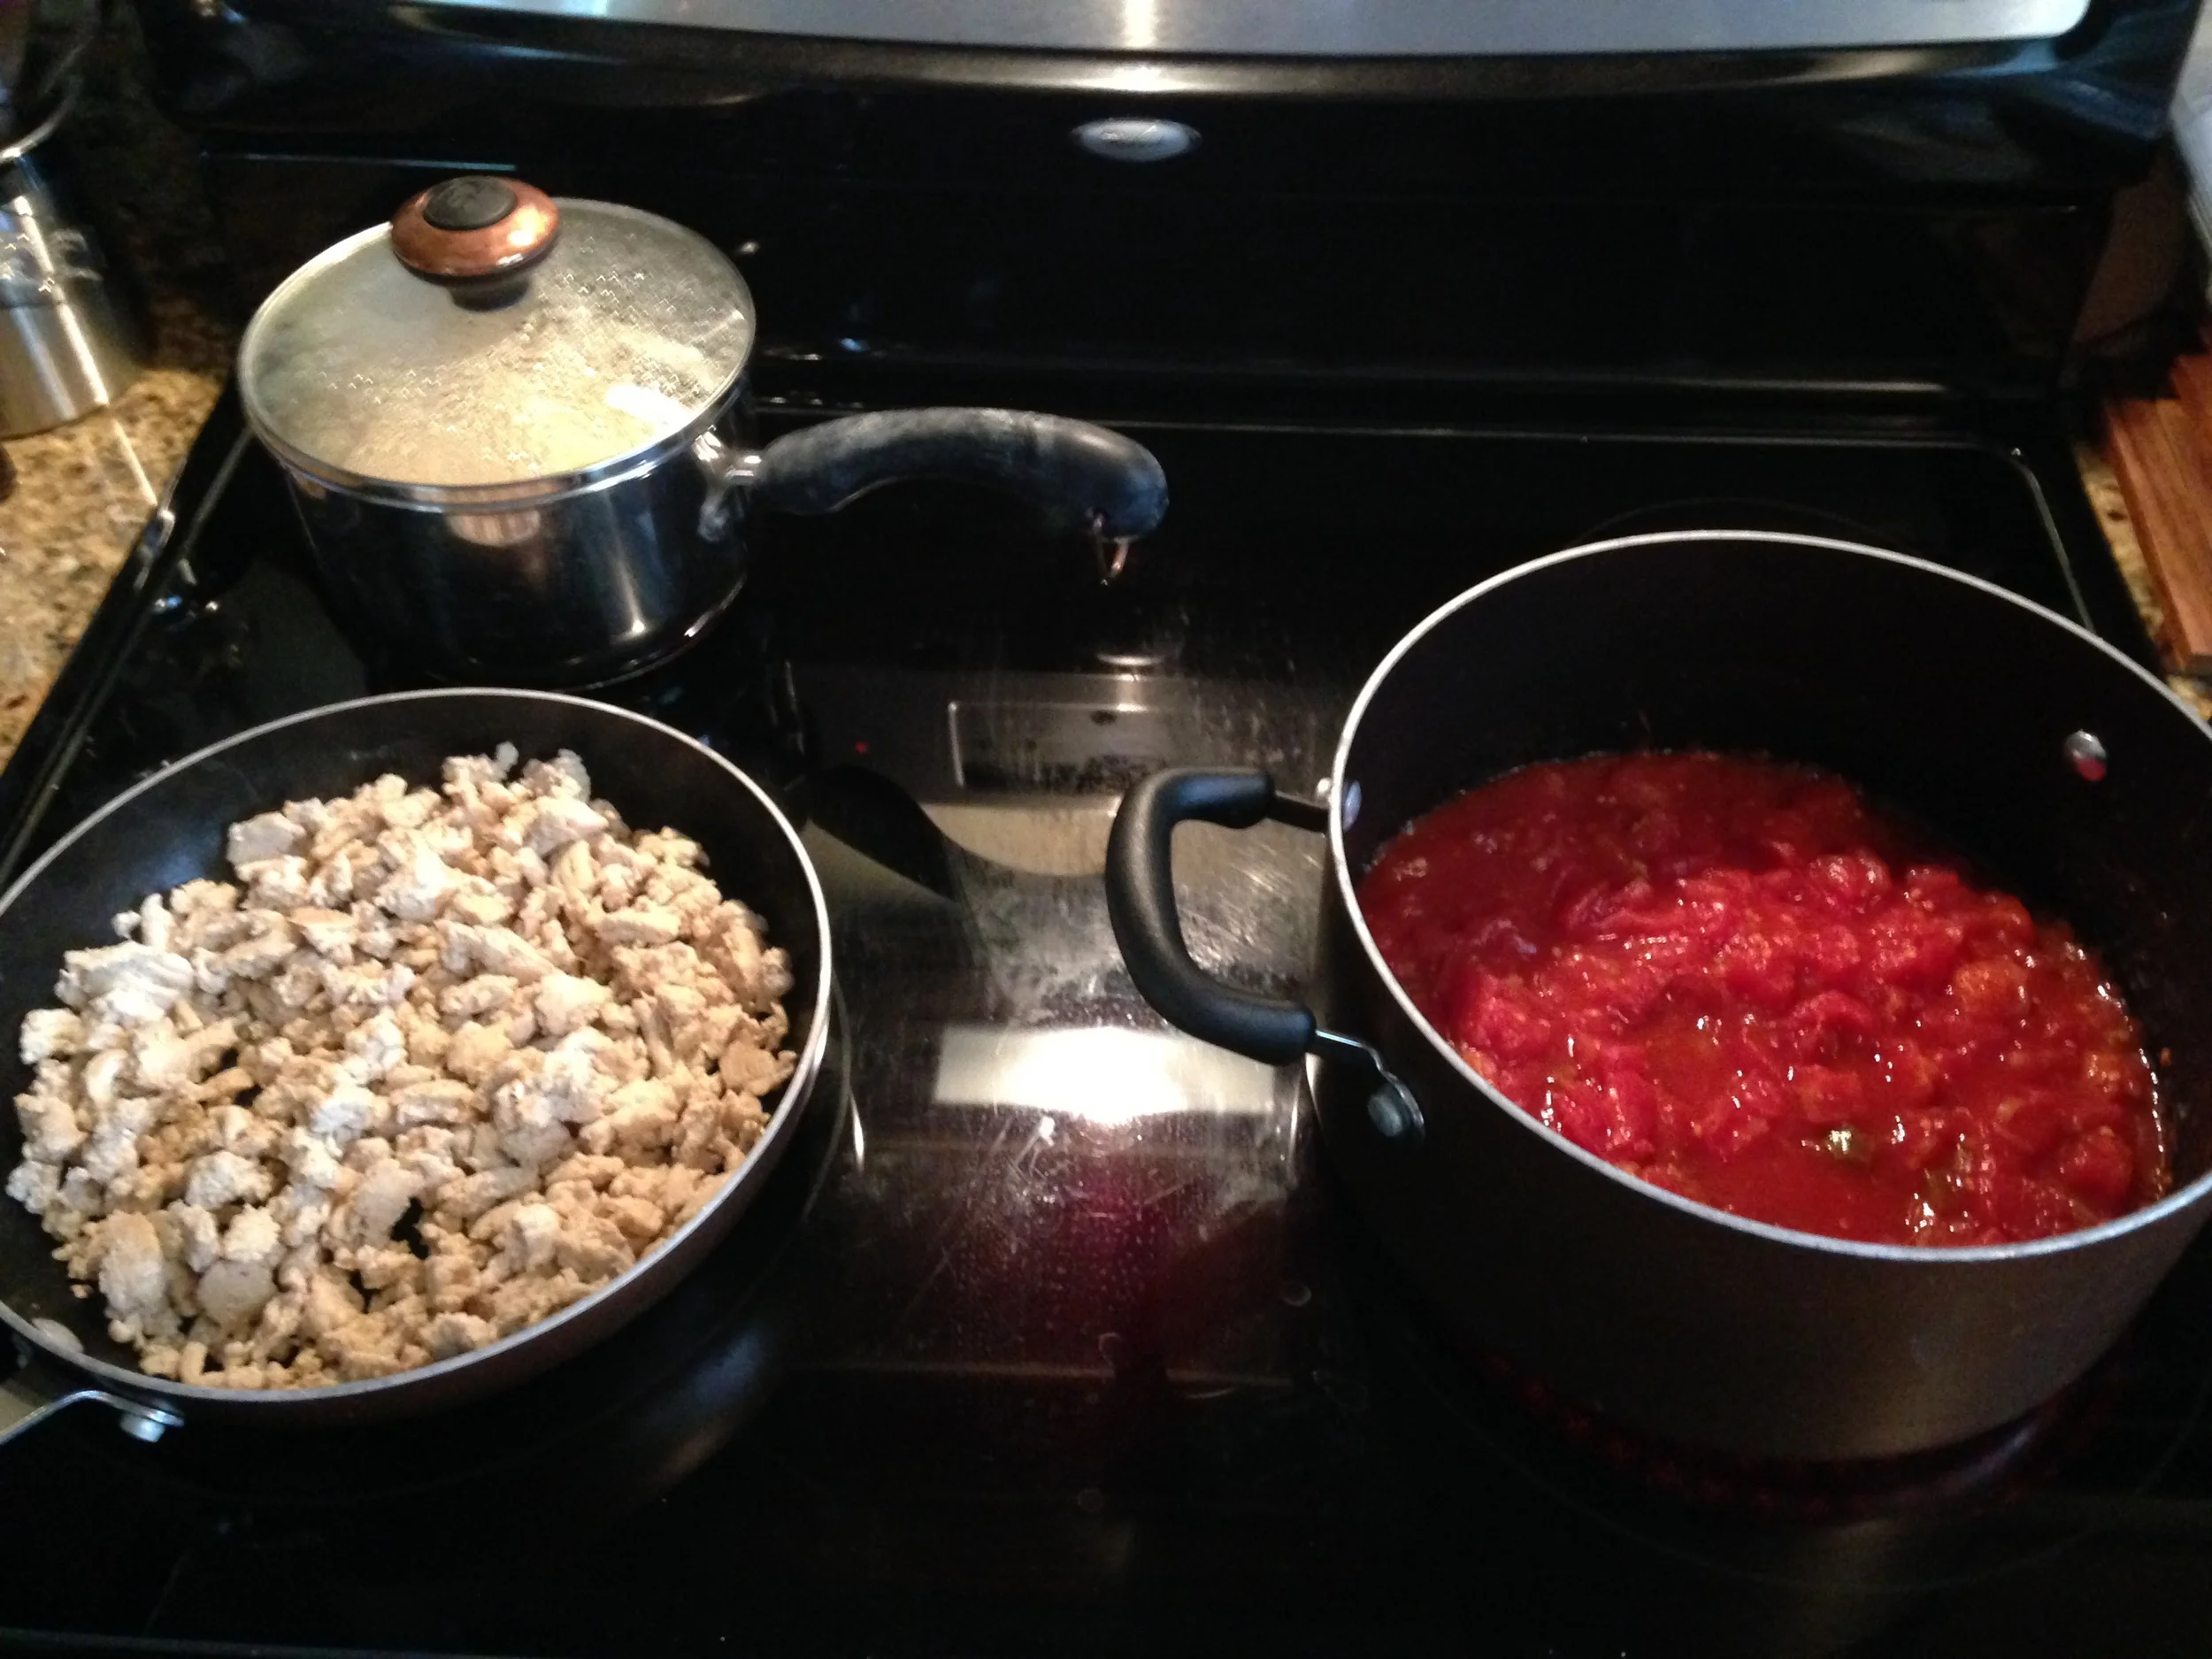
Cooking in progress!

Prepared single-serve portion of Zoodles for lunch tomorrow! Made possible by my amazing Kitchen Supreme Spiralizer!
And that's a wrap! A perfect assortment of nutrients in one complete meal made in under 15 minutes! I know I cannot wait to eat my Turkey and Tomato Salsa over brown rice AND zoodles tomorrow for lunch.... and then come home to leftovers for a quick on-the-spot dinner after a long day.
Enjoy, my friends! Have a Happy Sunday and great week ahead!
Meal made in minutes: Maple Blueberry Overnight Oats
RecipeCommentIt's already Sunday again! This week really flew by... actually, this whole summer really flew by, and today I am preparing for my trip to NC for Orientation Week at Lenoir-Ryhne University! I am excited for my Dietetic Internship program to start, but I am also very anxious and nervous for the next big step in my journey to becoming a Registered Dietitian. Luckily, I have a long list of "to-do's" today before I leave tomorrow to keep me preoccupied and distracted. One of the most important things on my "to-do" list is to make overnight oats for my husband to eat for breakfast all week while I am gone! I am sure you have heard of overnight oats by now, but if you haven't gotten around to making them then you are missing out! Overnight oats are incredibly easy to make, a delicious way to start your day, and can be made in minutes! I make a couple batches at a time for my husband to eat for breakfast when he is short on time (which is all the time) and have experimented with several different ingredients. After a few trail and error attempts, I have found the perfect recipe for the BEST overnight oats - and today I am going to share it with you!
This week's Meal Made in Minutes: Maple Blueberry Overnight Oats

Maple Blueberry Oats (5)
Ingredients:
- 1/3 cup rolled oats (Gluten-Free if needed) (I use Bob's Red Mill Gluten-Free Rolled Oats)
- 1/2 cup milk (Dairy-Free if needed) (I use 1% milk for my hubby and Unsweetened Vanilla Almond milk for me)
- 1/4th cup plain Greek yogurt (I use Fage or Oikos) or 2 tbsp vegan protein powder (I use Bio Chem Vegan Vanilla Bean)
- 1-2 tbsp Maple syrup (to desired sweetness)
- 1-2 tbsp Chia seeds (to desired thickness)
- 1/3 cup fresh blueberries

Maple Blueberry Oats ingredients
(Ingredients for 4 jars of Maple Blueberry Overnight Oats and 1 jar of Gluten-Free & Vegan Maple PB Protein Overnight Oats)
Directions:
- Place oats, milk, yogurt / protein powder, and maple syrup (in that order) into a mason jar or deep Tupperware container (with a lid). Mix all ingredients well with a spoon.
- Add in the Chia seeds and mix well again.
- Add in the blueberries and mix well again.
- Top with the lid (air-tight) and store in the refrigerator for at least 4 hours or overnight for best results.
- Remove from the refrigerator when ready to eat and enjoy as-is (straight from the jar) or warm up your oats in the microwave for 30-60 seconds.
** You can add any toppings of your choice to your oats :-) Some of my favorite toppings are banana slices, almond slices, PB2, and cinnamon.
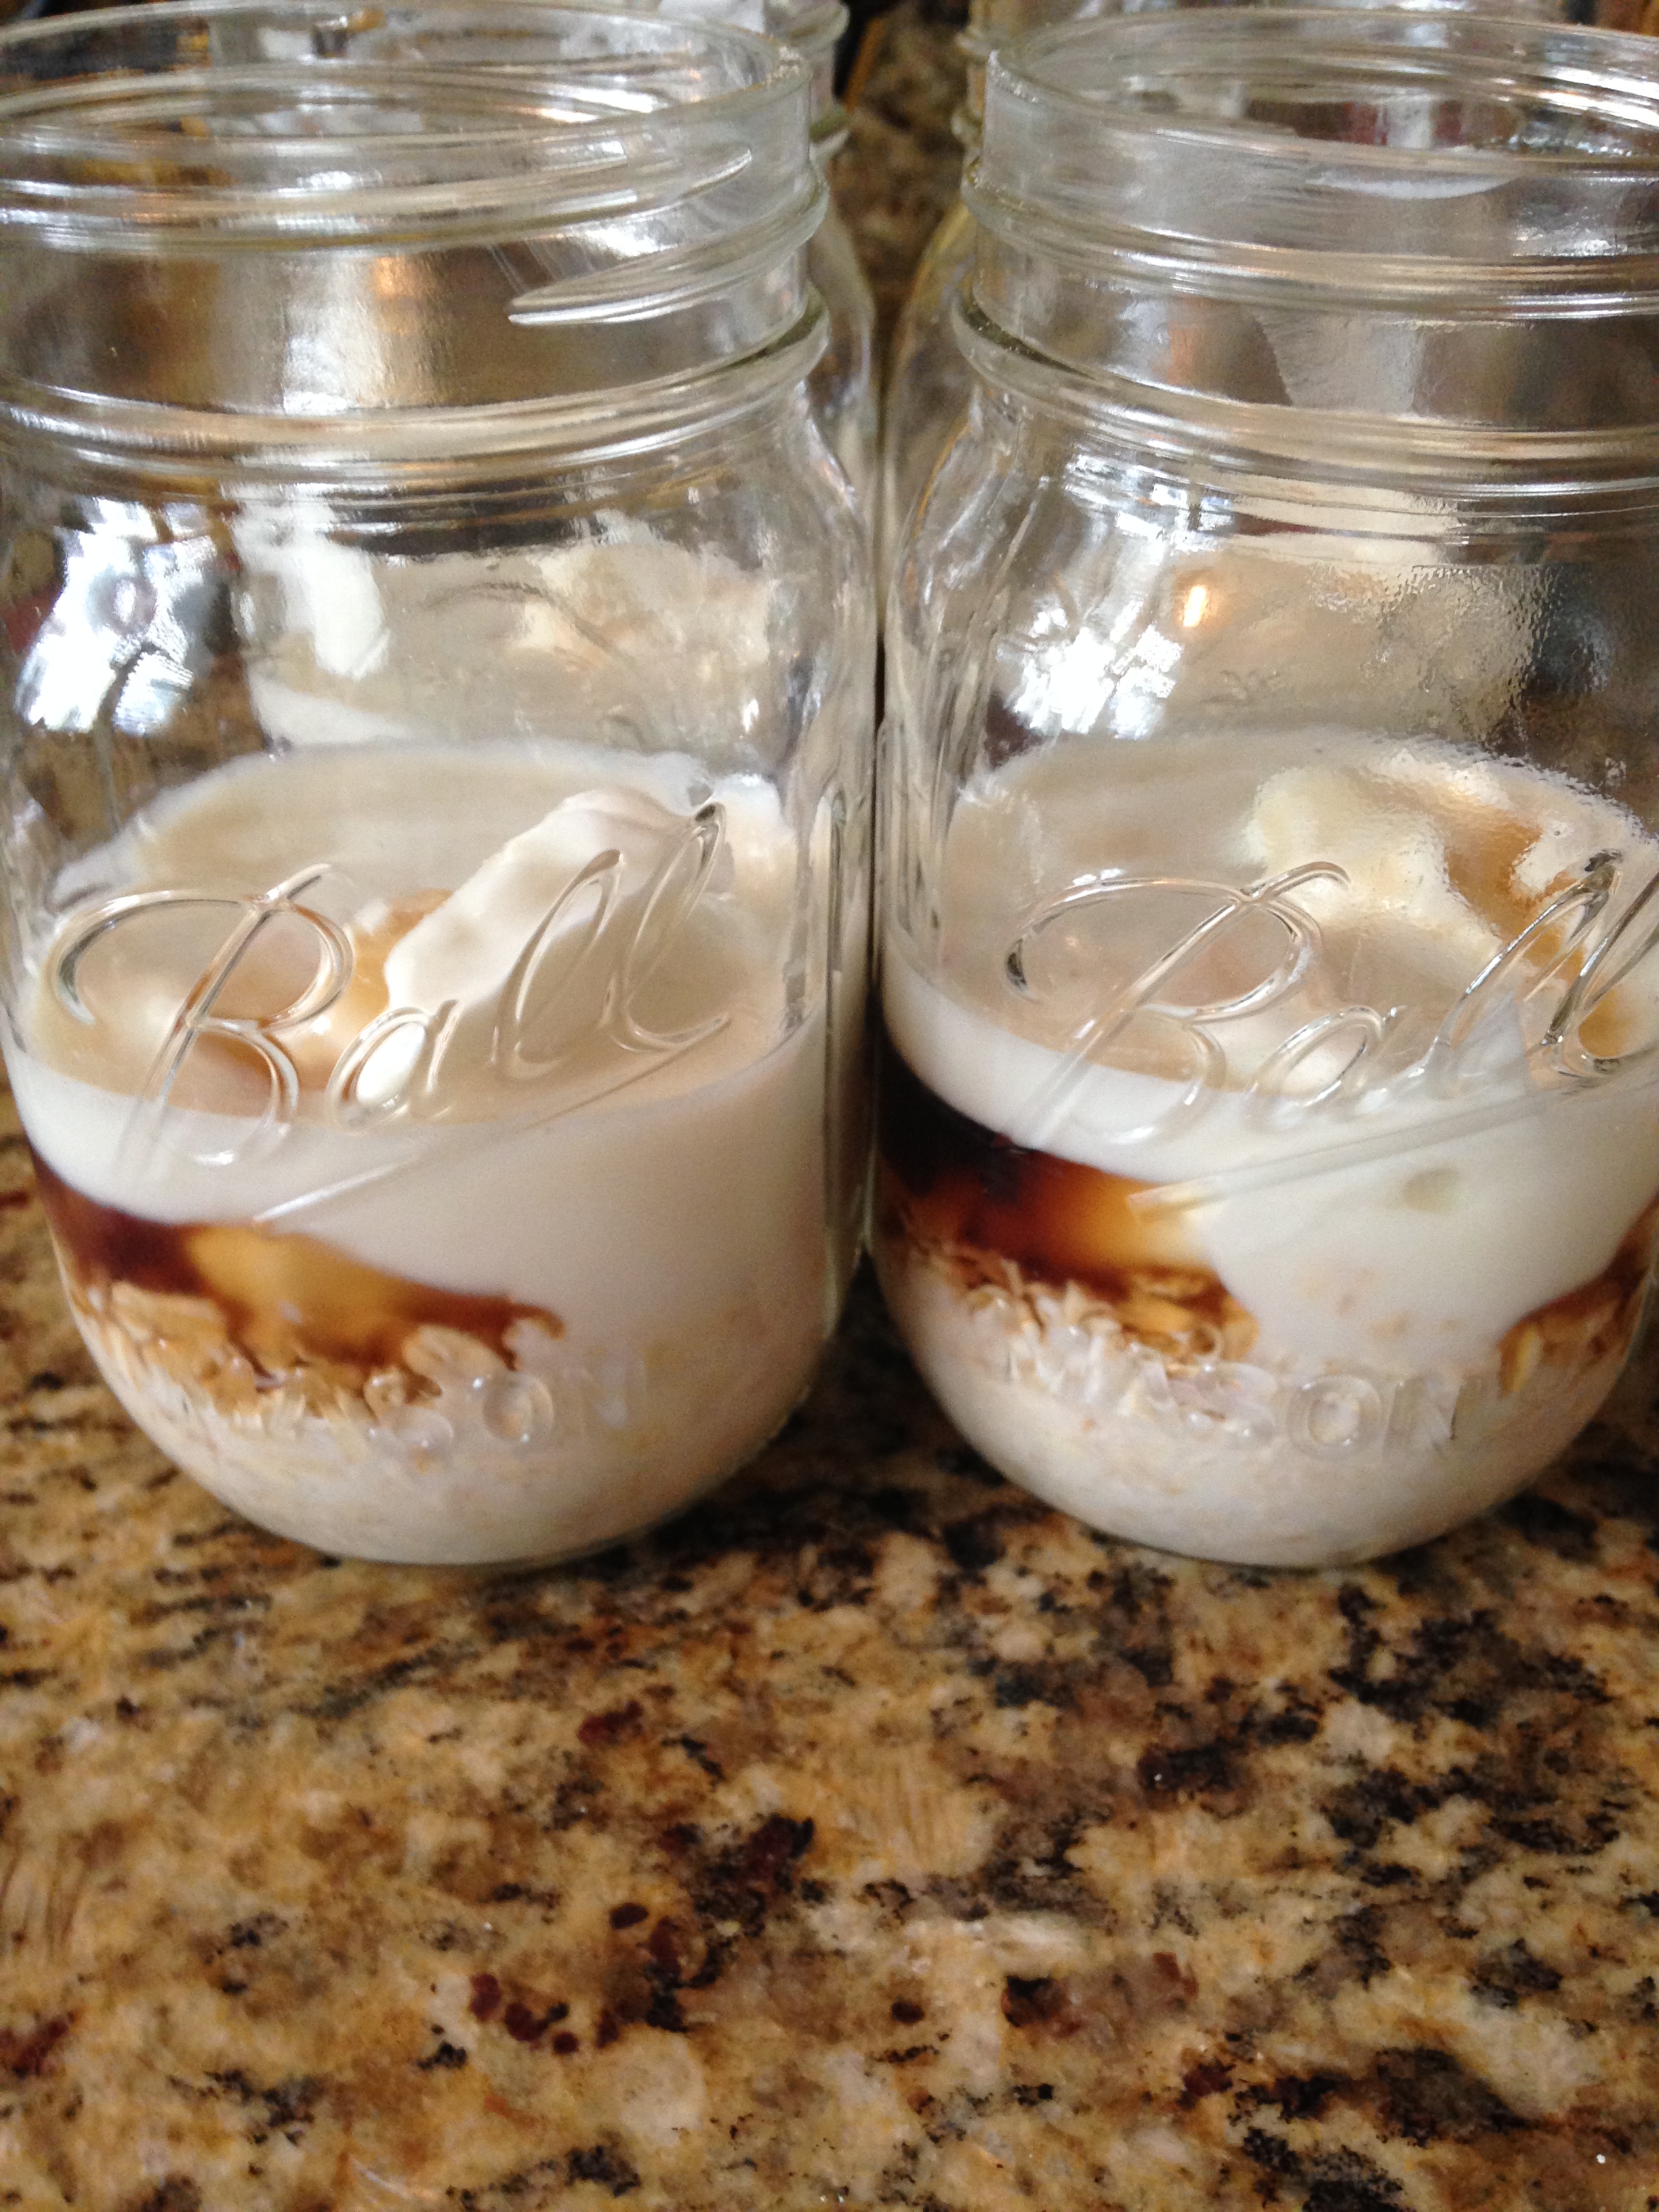
Maple Blueberry Oats (2)
(Step 1: before the ingredients are mixed well)

Maple Blueberry Oats (3)
(Step 2: with the Chia seeds mixed in)
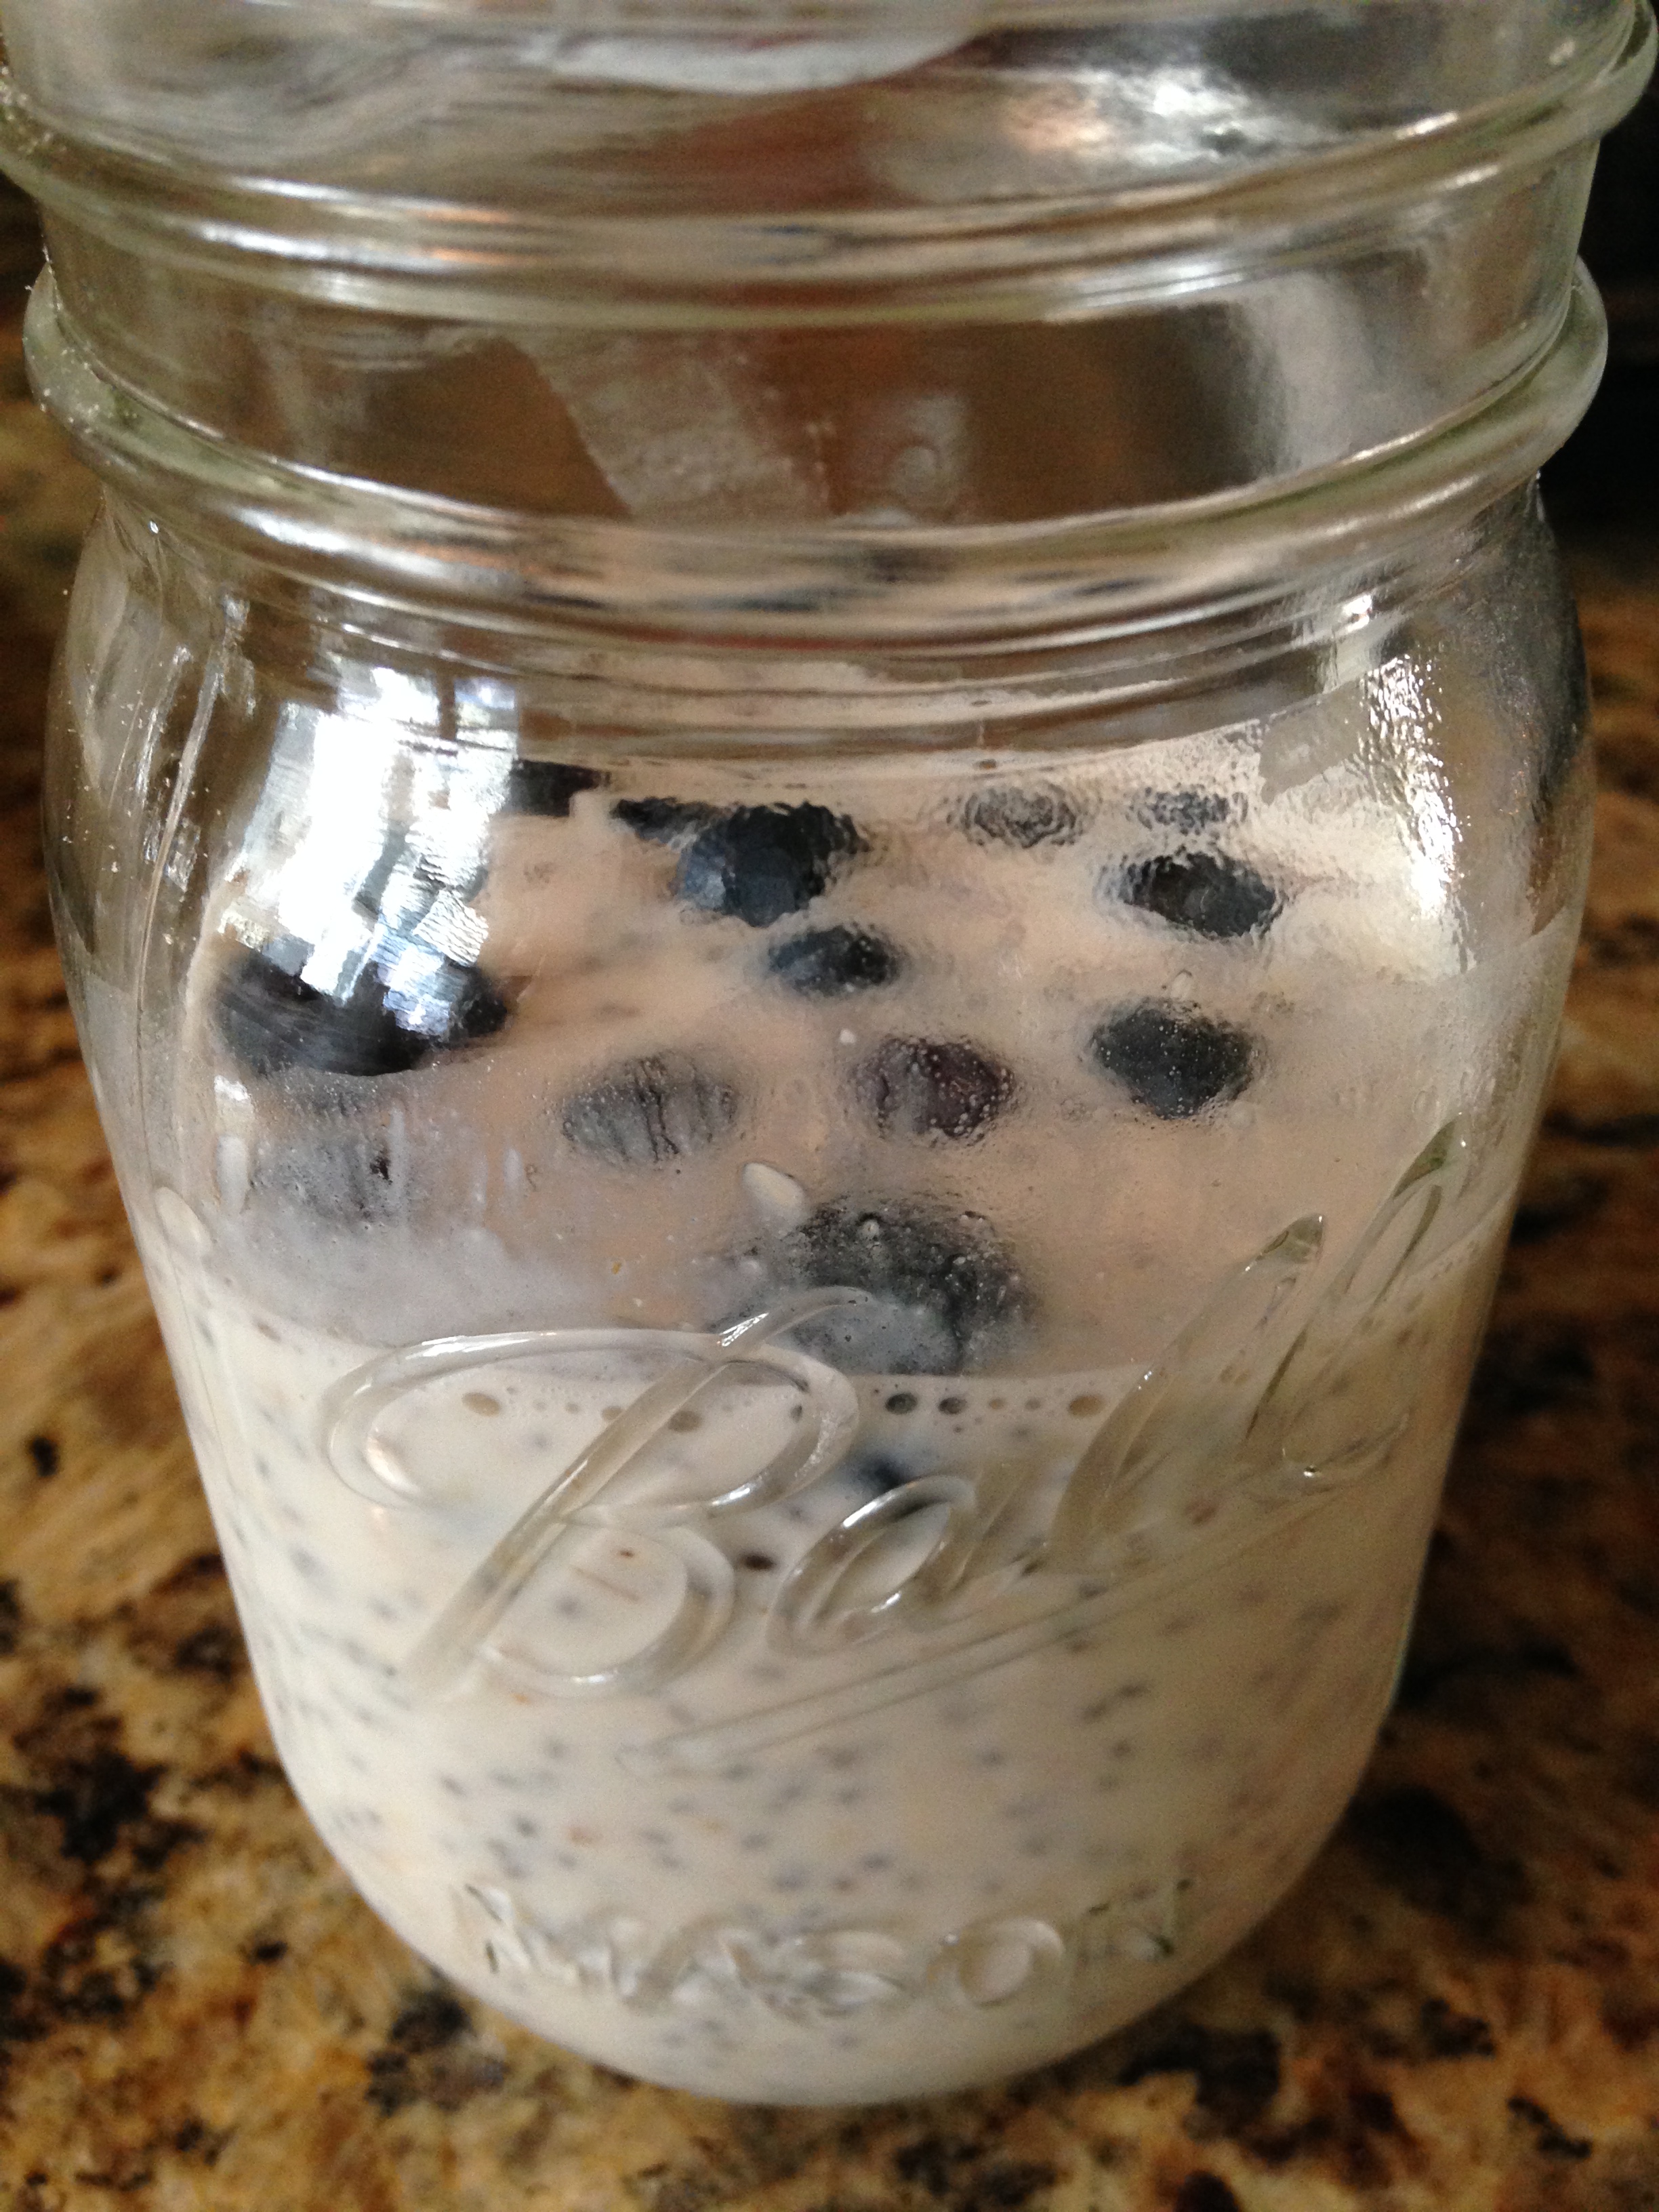
Maple Blueberry Oats (4)
(Step 3: before the blueberries are mixed in)
It really is that simple and SO delicious! You can make the overnight oats in less than 5 minutes and have your breakfast ready to grab-and-go the next morning!
You can play around with the ingredients a little, but be sure to have more liquid than oats (since the oats will absorb the milk and expand) and increase the liquid even more if you add more Chia seeds (since the seeds will also absorb the milk and expand even more)!

Maple PB Protein Oats
(My Gluten-Free & Vegan version: Maple PB Protein Overnight Oats - with GF oats, almond milk, Vegan protein powder, PB2, maple syrup and Chia seeds!)
Have fun experimenting with your Overnight Oats and enjoy a delicious and satisfying breakfast made in minutes :-)
Meal Makeover: Eggplant Turkey Boats
RecipeCommentThe realization that my summer vacation is coming to an end has officially sent in and I find myself daydreaming about my trip home last week. My favorite part of being home was spending time with my family and cooking in the kitchen with my mom. My mother has become quite the cook these days and, with the help of my creative healthy twists on recipes, she and I made the perfect team. We invited my grandparents, my aunt, and my younger cousin over for dinner the night before I flew back to Tampa and we had quite the task of feeding seven people with seven different "particular tastes".... so I figured that would be a perfect night to try out a new recipe!
This week's Meal Makeover: Eggplant Turkey Boats
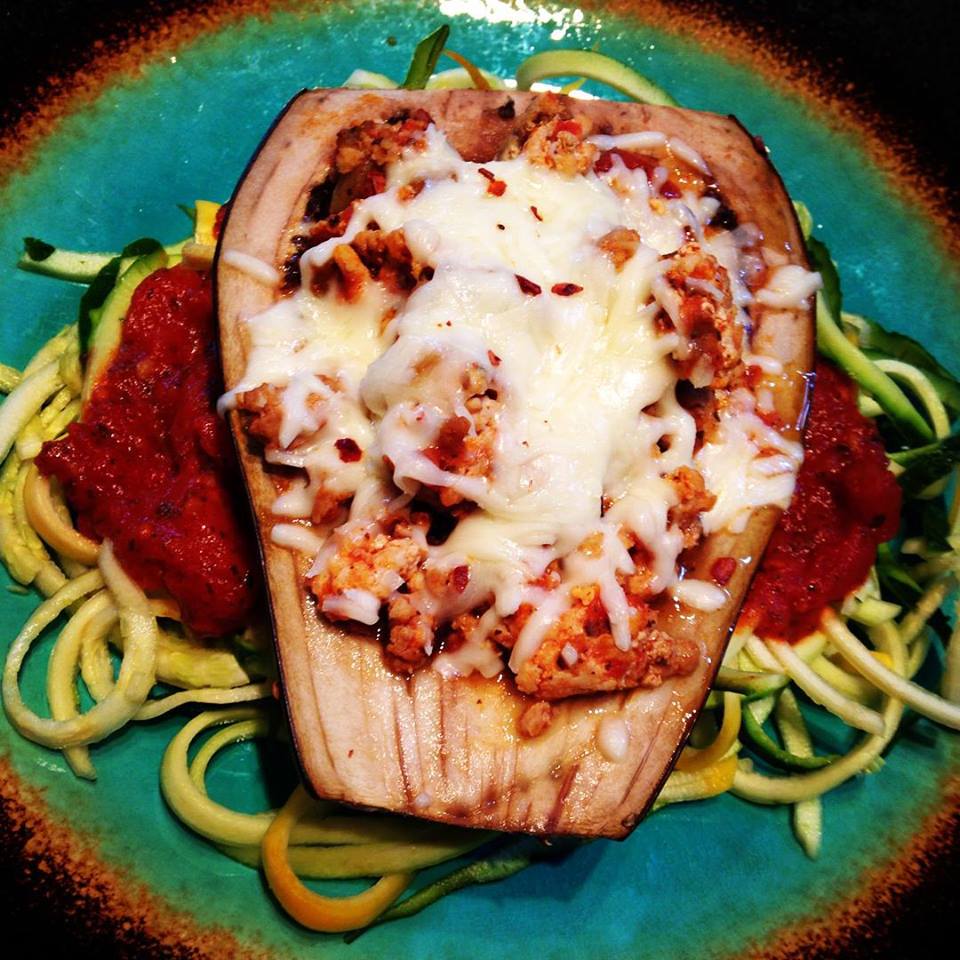
Eggplant plated
The best part is that the main ingredients were as "farm-to-table" as we could get - we used the vegetables straight from mother's garden and she felt quite proud of herself!
Ingredients: Serves 6-8
- 2 lbs extra-lean ground turkey
- 4 medium eggplants
- 6-8 medium zucchini / yellow squash (1 per person)
- 2 16-oz jars of low-sodium marinara / pasta sauce
- 1.5 - 2 cups part-skim mozzarella cheese (shredded) (1/4th cup per eggplant half)
- 2 tsp chili powder
- 2 tsp cumin
- Black pepper (to taste)
Tools needed:
- Large skillet / sauce pan
- Spiralizer / Veggetti
Instructions:
- Preheat oven to 400 deg. F.
- Wash the eggplant and zucchini / squash. Cut the ends off each vegetable and set aside the zucchini / squash. Cut the eggplant in half (length wise) and carve out the seeds / flesh with a spoon, leaving 1/2 the flesh remaining in the shell for the "boat" - Note: be careful not to carve too deep / crack the shell of the eggplant! Set the seeds / flesh aside.
- Spray 2-3 baking dishes with olive oil spray (to prevent sticking) and place each eggplant half on the baking sheet, flesh side up. Spray the flesh of the eggplant with olive oil spray to prevent burning when baking. Bake eggplant in the oven for 10-15 minutes - Note: be sure to watch the flesh of the eggplant and remove them from the oven if they start to burn!
- While the eggplants are baking, cook the ground turkey in a large sauce pan (no pink remaining) and add in the cumin, chili powder, and black pepper. Turn the heat down to simmer / low and add in the eggplant seeds / flesh and one jar of the marina sauce. Cook for an additional 2-3 minutes (just to soften the eggplant and heat the sauce). Stir as needed.
- When the eggplants are done, remove from the oven and carefully fill each eggplant shell half with the ground turkey mix and top each with 1/4th cup shredded cheese.
- Reduce oven temperature to 350 deg. F and place the eggplants back into the oven for 5-10 minutes (just until the cheese has melted).
- While the cheese is melting, spiralize each zucchini / squash onto a serving dish (1 per person).
- Pour the remaining jar of sauce into a microwave-safe bowl and heat for 1-2 minutes (stopping the time and stirring the sauce at the 1-minute mark) and spoon some sauce on top of the spiralized zucchini / squash.
- Remove the eggplants from the oven and place one eggplant "boat" on top of the zucchini / squash noodles and serve! Note: use tongs to transfer the eggplant to each plate!

Eggplant prep
(Eggplant "boats" carved out and ready to bake!)
Eggplant Turkey Filling
(Cooked ground turkey with spices and sauce)

Eggplant filled
(Eggplant "boats" stuffed with turkey & eggplant mix and topped with cheese)

Eggplant done
(Eggplant "boats" baked and ready to eat!)
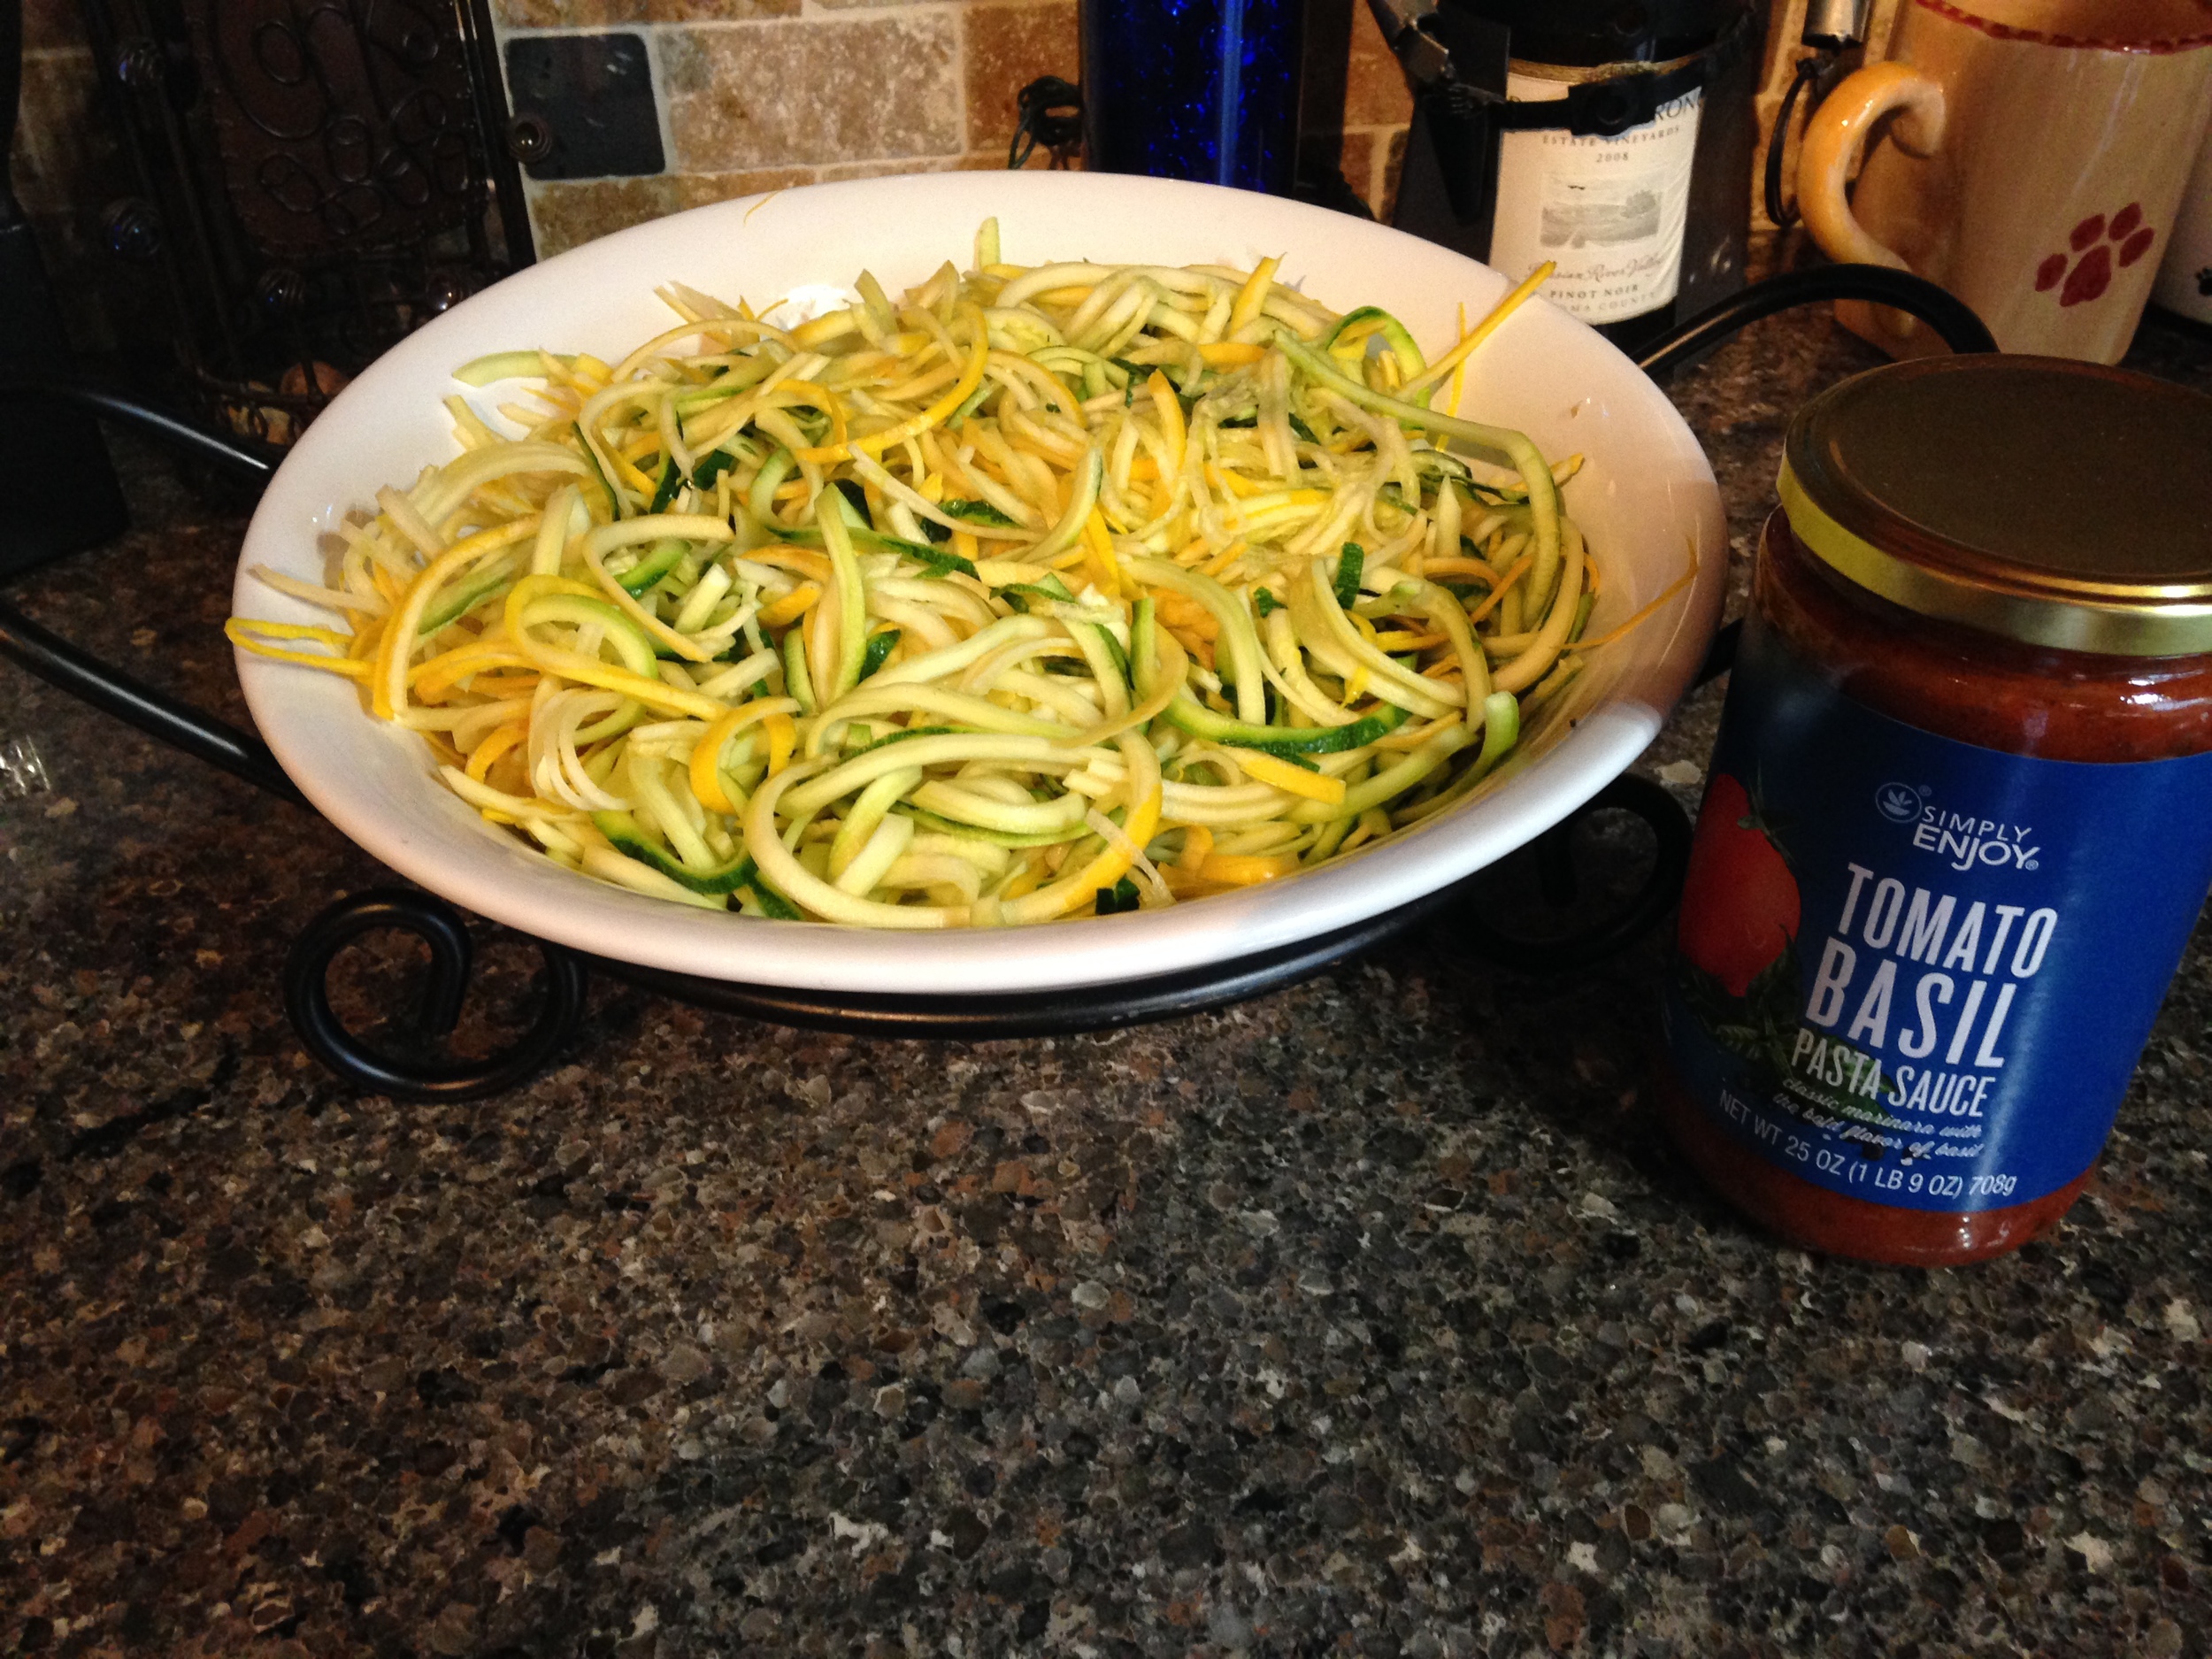
Zoodles
(All the zucchini and yellow squash spiralized into "noodles")
Eggplant plated
(One plated Eggplant Turkey Boat over a bed of zoodles!)
Now doesn't that look delicious!? The good news is that this dish was as delicious as it looks and my whole family was impressed - even my 21-year-old male cousin in college loved it!
The whole meal was prepared and served within 45 minutes (and consumed within 15 minutes!!) and kept us happy and full all night! Do yourself a favor and serve this meal at your next family dinner - trust me, you won't regret it :-)
Meal Makeover: Zucchini Pizza Boats
Nutrition, RecipeCommentI had a lot of "me time" this past weekend (since my sweet husband was busy working at the office Saturday and Sunday) so I took advantage of my free time and tested out some new recipes! Not only did I have a blast making a mess of my kitchen, but I was able to play around with three new recipes and could not wait to share this week's meal makeover recipe with you all! If you are like me (and human) you may crave pizza nearly 365 days a year, but you may not want the high-carbohydrate and high-calorie content of the traditional pizza! Have no fear, the Zucchini Pizza Boat has come to your rescue!
This week's Meal Makeover: Zucchini Pizza Boat

Zucchini pizza complete

Zucchini pizza nutrition
This low-carb, high protein "pizza" is super easy to make and surprisingly delicious and filling (thanks to the water and fiber content of the almighty zucchini)! One serving (1 zucchini boat) provides you with nearly 36g of lean protein and a mere 13g carbohydrates and 6g total fat at only 245 calories.
The best part is that you can modify the ingredients to make this meal for yourself or for the whole family to enjoy and you can use any type of lean protein that you prefer (extra-lean ground turkey, chopped chicken breast, shrimp, tofu...)! I made this meal for my neighbor and myself with extra-lean ground turkey and used the leftover turkey in my meals for the next two days. (Meal-prepping at its finest!)
Ingredients: 2 servings (2 Zucchini Boats)
- 6 oz cooked extra-lean ground turkey (divided) (I cooked 1.25 lbs of Jennie-O Extra-lean Turkey and saved the rest for leftovers).
- 1 large zucchini (divided) (I found a very large, wide diameter zucchini that weighed about 12 oz)
- 1/2 cup pizza sauce (divided) (look for low-sodium, all-natural varieties or make your own)
- 1/2 cup 2% milk shredded mozzarella cheese (divided)
- 1 tsp cumin
- 1 tsp chili powder
- 1 tsp garlic salt
Intructions:
- Preheat oven to 400 deg. F. Wash the zucchini well and dry with a paper towel before cutting the vegetable in half (length wise). Cut the ends off as well. Carefully scoop out the zucchini flesh and seeds with a mini ice cream scoop or spoon, but be careful not to press too hard and break the core of the zucchini. You want to leave about 1/4th of the zucchini flesh intact to make the "boat" shape for the turkey filling. Discard the zucchini flesh and seeds or save for later use in another recipe.
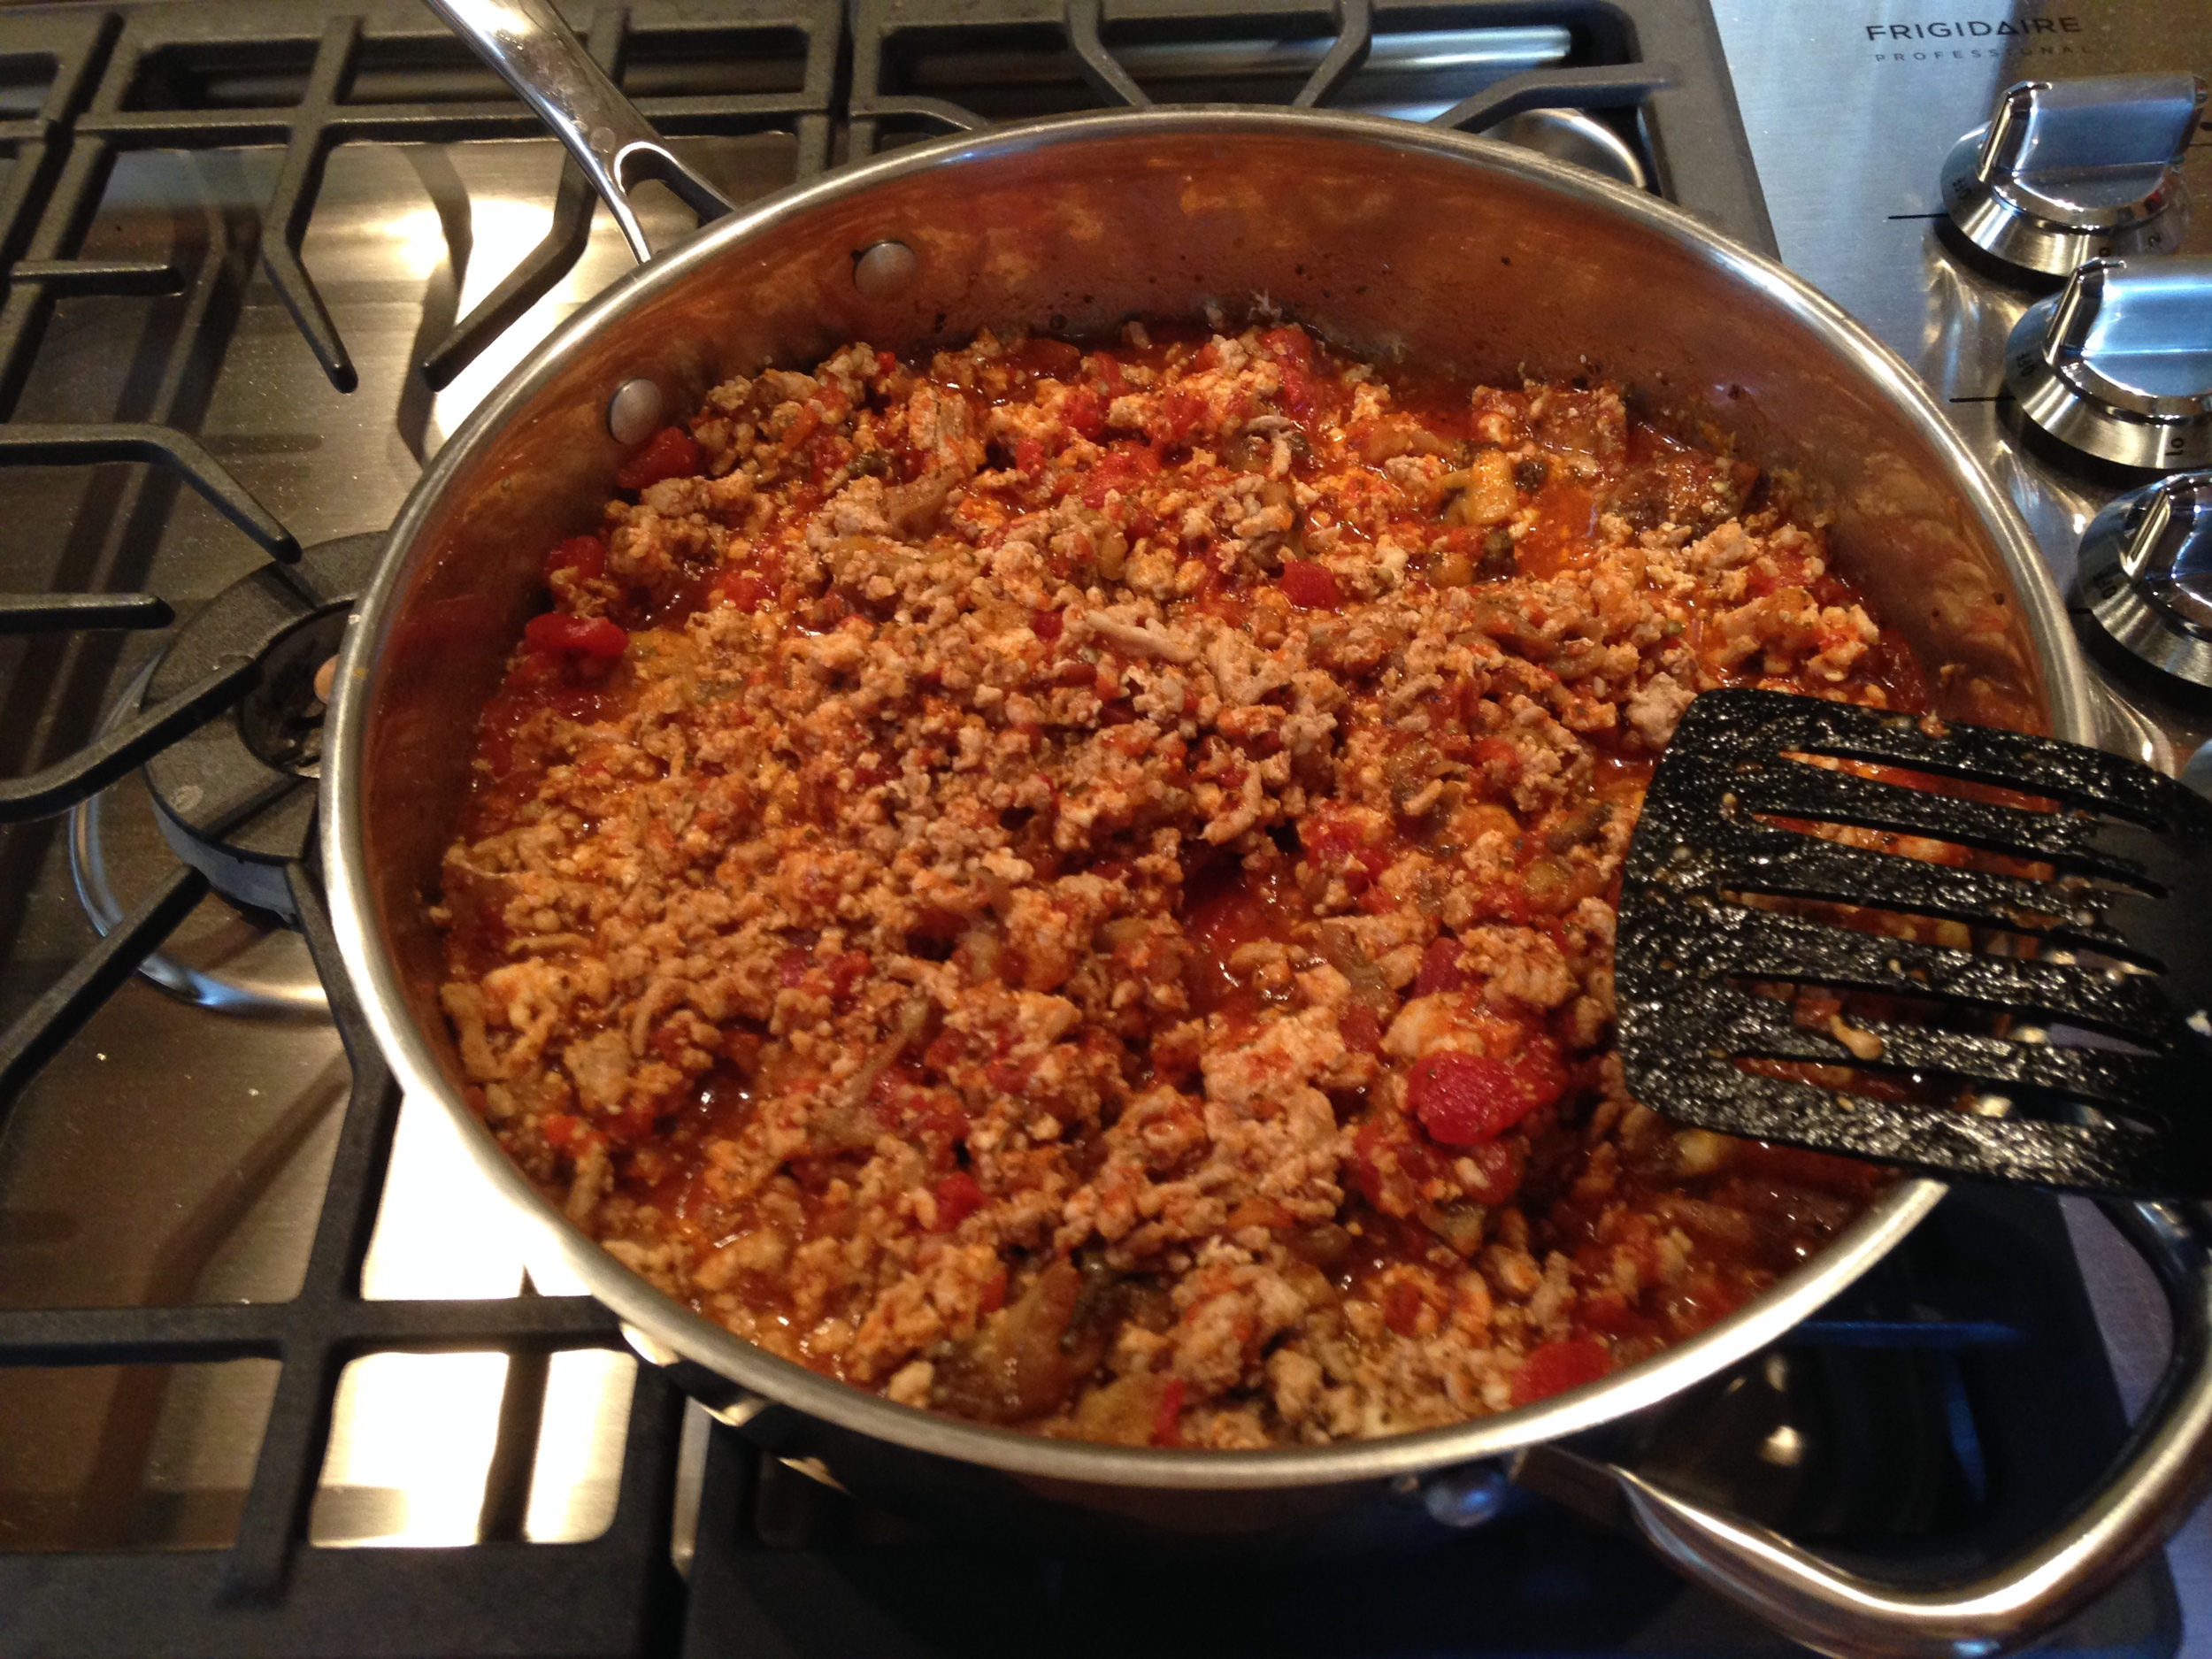
- In a large sauce pan, cook the turkey completely (no pink pieces left) and then add in the spices (cumin, chili powder, and garlic salt), remove from heat and stir in spices well.
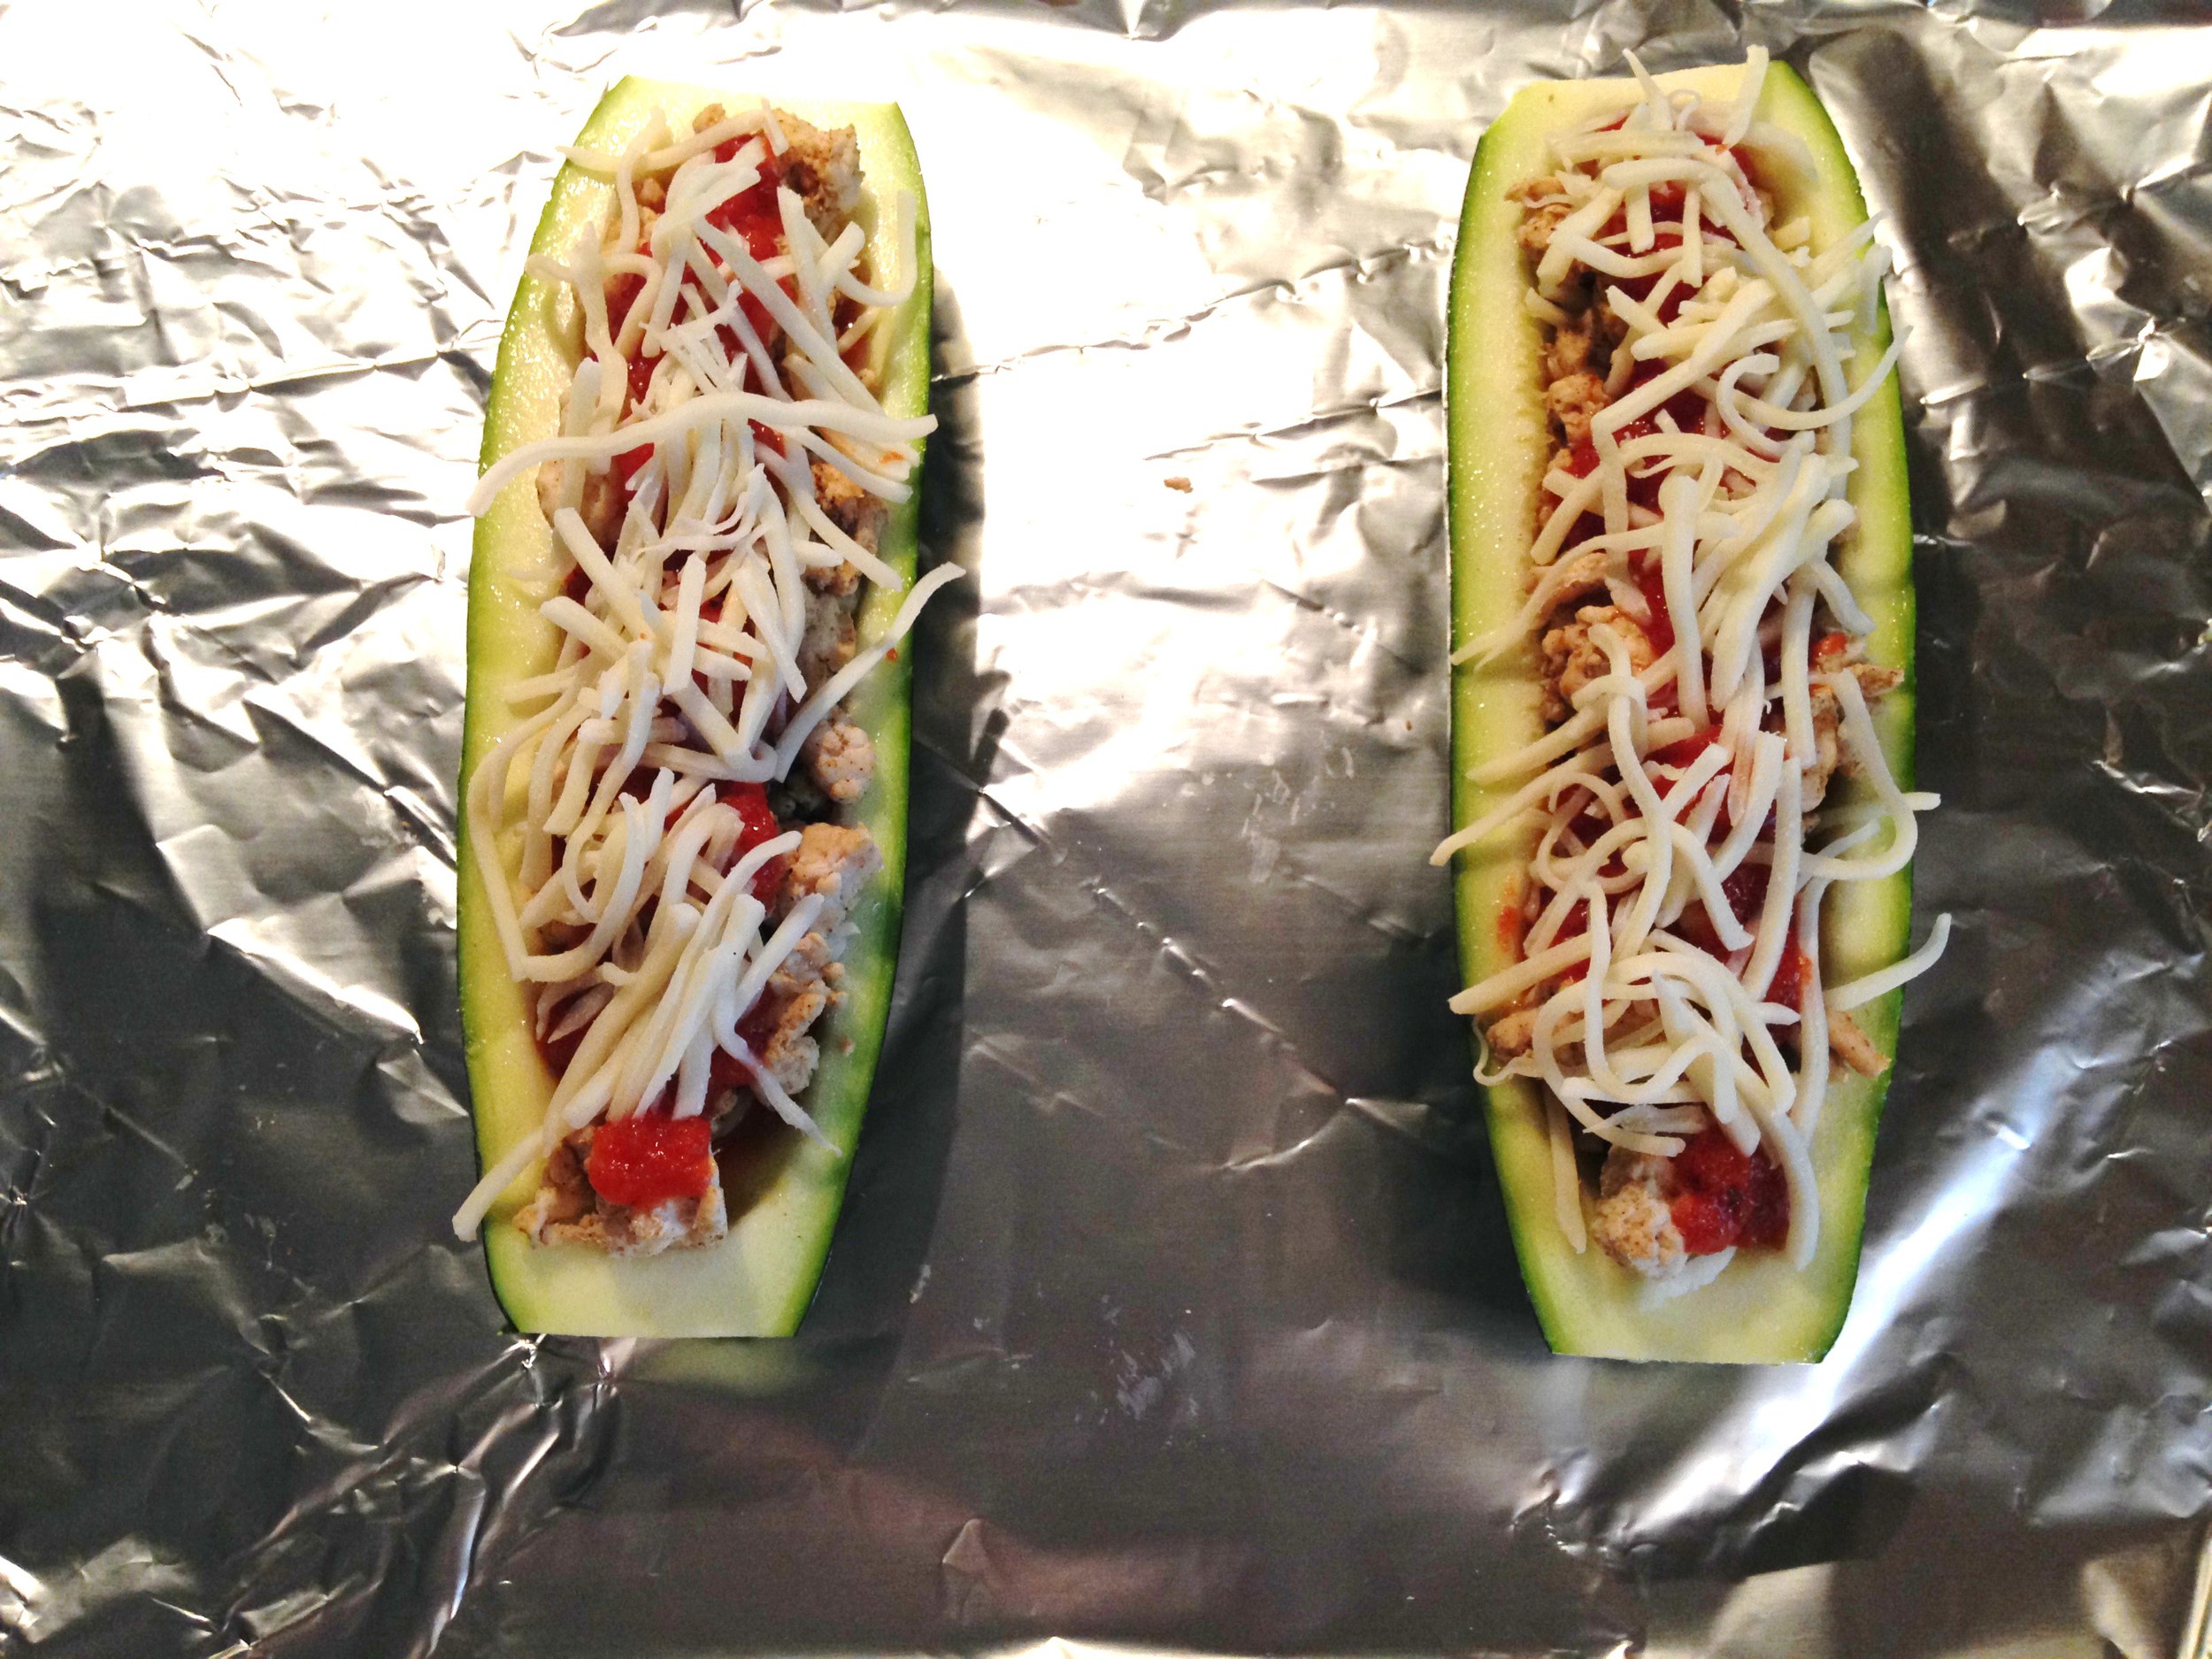
- Line a cookie sheet with aluminum foil and place the zucchini halves on top of the foil (flesh side up). Fill each boat with 2 tbsp pizza sauce, then 2 tbsp shredded cheese, then 3 oz of cooked turkey, followed by remaining 2 tbsp pizza sauce.
- Bake the zucchini boats at 400 deg. F for 20 minutes. Carefully remove the cookie sheet from the oven and top each boat with the remaining 2 tbsp shredded cheese.
- Reduce the oven temperature to 350 deg. F and return the cookie sheet back to the oven and bake for an addition 5-10 minutes (or until cheese is completely melted). Keep a close eye on the cheese so that it does not burn (like mine did in the picture above)! ...ooops....
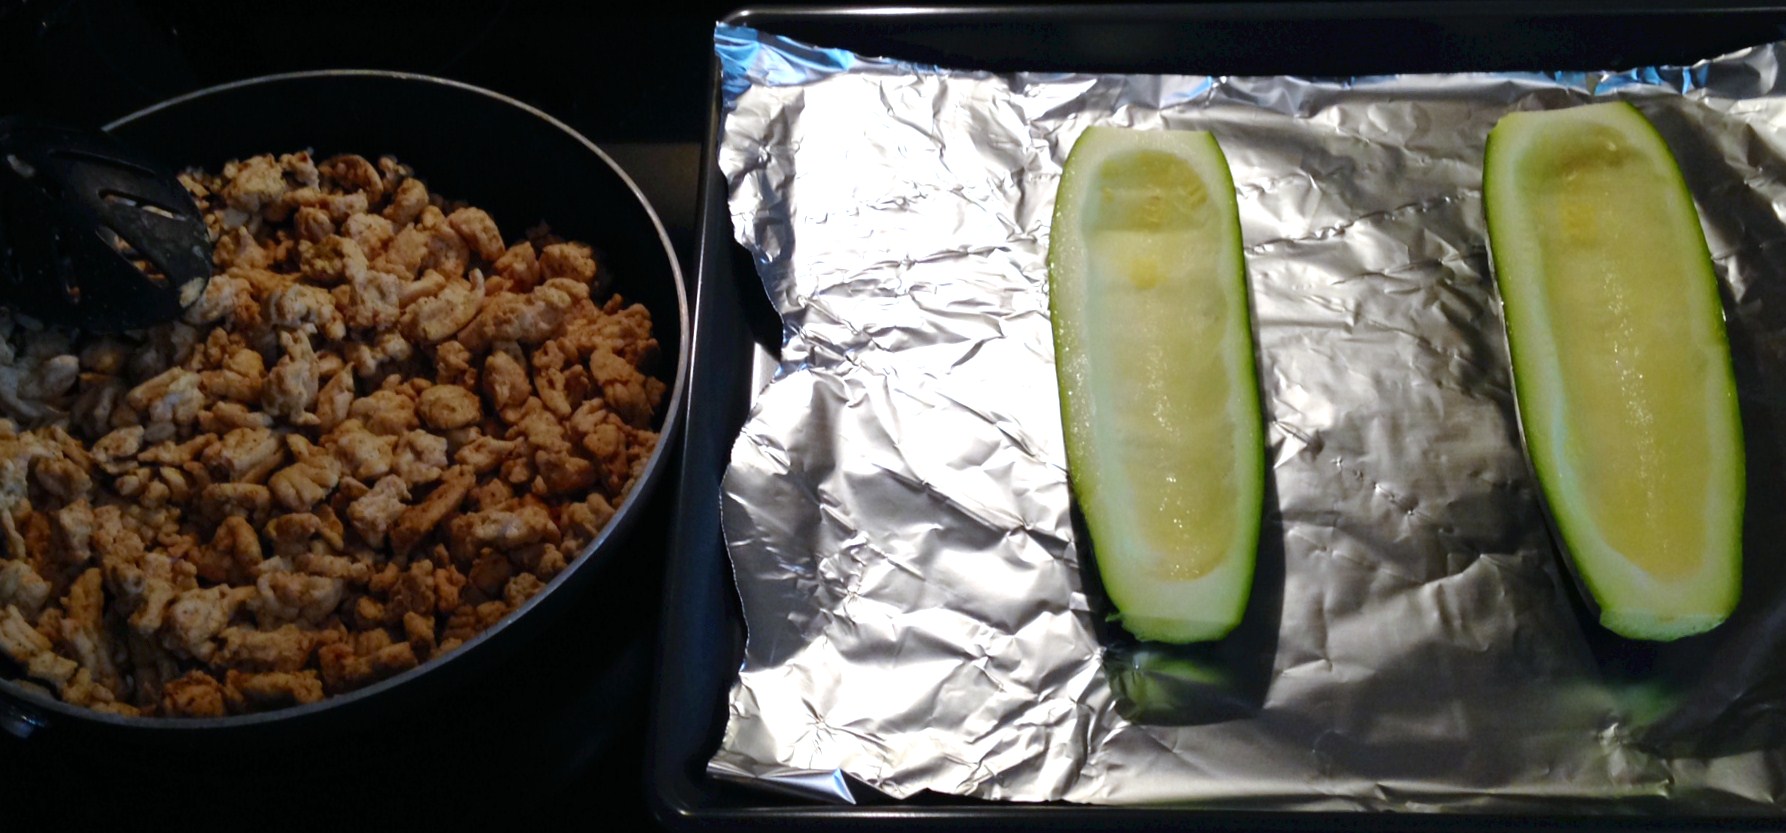
Zucchini pizza prep
(Cooked turkey with spices and hollowed-out zucchini boats)

Zucchini pizza filling
(Filled boats with pizza sauce and shredded cheese)
Zucchini pizza full
(Filled boats with ground turkey and shredded cheese)
And that's it! We paired our zucchini boats with a mixed greens salad for a well-balanced and nutritious meal. I enjoyed every last bite of my zucchini pizza boat and the great company of my sweet neighbor, Margie :-)
I hope you will try out this meal makeover recipe and share it with your family or friends. Let me know what you think!
Meal made in minutes: Easy egg white sandwich
Nutrition, RecipeCommentEggs are a very versatile lean protein and can really be eaten anytime of the day - breakfast, lunch, or dinner! This power-house of a super-food is nutrient dense, yet low in calories and contains several essential vitamins (B vitamins and vitamin A and vitamin D) and minerals (choline, selenium, and phosphorus) as well as the highest quality protein and amino acid profile that meets the needs of the human body. The whites alone contain only 16 calories (per large egg) and 4g of protein, without the saturated fat or cholesterol that is found in the yellow yolk. The best part is that egg whites can be prepared in minutes and easily incorporated into a perfect sandwich for a quick breakfast before work. Heck, you can even make this meal portable and eat it on your way into work (while driving as safely as possible, of course!)...

Quick Egg white sandwich
This week's Meal Made in Minutes: Easy Egg White Sandwich
Ingredients:
- 1/2 cup liquid egg whites (I used All Whites) or the egg whites of 3 large eggs
- 2 slices whole grain bread (I used Canyon Ranch 7-Grain gluten-free bread)
- 1 slice reduced-fat provolone cheese (I used Sargento)
- 1 cup baby spinach leaves
- 2 tbsp hummus (any flavor) (I used Tribe Sun-dried Tomato)
- Cherry tomatoes (optional)
- Black pepper or red chili flakes (to taste)
Tools needed:
- Toaster oven
- Microwaveable omelet maker (I bought mine at Amazon.com)

Egg white omelet
(All Whites egg whites with red chili flakes)
Directions:
- Toast bread in toaster oven
- While bread is toasting, prepare omelet - pour egg whites into omelet maker and season with black pepper or red chili flakes (to taste).
- Cook eggs in the microwave on high heat for 1 minute. Make sure whites are complete set and cooked through - if whites are still runny, place omelet maker back in the microwave for 15 seconds.
- Assemble egg white sandwich - spread 1 tbsp hummus on one slice of bread, then lay 1/2 cup spinach on top, then the egg whites, provolone cheese, remaining 1/2 cup spinach and the second slice of bread with remaining 1 tbsp hummus spread on top.
Viola! That's it, within 6-8 minutes you will have the perfect egg white breakfast sandwich! To take your breakfast to-go, wrap the sandwich in aluminum foil and hit the road!
This breakfast sandwich will beat any fast-food option and will fill you up with complex carbs, healthy fats, and lean protein to get you through the busy morning :-)
Feel free to play around with the ingredients. Some substitutions you can try:
- 1 egg + 2 whites instead of all whites
- 1/4th avocado (mashed or sliced) instead of hummus
- kale instead of spinach
- a whole-grain tortilla wrap instead of bread
Enjoy!
Meal Makeover: Shrimp and Avocado Pesto "Pasta"
Recipe3 CommentsThere is nothing more comforting to me than a big ol' plate of pasta, but there are few meals more calorically dense or higher in carbohydrates! One of my favorite meals is shrimp and spaghetti with pesto sauce and Parmesan cheese, but this meal can contain upwards of 1,000 - 1,300 calories and leaves me feeling bloated, sluggish, and curled up on the couch in the fetal position (thanks GLUTEN)! This terrible combination lead me to search for a recipe for a healthier version of my beloved Pesto Pasta that would provide me with the right combination of nutrients to leave me feeling energized and still give me that "comfort food" feel I so desperately miss. After a few trial and errors with different recipes, I decided to make my own version of a Pesto Pasta that is higher in protein, healthy fats, and antioxidants and lower in calories, saturated fat, and empty carbohydrates. I was quite surprised with the end result and could not believe how delicious my concoction was... not to mention it is naturally gluten-free, contains 2-3 servings of vegetables, and is surprisingly filling!
Let me introduce to you....
Shrimp and Avocado Pesto "Pasta"

Shrimp Pesto Zoodle Pasta
The big secret is I used zucchini and yellow squash for the "pasta" (also known as "zoodles") and avocado and spinach in the pesto sauce! I promise you won't miss the spaghetti and your taste buds will be blown away by the avocado pesto sauce!
So what are you waiting for!? Give this made-over recipe a try!
Ingredients: (Makes 4 servings)
* Avocado Pesto Sauce (About 30 calories per 2 tbsp - serving)
- 1/2 small Haas Avocado
- 3 tbsp fresh squeezed lemon juice (1/2 a lemon)
- 2 cups baby spinach leaves (stems removed)
- 10 Basil leaves (stems removed)
* Shrimp & Zoodles
- Olive oil spray
- Old bay spice (to taste)
- 12 oz pre-cooked, frozen shrimp (thawed)
- 2-3 medium zucchinis
- 2-3 medium yellow squash
- 1 cup grape tomatoes
- 1/2 cup reduced-fat Parmesan cheese (for topping)
- Red Chili flakes (to taste)
* Tools needed:
- Food Processor, like my Cusinart 8-cup
- Vegetable Spiralizer, like my Veggetti
- Large skillet / sauce pan
Instructions:
- Combine all the ingredients for the Avocado Spinach Pesto in a food processor and blend until well combined. You may need to scrape down the sides of the bowl periodically and add a tbsp or two of water to reach desired consistency. Once the pesto reaches your desired consistency and taste, set aside in the refrigerator while you prepare the shrimp and zoodles.
- Use a vegetable spiralizer or mandolin slicer to turn your zucchini and yellow squash into vegetable noodles. Once all vegetables are spiralized, set aside.
- Spray a large skillet / sauce pan with olive oil spray and saute the shrimp with the Old Bay (to taste) until the shrimp are heated through (about 2 minutes). Add the spiralized zucchini and yellow squash and heat for another 1-2 minutes until the vegetables are heated through and soften up a bit.
- Remove the skillet from the heat and add the avocado pesto sauce. Mix well!
- Divide the shrimp and zoodles among 4 plates and top each plate with 1/4 cup grape tomatoes, 2 tbsp Parmesan cheese, and chili flakes (to taste).
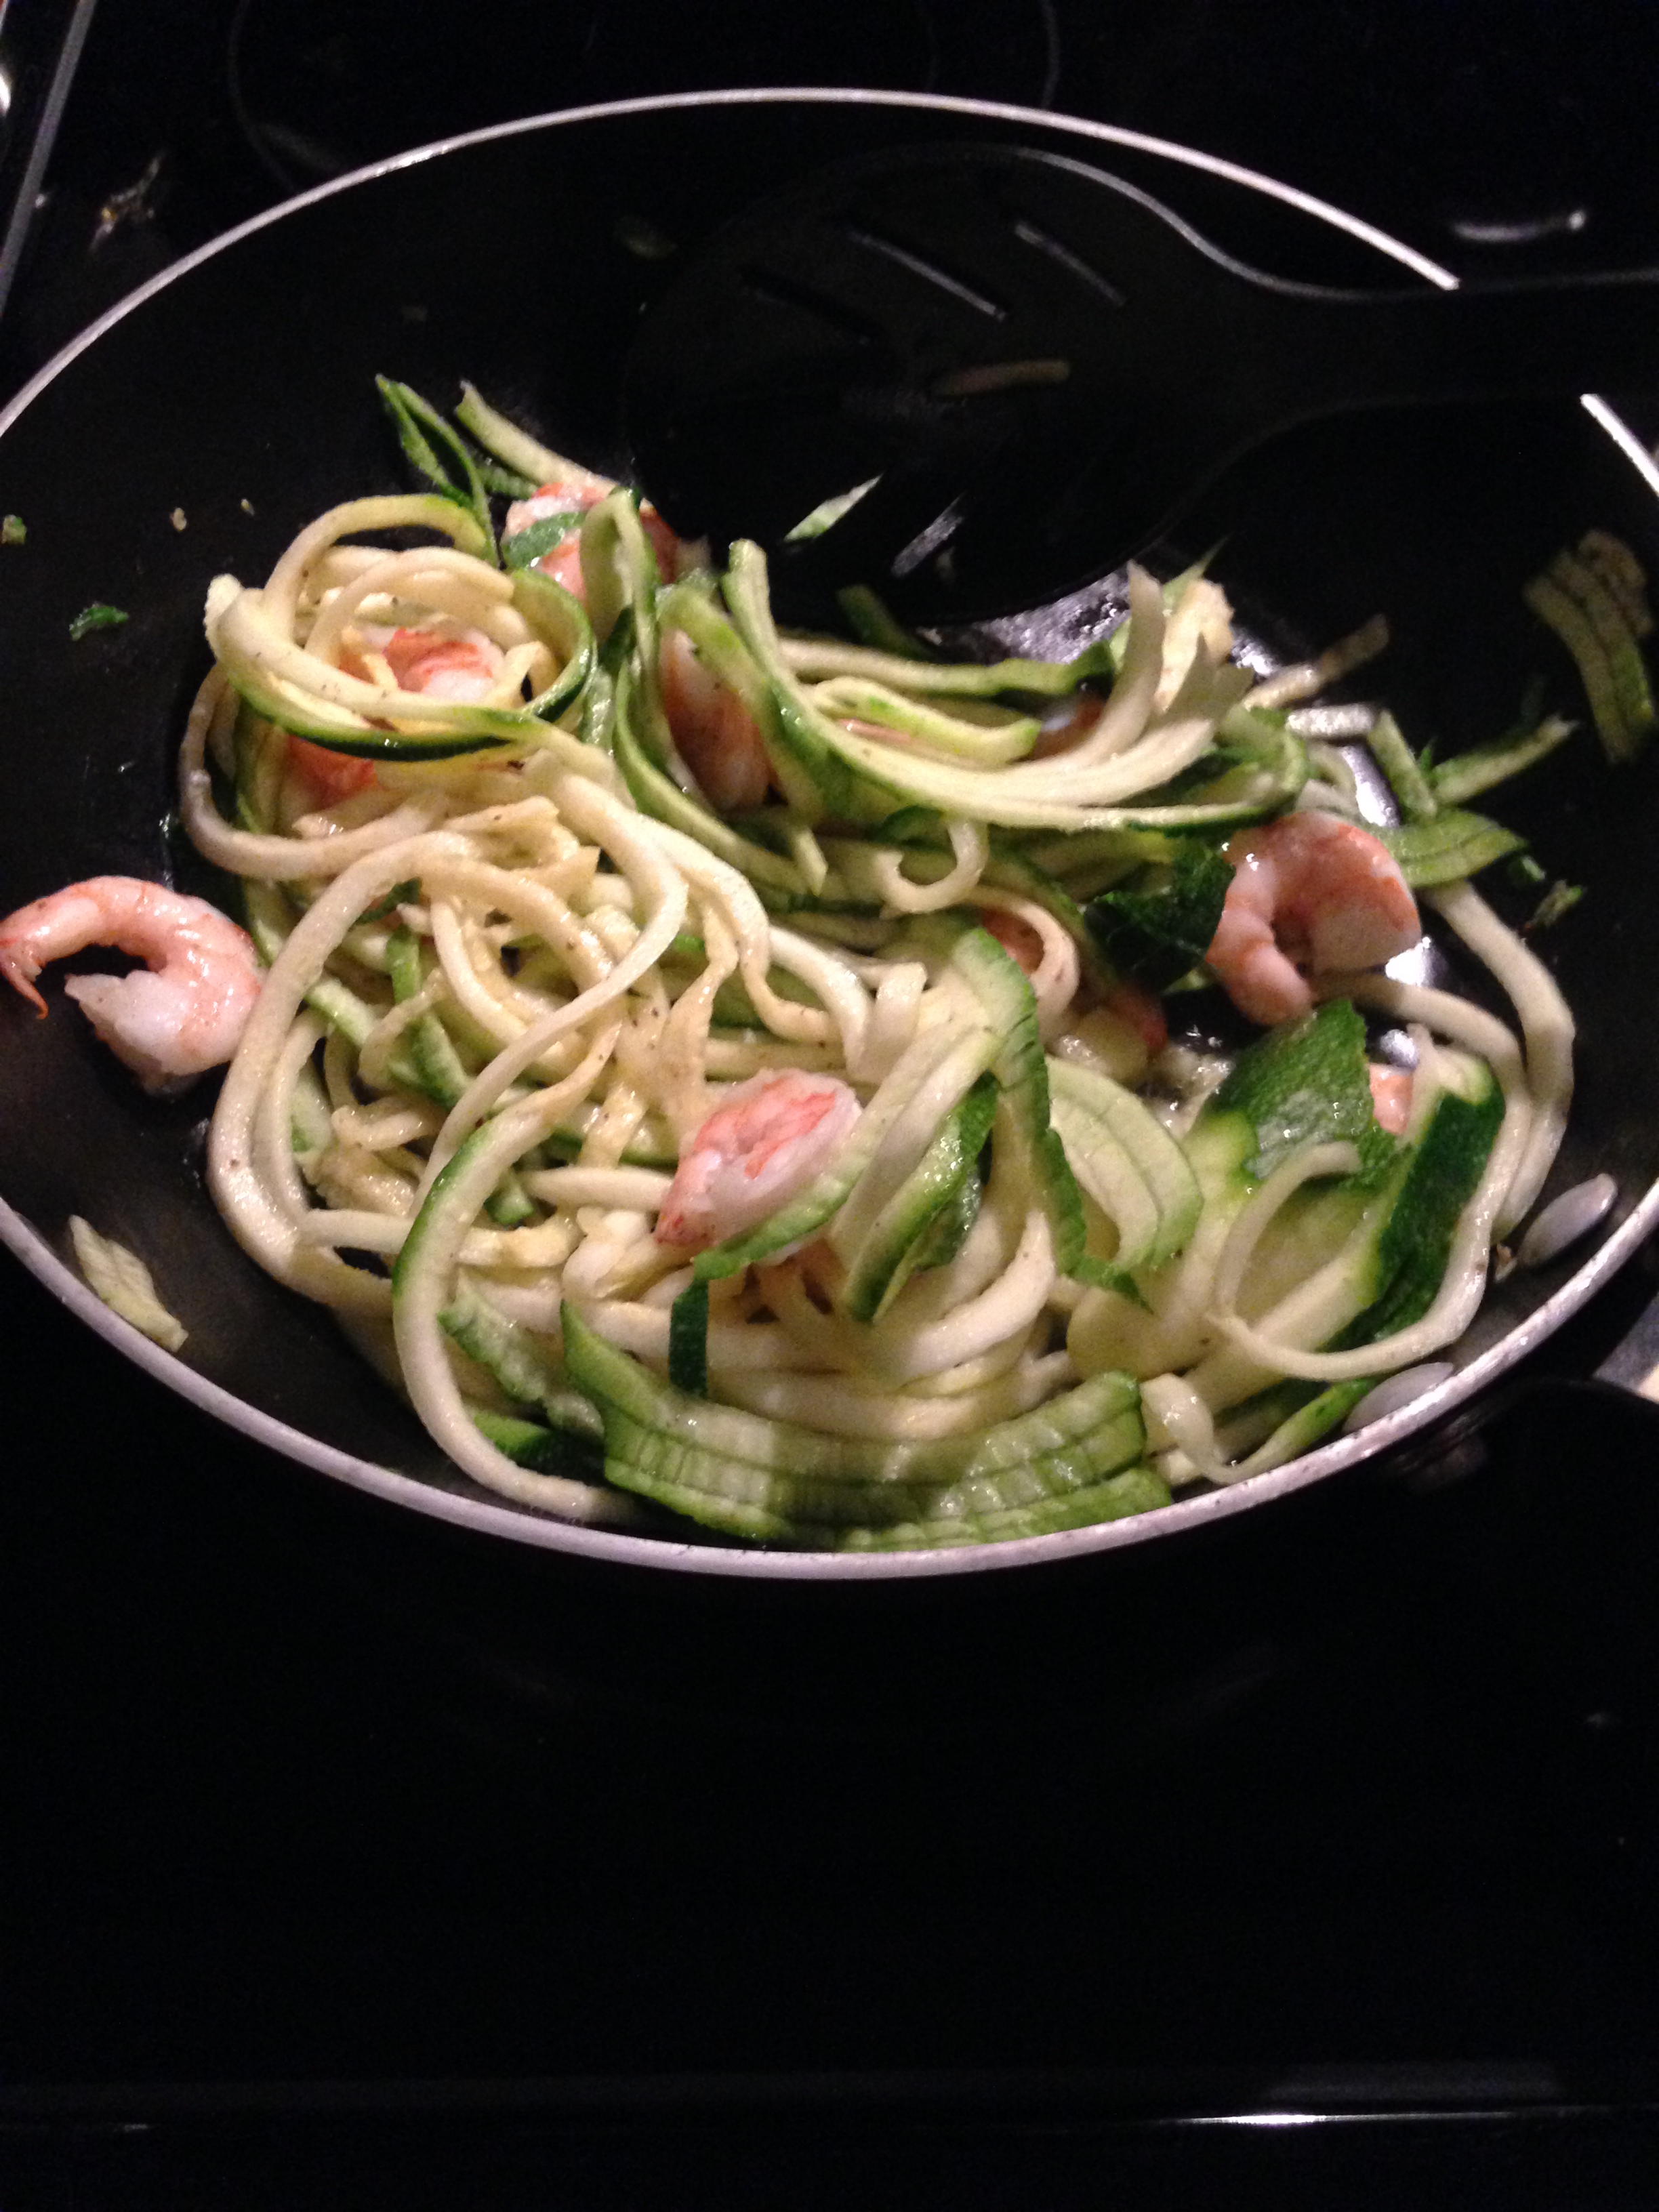
Shrimp & Zoodles
(Sauteing the Shrimp and Zoodles with Old Bay :-) )
And that's all there is to it! A quick and VERY healthy meal the whole family will love, without the carb-overload and bloating! You can switch up the ingredients to your liking and be creative with your very own concoctions! Some of my favorite versions of this Pesto Pasta include grilled chicken and ground turkey with canned diced tomatoes!

Grilled chicken zoodles
(Grilled chicken breast with "Pesto Pasta")
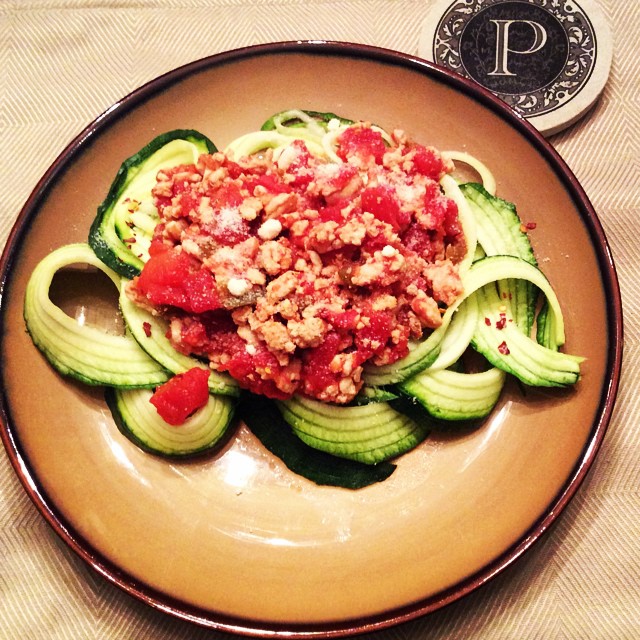
Turkey zoodles
(Ground turkey with "Pasta" Marinara)
Go ahead, have fun with your Pesto Pasta! You can thank me later :-)
Bon appetit!
Meal made in minutes: Chicken & Brown Rice Bowl
Nutrition, Recipe1 CommentI love Sundays! For many, it is a day to rest and recover from the busy week; to spend time with family and friends; and a day to enjoy some "me time." But for some, it is a day that is full of honey-do lists and endless errands; full of catching up on the list of things you left un-done from the previous week; and a day spent trying to get ahead of the game at home or at the office. For me, Sundays consist of a little bit of both - spending time with my husband and in-laws mixed in with endless chores around the house, running errands, and prepping for the week ahead. The day passes by so quickly and before I know it, it's nearing 9:00 pm and I still need to prepare my meals for the next few days. When I am short on time (which happens more often than not) my go-to meal is some variation of a Brown Rice Bowl - a super easy way to combine your favorite foods in one bowl to take to work with you for lunch or to have ready when you come home for dinner. On the menu for this Monday is one of my favorite bowls - the Chicken and Brown Rice Bowl - full of lean protein, healthy fats, complex carbohydrates, and colorful vegetables!

chicken bowl
This meal (inspired by one of our favorite South Tampa restaurants, Ciccio's) is not only super easy to make, but it is loaded with nutrients and long-lasting energy! All you have to do is a little prep work the night before and you will have a meal made in minutes that will be sure to satisfy :-)
Ingredients:
- 1/2 cup brown rice
- 1-2 cups mixed greens
- 4 oz cooked chicken breast meat (from a rotisserie chicken or grilled chicken breast)
- 1/4 cup guacamole (1 single-serve guacamole packet)
- 1-2 tbsp balsamic & olive oil dressing
Directions:
- Boil or steam brown rice (as instructed) I used Minute Rice and boiled 1 cup of rice for 5 minutes. I saved the rest for leftovers.
- While rice is cooking, remove (4 oz) chicken breast and chop into smaller pieces. I used a rotisserie chicken, but grilled or baked chicken breast is fine too).
- Once rice is cooked and cooled, place 1/2 cup into a Tupperware bowl and top with mixed greens, and chopped chicken breast.
- Add guacamole and dressing right before serving and enjoy!
I typically eat this quick meal for lunch and take the Tupperware with me on-the-go. I recommend waiting to add the guacamole and dressing until you are ready to eat to prevent the greens from getting soggy and the guacamole from turning brown.
This is such a quick and versatile meal! You can really use any lean protein and any other vegetable your heart desires for this bowl, you just need to do a little planning and prepping the night before!
Here are some variations of the Rice Bowl for substitution ideas and inspiration:

Chicken buritto bowl

Chicken green bean bowl
(Chicken Burrito Bowl: with brown rice, spinach, grilled chicken breast, grape tomatoes, salsa, avocado, and 1 hard-boiled egg)
(Lighter Chicken Bowl: with mixed greens, steamed green beans, grilled chicken breast, grape tomatoes, and balsamic dressing)
Here are some tips for the planning and prepping:
- Buy a rotisserie chicken from the grocery store when you do your weekly food shopping or bake a couple chicken breasts on Sunday evening for the beginning of the week.
- Use Minute brown rice, steam-able rice bags for the microwave, or boil a batch of rice on Sundays to use as leftovers for the next few days.
- Look for single-serve guacamole packets (such as Wholly Guacamole) and pour your salad dressing in small Tupperware container for on-the-go convenience.
Bon appetit!
Meal Makeover: Momma's Spinach and Tomato Quiche
Nutrition, RecipeCommentThere is nothing better than a home-cooked meal that is made with love, but these hearty home-cooked meals are usually high in fat, sugar, and sodium and overall high in calories. While these recipes "have been in the family for generations," there's nothing wrong with a little "makeover" action to make your favorite home-cooked meals hearty AND healthy! Take my mom's famous Spinach and Tomato Quiche recipe, for example - while it has been in the family for years, it is not the most waist-friendly OR heart-healthy meal for the family (sorry mom!).
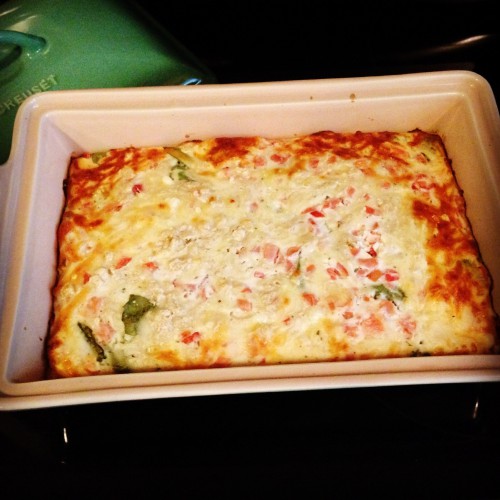
Quiched cooked
Today's Meal Makeover: Momma's Spinach and Tomato Quiche
Turned into Spinach and Tomato Egg White Quiche
With a simple swap of a few ingredients, I was able to turn my mother's famous (calorie-laden) Quiche into a low-fat, high-protein, Gluten-Free slim & trim Spinach and Tomato Egg White Quiche that the WHOLE family will love (and not feel guilty about having seconds)! The recipe make 6 generous servings and each serving has 180 calories, 5g fat (2g sat fat), 20g carbs, 3g sugar, and a whopping 16g protein! One serving also provides 34% of your daily Vitamin A and 45% of your daily Calcium requirements! Now that's a win, win, win situation!
So here's the recipe - super simple and ready in under 1 hour!
Ingredients:
- 1 cup non-fat plain Greek yogurt (I used Oikos)
- 1/2 a packet of Hidden Valley Ranch Dip (dry mix)
- 1 & 1/2 cups unsweetened almond milk (I used Silk original unsweetened)
- 1 cup Gluten-Free all purpose baking mix (I used Bob's Red Mill)
- 1 cup liquid egg whites (I used All Whites)
- 1 cup 2% (part-skim) shredded mozzarella cheese (I used Publix brand)
- 2 cups baby spinach (I used Fresh Express)
- 1 cup diced tomatoes
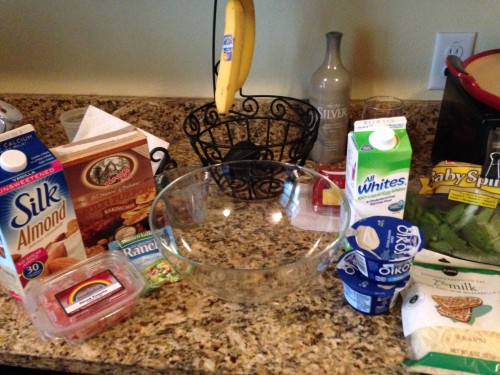
(The ingredients)
Instructions:
- Pre-heat oven to 400 deg. F and lightly spray a 9 X 13 baking dish with olive oil spray
- In a large mixing bowl, combine Greek yogurt with Ranch dip mix until it's evenly mixed in. Then add the almond milk and egg whites until completely combined
- Add the Gluten-free baking mix and mix very well, until all clumps are dissolved and mixture is completely blended
- In the prepared baking dish, layer the spinach to completely cover the entire bottom of the dish, then layer the diced tomatoes over the spinach, then layer the shredded cheese over the spinach and tomato layers
- Slowly pour the egg white mixture over the layers and push down any floating pieces of spinach with the back of a large spoon so that the egg white mixture completely covers the other ingredients
- Bake in the oven for 40-45 minutes or until the cheese slightly browns and the egg whites have completely set. (Feel free to stick a tooth pick or skewer stick to test that the egg whites have set completely and the tooth pick comes out clean)
- Let the dish cool for about 5-10 minutes, cut into 6 even pieces and serve
** You can store the Quiche in the fridge for about 3 days and reheat in the microwave to eat at anytime of the day (breakfast, lunch, dinner, or even for a hearty snack)!

Quiche uncooked
(The layers of spinach, tomatoes, and cheese - before adding egg white mixture)
If you are serving the Quiche for breakfast, I recommend adding a bowl of plain oatmeal with nuts and berries for added complex carbohydrates, healthy fats, and antioxidants to power your loved-ones (or yourself) up for the busy day ahead. If you plan to have the Quiche for lunch or dinner, I recommend adding in a slice of whole-grain bread and sliced avocado (i.e. avocado toast) or a side of brown rice or mashed sweet potato with a dash of brown sugar! YUM!
It's as easy as that! Now you have "tools" you need to serve up this delicious and healthy Quiche that the whole family will love! I am sure this recipe will stay in the family for generations to come :-)
Meals made in minutes: Super Easy Tuna Salad
Nutrition, RecipeCommentMonday means the beginning of the busy work-week and the beginning of "not having enough time" to prepare a healthy meal during the day! For those of you who feel the same way, have no fear! Come HERE every Monday to find a super easy and nutritious recipe for a meal made in minutes! That's right, every Sunday evening I will post a new recipe for one of my favorite meals that can be made in minutes! Make this meal Sunday night to take into work with you on Monday for a healthy lunch or wait until you come home from work and whip up this meal for a super easy dinner!
Today's Meal Made in Minutes: Super Easy Tuna Salad

Winning Combo Tuna Salad
(Proof that even a "novice chef" can make this meal!)
What you will need:
- Two cups of your favorite mixed greens (I used Fresh Express Mixed Greens)
- 1 single serve pouch of StarKist Low Sodium Chunk Light Tuna (2.6 oz)
- 1 single serve Wholly Guacamole mini cup
- 2 Tbsp plain non-fat Greek Yogurt (I used Oikos Greek Yogurt)
- 1/4th cup cherry tomatoes (sliced in half)
- 1/2 whole wheat tortilla wrap or Lavash bread (I used Sami's Bakery Millet & Flax Lavash)
- 2 tbsp Balsamic Vinaigrette salad dressing
- Red chili flakes and black pepper to taste
How to prepare it:
- Mix the tuna with the guacamole and Greek yogurt in a small bowl, add in the chili flakes and pepper (to taste) and stir to completely combine all ingredients
- In a serving bowl, place mixed greens and tomatoes in the bottom of the bowl and pour 1 tbsp balsmic vinaigrette on top
- Top the mixed greens with tuna salad and pour remaining 1 tbsp dressing over the tuna
- Serve with 1/2 tortilla or Lavash and dig in!
This meal provides all three macro-nutrients - complex carbohydrates, lean protein, and healthy fats (known as "the winning combos") - with tons of antioxidants for long lasting energy to get you through the long work day!
For a variation of this Super Easy Tuna Salad, try adding in some baby carrots for extra antioxidants! Go ahead, have fun with your food!

Tuna Salad w carrots
That's really all there is to it! A healthy meal made in minutes that doesn't skimp out on nutrients or taste!
Enjoy!
Meal Makeover: Meet the Meatza Pizza!
Recipe, Nutrition3 CommentsHey there! Welcome to my FIRST EVER blog post! For those of you who know me well, you are very familiar with my never-ending "meal makeovers" and healthy(er) recipe posts on my Pinterest, Instagram, and Facebook pages, but now you will be able to come to one site to see all of my creative meals and recipes! I hope you enjoy what you see... make...and EAT! I figured there was no better way to start my first Recipe Blog Post than to introduce you all to the greatest thing since sliced GLUTEN-FREE bread!! Allow me to introduce the amazing "Meatza" Pizza - which just happens to be NATURALLY gluten-free and SURPRISINGLY delicious!
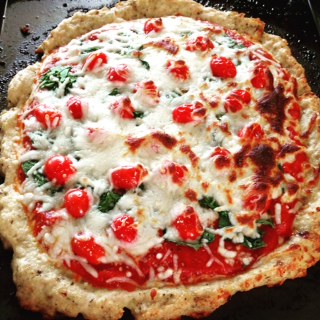
Meatza Pizza
(Yes folks, it truly looks that beautiful and delicious! I took this picture right after the Meatza came out of the oven!)
When I first discovered this recipe on Pinterest, I was very intrigued to try it out myself (but was very skeptical at the same time). Now, I will admit that I am not the best cook (yet), so I enlisted the help of my (very talented and sweet) neighbor who just happens to be a pro in the kitchen. My neighbor, Margie, and I (along with the help of her 10-year old grandson) made two Meatza Pizzas earlier this afternoon and we were all surprised by how easy it was to make them (and by how much fun we had while doing it)! Within an hour, the Meatzas were done and we couldn't believe the final product. Our Meatza Pizzas looks like regular pizzas! We could hardly wait to slice up one of the Meatza Pizzas and I for one was blown away by the amazing taste and texture! Even the 10-year old boy LOVED it!
Now if you don't believe me... try it yourself! Here is the recipe that started this whole "crazy" Meatza Pizza idea (from the talented Baker By Nature).

Marg. Meatza Pizza
(Photo: BakerByNature)
As always, I made some minor modifications to her recipe, but you could really use any toppings you would like! Here are the modified ingredients that I used to make the Spinach and Tomato Meatza:
Ingredients
- 1 teaspoon salt
- 1 teaspoon dried oregano
- 1 teaspoon garlic salt
- 1 teaspoon onion powder
- 1 teaspoon ground black pepper
- 1/2 teaspoon crushed red pepper flakes
- 1.25pounds extra-lean ground turkey meat
- 1 teaspoon worcestershire sauce
- 2 large eggs
- 1/2 cup grated Parmesan cheese
- 8 ounces shredded 2% mozzarella cheese
- 1 cup tomato sauce
- 10 Grape Tomatoes, sliced in half length-wise
- 1/4 cup baby spinach, chopped
It's truly that simple! We baked the "crusts" for 15 minutes, put our toppings on, and put the Meatzas under the broiler for 5 minutes. Once they were cooled a bit, we sliced one Meatza into 8 slices and entered "Meatza Bliss" with our first bite!

Meatza Crust
(The Meatza "crust" after baking for 15 minutes)
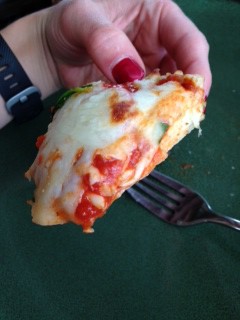
Slice of Meatza
(The first bite of the first slice...mmmm)
Don't just take my word for it - try it out yourself. Like.....NOW! You're welcome :-)