When you hear about Zinc regarding your health, you probably only think of it as one of the many effective natural cold remedies and only necessary once in a great while to help you fight the common cold. Zinc, however, is required for the functions of over 300 enzymes and is needed in small amounts every day in order to maintain health. Zinc is involved in many important processes in your body and has significant therapeutic benefits for several common, chronic diseases (like fighting cancer or reversing heart disease). Read on to learn more about the health benefits and natural food sources of this powerful nutrient!
Nutrition
Nutrients by the Alphabet: Water Health Benefits and Recipe
Nutrition, RecipeCommentWe all know that drinking plenty of water a day is beneficial, but do you know why? Water is actually an essential nutrient with tons of benefits and makes up about 60% of the body! In addition to hydration, water fills the spaces in and between cells and helps form structures of large molecules such as protein and glycogen. Read on to learn about the numerous health benefits and natural food sources of Water!
Nutrients by the Alphabet: Magnesium Health Benefits and Recipe
Nutrition, Recipe1 CommentDid you know that magnesium is a major mineral that is crucial for your health? In fact, magnesium is one of the most important minerals when it comes to maintaining optimal health since it plays major roles in bone health, nerve health, heart health, mental health, and many more health systems. Unfortunately, even if you have a healthy diet you can still suffer from magnesium deficiency which can cause a number of conditions and diseases. Read on to learn about the numerous health benefits of magnesium and were to find the best natural sources.
Nutrition Tip Tuesday: Surprising Health Benefits of Yogurt
CommentYogurt has quickly become a favorite dairy option for many Americans and several varieties of yogurt have practically taken over the dairy aisle in grocery stores nationwide. While there is a lot of controversy about the health effects of dairy, it may surprise you to learn about the proven health benefits of yogurt! No sure what makes yogurt so special compared to its other dairy family members? Here are my top health benefits of yogurt and how to increase your consumption of this powerful (and tasty) food to improve your overall health!
Nutrition Tip Tuesday: Preventing Iron Deficiency with Iron-Rich Foods
CommentIt is well known that Iron is an important nutrient for optimal health, but many individuals may not know how much Iron they need each day and which foods contain the largest amount of Iron. A dear friend of mine who is pregnant with her second child asked me how she can increase her Iron intake without taking more pills or eating too much red meat during her pregnancy. If she has this question, then I know others may have the same question! So this week's Nutrition Tip is all about Iron and the best food sources for this essential mineral.
Recipe Feature: Egg White Potato Nests
RecipeCommentMeal made in minutes: Maple Blueberry Overnight Oats
RecipeCommentIt's already Sunday again! This week really flew by... actually, this whole summer really flew by, and today I am preparing for my trip to NC for Orientation Week at Lenoir-Ryhne University! I am excited for my Dietetic Internship program to start, but I am also very anxious and nervous for the next big step in my journey to becoming a Registered Dietitian. Luckily, I have a long list of "to-do's" today before I leave tomorrow to keep me preoccupied and distracted. One of the most important things on my "to-do" list is to make overnight oats for my husband to eat for breakfast all week while I am gone! I am sure you have heard of overnight oats by now, but if you haven't gotten around to making them then you are missing out! Overnight oats are incredibly easy to make, a delicious way to start your day, and can be made in minutes! I make a couple batches at a time for my husband to eat for breakfast when he is short on time (which is all the time) and have experimented with several different ingredients. After a few trail and error attempts, I have found the perfect recipe for the BEST overnight oats - and today I am going to share it with you!
This week's Meal Made in Minutes: Maple Blueberry Overnight Oats

Maple Blueberry Oats (5)
Ingredients:
- 1/3 cup rolled oats (Gluten-Free if needed) (I use Bob's Red Mill Gluten-Free Rolled Oats)
- 1/2 cup milk (Dairy-Free if needed) (I use 1% milk for my hubby and Unsweetened Vanilla Almond milk for me)
- 1/4th cup plain Greek yogurt (I use Fage or Oikos) or 2 tbsp vegan protein powder (I use Bio Chem Vegan Vanilla Bean)
- 1-2 tbsp Maple syrup (to desired sweetness)
- 1-2 tbsp Chia seeds (to desired thickness)
- 1/3 cup fresh blueberries

Maple Blueberry Oats ingredients
(Ingredients for 4 jars of Maple Blueberry Overnight Oats and 1 jar of Gluten-Free & Vegan Maple PB Protein Overnight Oats)
Directions:
- Place oats, milk, yogurt / protein powder, and maple syrup (in that order) into a mason jar or deep Tupperware container (with a lid). Mix all ingredients well with a spoon.
- Add in the Chia seeds and mix well again.
- Add in the blueberries and mix well again.
- Top with the lid (air-tight) and store in the refrigerator for at least 4 hours or overnight for best results.
- Remove from the refrigerator when ready to eat and enjoy as-is (straight from the jar) or warm up your oats in the microwave for 30-60 seconds.
** You can add any toppings of your choice to your oats :-) Some of my favorite toppings are banana slices, almond slices, PB2, and cinnamon.
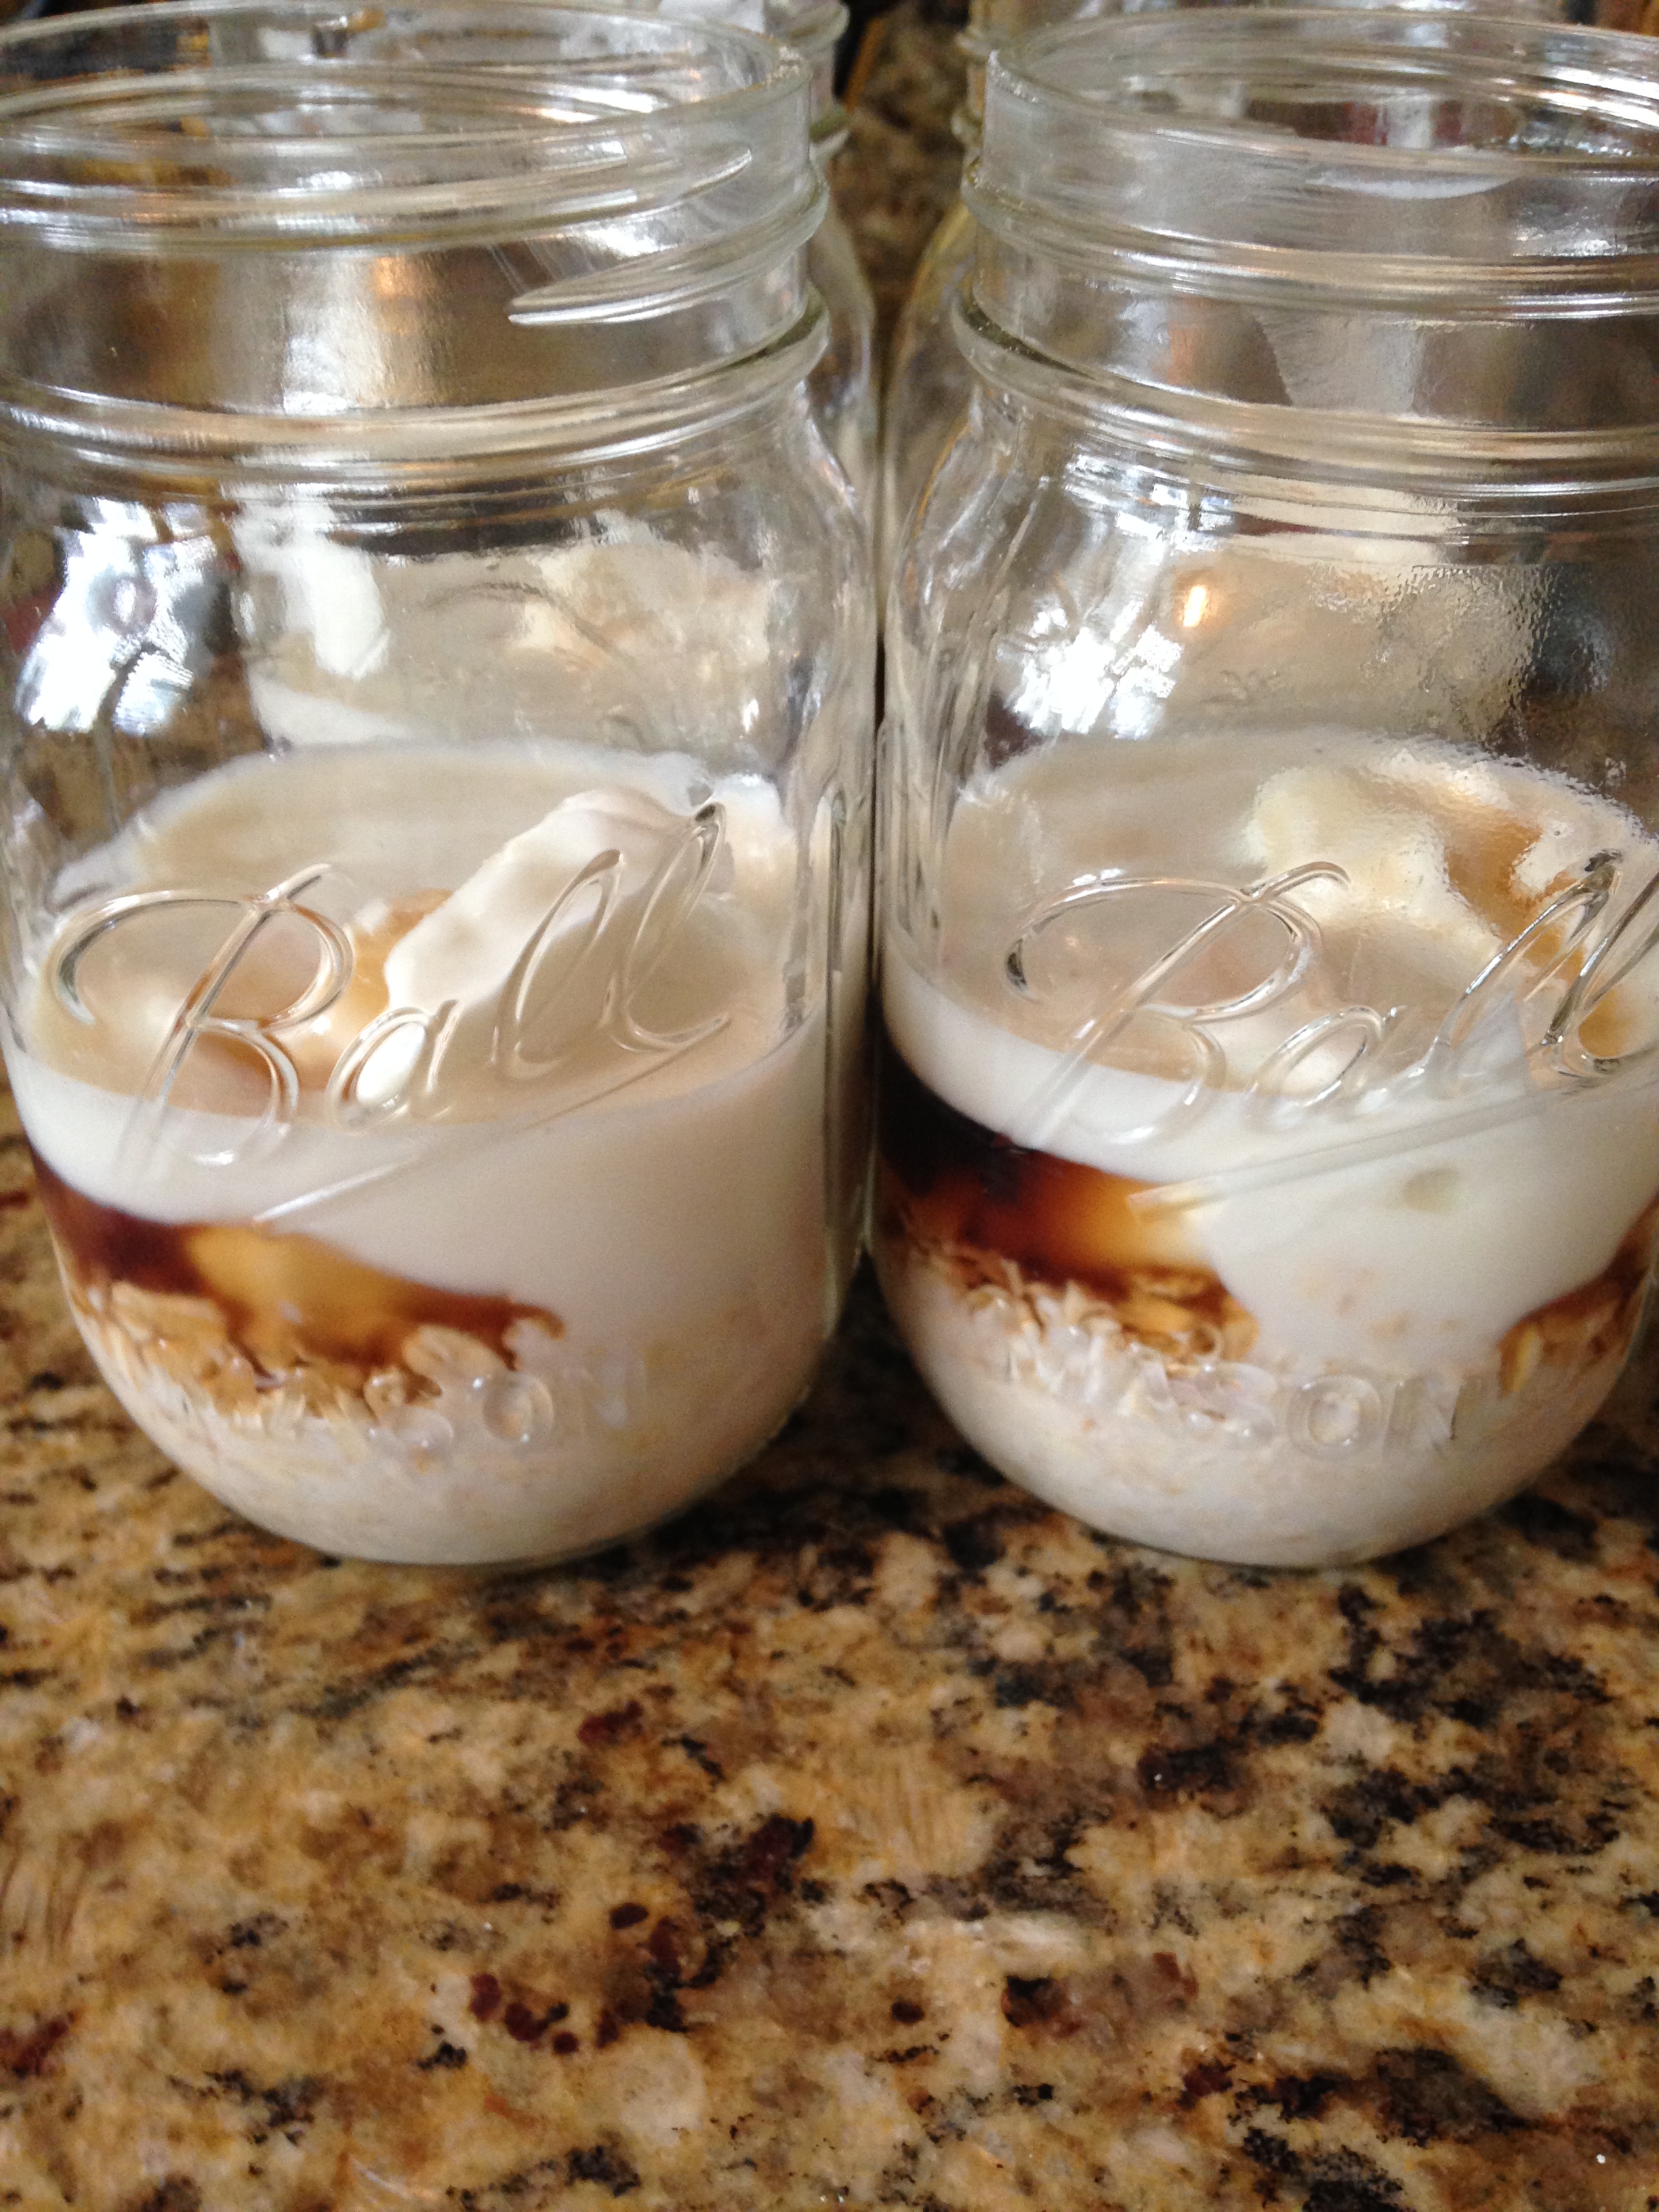
Maple Blueberry Oats (2)
(Step 1: before the ingredients are mixed well)

Maple Blueberry Oats (3)
(Step 2: with the Chia seeds mixed in)
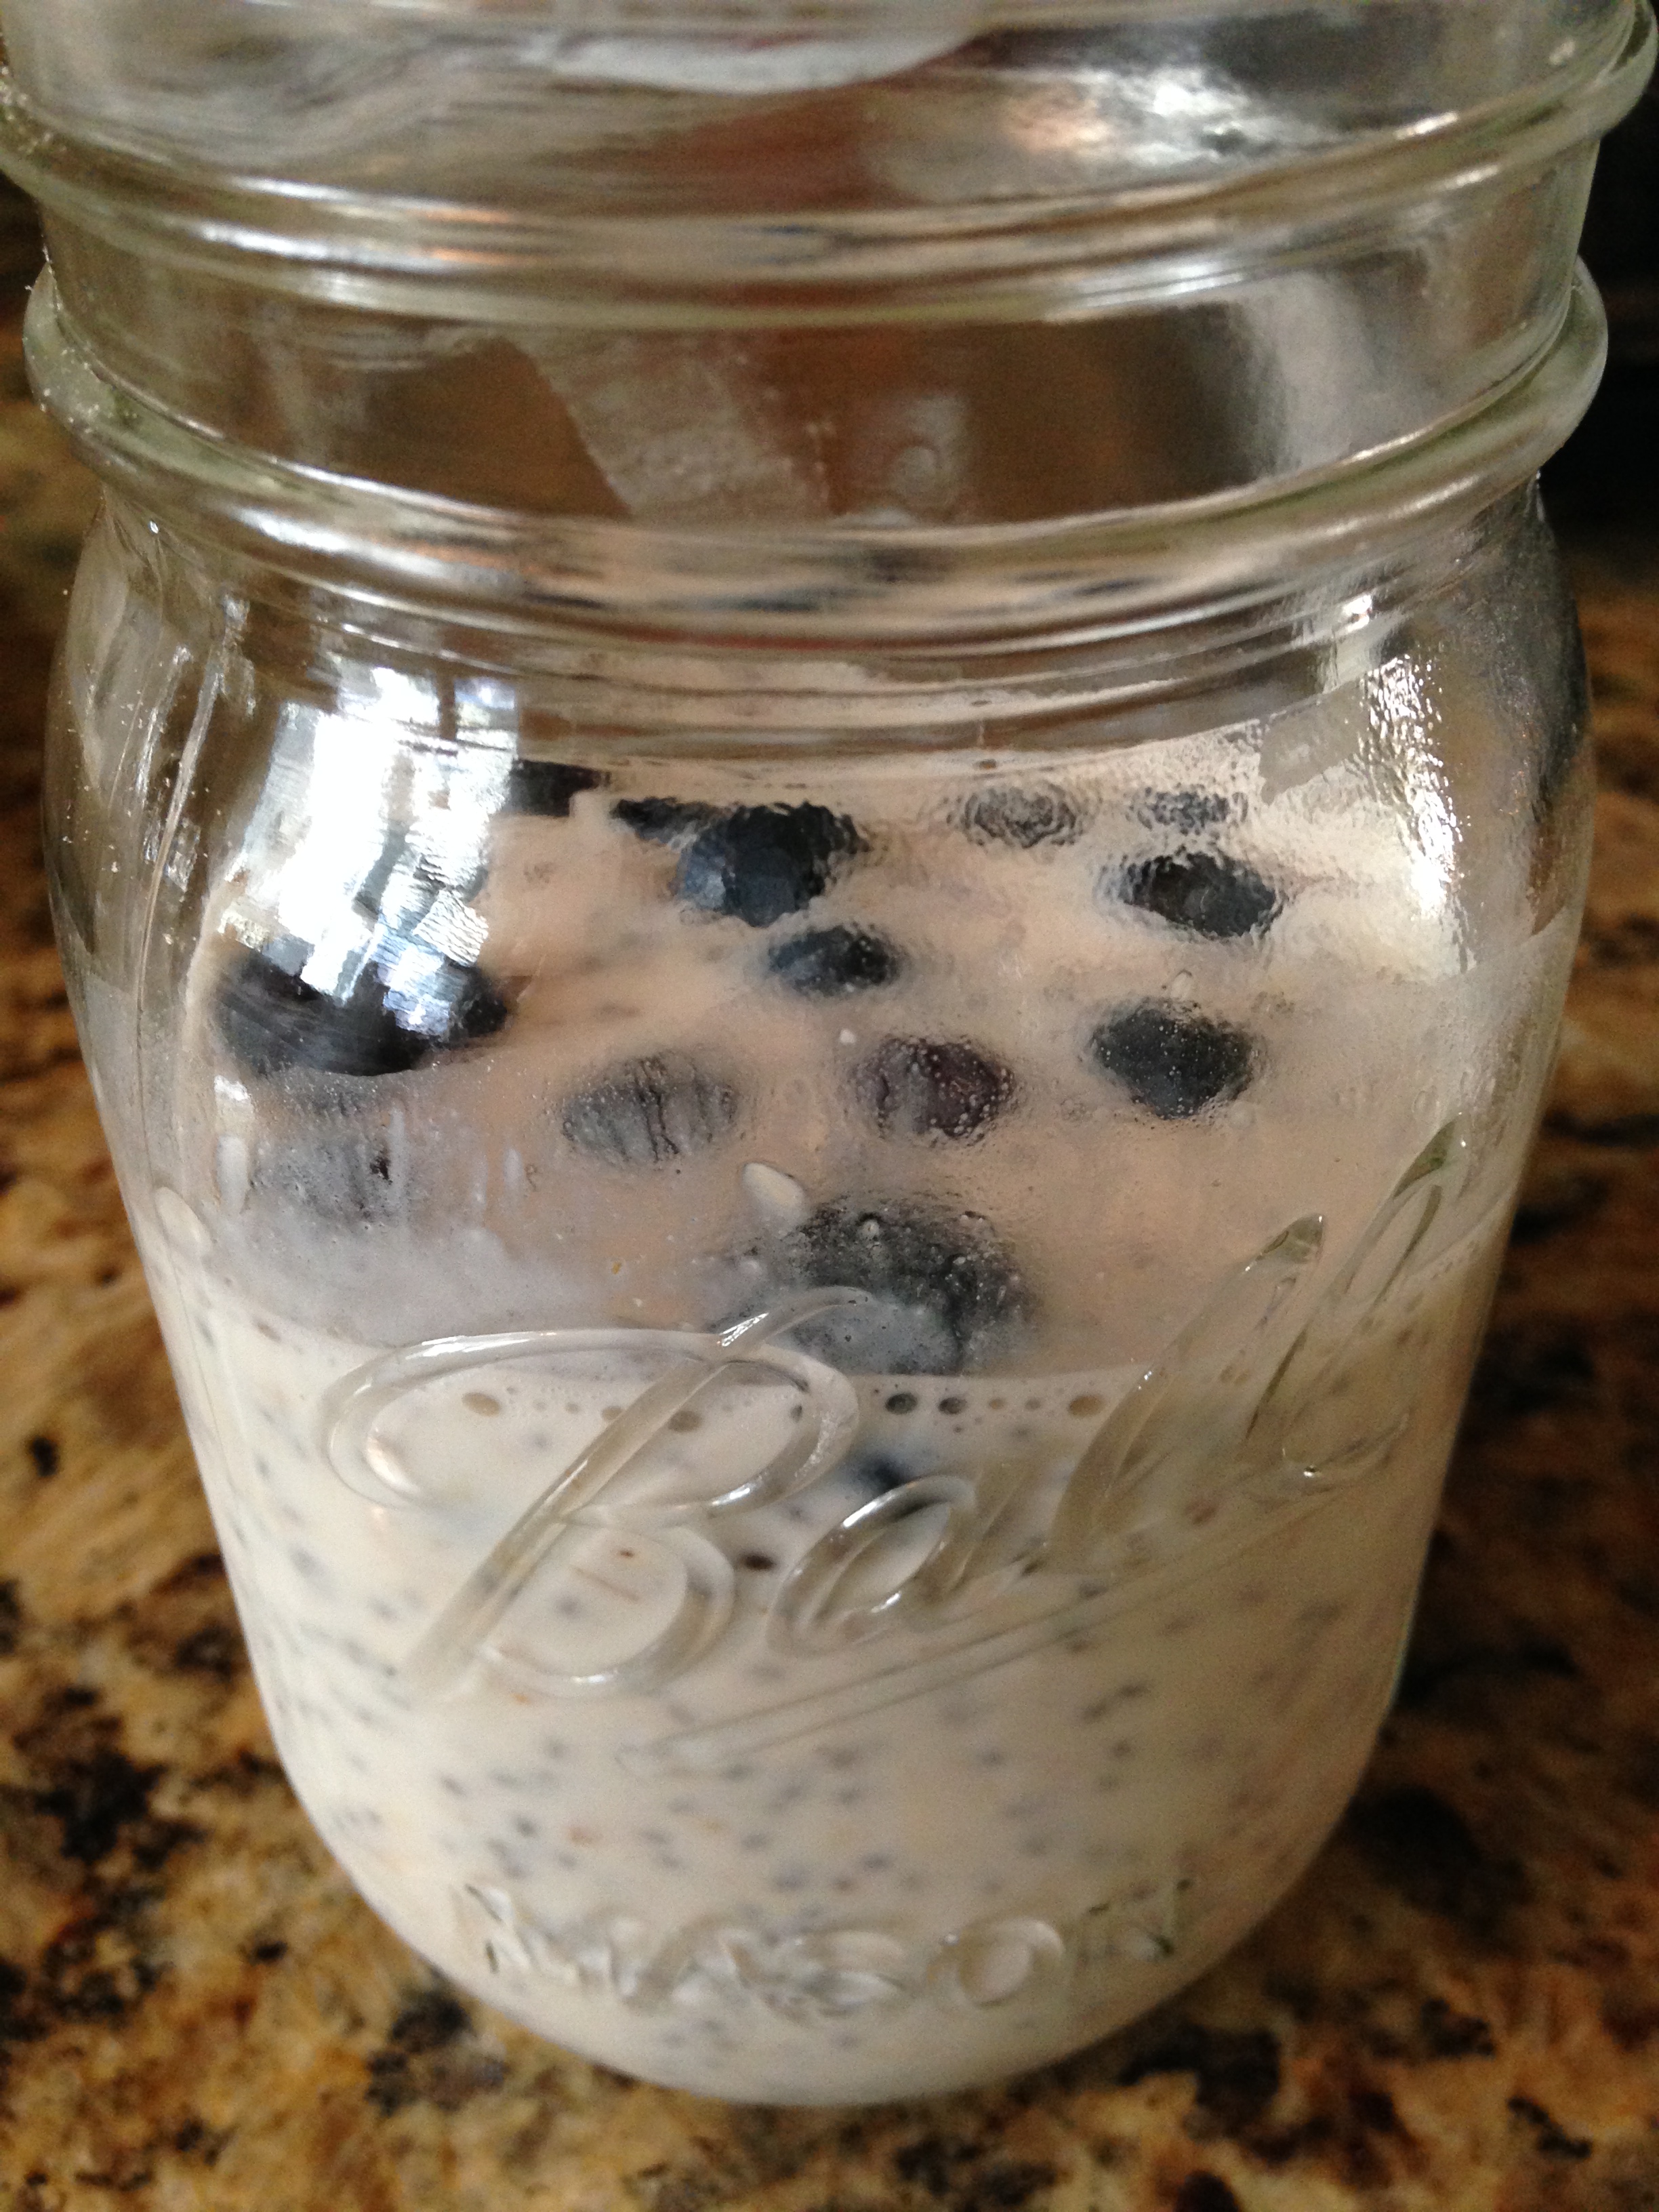
Maple Blueberry Oats (4)
(Step 3: before the blueberries are mixed in)
It really is that simple and SO delicious! You can make the overnight oats in less than 5 minutes and have your breakfast ready to grab-and-go the next morning!
You can play around with the ingredients a little, but be sure to have more liquid than oats (since the oats will absorb the milk and expand) and increase the liquid even more if you add more Chia seeds (since the seeds will also absorb the milk and expand even more)!

Maple PB Protein Oats
(My Gluten-Free & Vegan version: Maple PB Protein Overnight Oats - with GF oats, almond milk, Vegan protein powder, PB2, maple syrup and Chia seeds!)
Have fun experimenting with your Overnight Oats and enjoy a delicious and satisfying breakfast made in minutes :-)
Meal Makeover: Eggplant Turkey Boats
RecipeCommentThe realization that my summer vacation is coming to an end has officially sent in and I find myself daydreaming about my trip home last week. My favorite part of being home was spending time with my family and cooking in the kitchen with my mom. My mother has become quite the cook these days and, with the help of my creative healthy twists on recipes, she and I made the perfect team. We invited my grandparents, my aunt, and my younger cousin over for dinner the night before I flew back to Tampa and we had quite the task of feeding seven people with seven different "particular tastes".... so I figured that would be a perfect night to try out a new recipe!
This week's Meal Makeover: Eggplant Turkey Boats
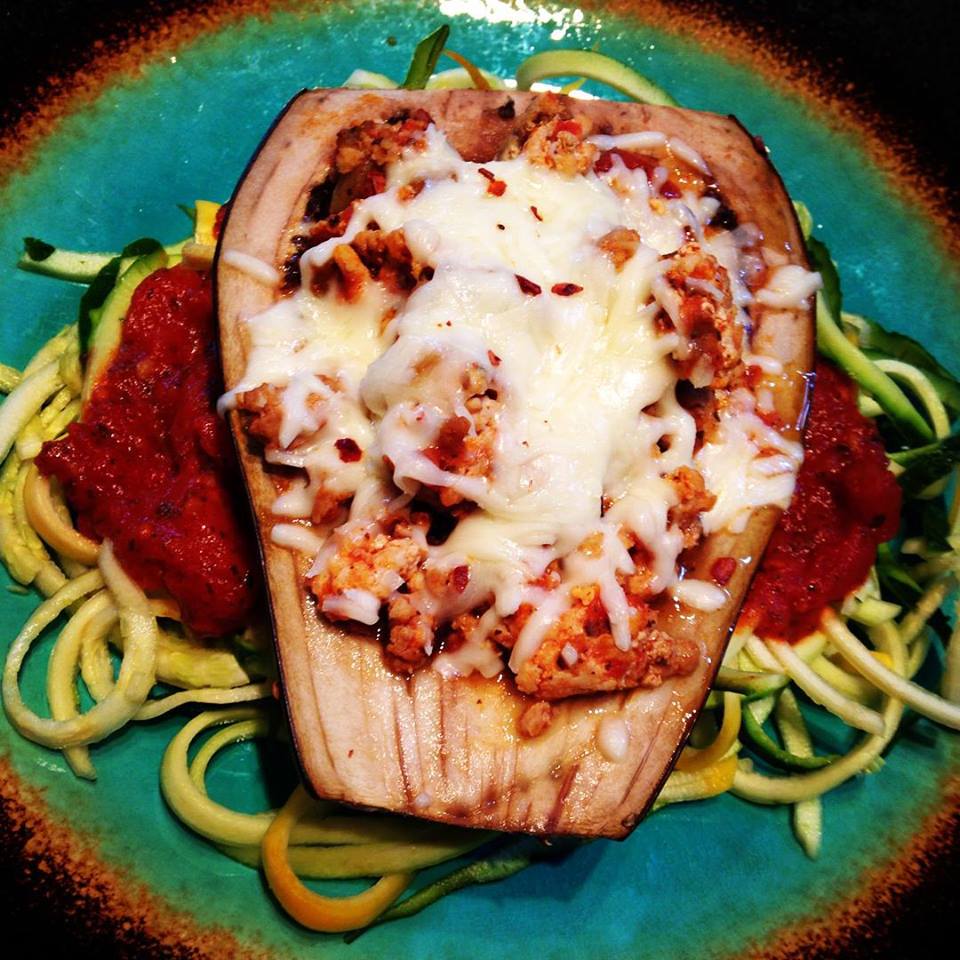
Eggplant plated
The best part is that the main ingredients were as "farm-to-table" as we could get - we used the vegetables straight from mother's garden and she felt quite proud of herself!
Ingredients: Serves 6-8
- 2 lbs extra-lean ground turkey
- 4 medium eggplants
- 6-8 medium zucchini / yellow squash (1 per person)
- 2 16-oz jars of low-sodium marinara / pasta sauce
- 1.5 - 2 cups part-skim mozzarella cheese (shredded) (1/4th cup per eggplant half)
- 2 tsp chili powder
- 2 tsp cumin
- Black pepper (to taste)
Tools needed:
- Large skillet / sauce pan
- Spiralizer / Veggetti
Instructions:
- Preheat oven to 400 deg. F.
- Wash the eggplant and zucchini / squash. Cut the ends off each vegetable and set aside the zucchini / squash. Cut the eggplant in half (length wise) and carve out the seeds / flesh with a spoon, leaving 1/2 the flesh remaining in the shell for the "boat" - Note: be careful not to carve too deep / crack the shell of the eggplant! Set the seeds / flesh aside.
- Spray 2-3 baking dishes with olive oil spray (to prevent sticking) and place each eggplant half on the baking sheet, flesh side up. Spray the flesh of the eggplant with olive oil spray to prevent burning when baking. Bake eggplant in the oven for 10-15 minutes - Note: be sure to watch the flesh of the eggplant and remove them from the oven if they start to burn!
- While the eggplants are baking, cook the ground turkey in a large sauce pan (no pink remaining) and add in the cumin, chili powder, and black pepper. Turn the heat down to simmer / low and add in the eggplant seeds / flesh and one jar of the marina sauce. Cook for an additional 2-3 minutes (just to soften the eggplant and heat the sauce). Stir as needed.
- When the eggplants are done, remove from the oven and carefully fill each eggplant shell half with the ground turkey mix and top each with 1/4th cup shredded cheese.
- Reduce oven temperature to 350 deg. F and place the eggplants back into the oven for 5-10 minutes (just until the cheese has melted).
- While the cheese is melting, spiralize each zucchini / squash onto a serving dish (1 per person).
- Pour the remaining jar of sauce into a microwave-safe bowl and heat for 1-2 minutes (stopping the time and stirring the sauce at the 1-minute mark) and spoon some sauce on top of the spiralized zucchini / squash.
- Remove the eggplants from the oven and place one eggplant "boat" on top of the zucchini / squash noodles and serve! Note: use tongs to transfer the eggplant to each plate!

Eggplant prep
(Eggplant "boats" carved out and ready to bake!)
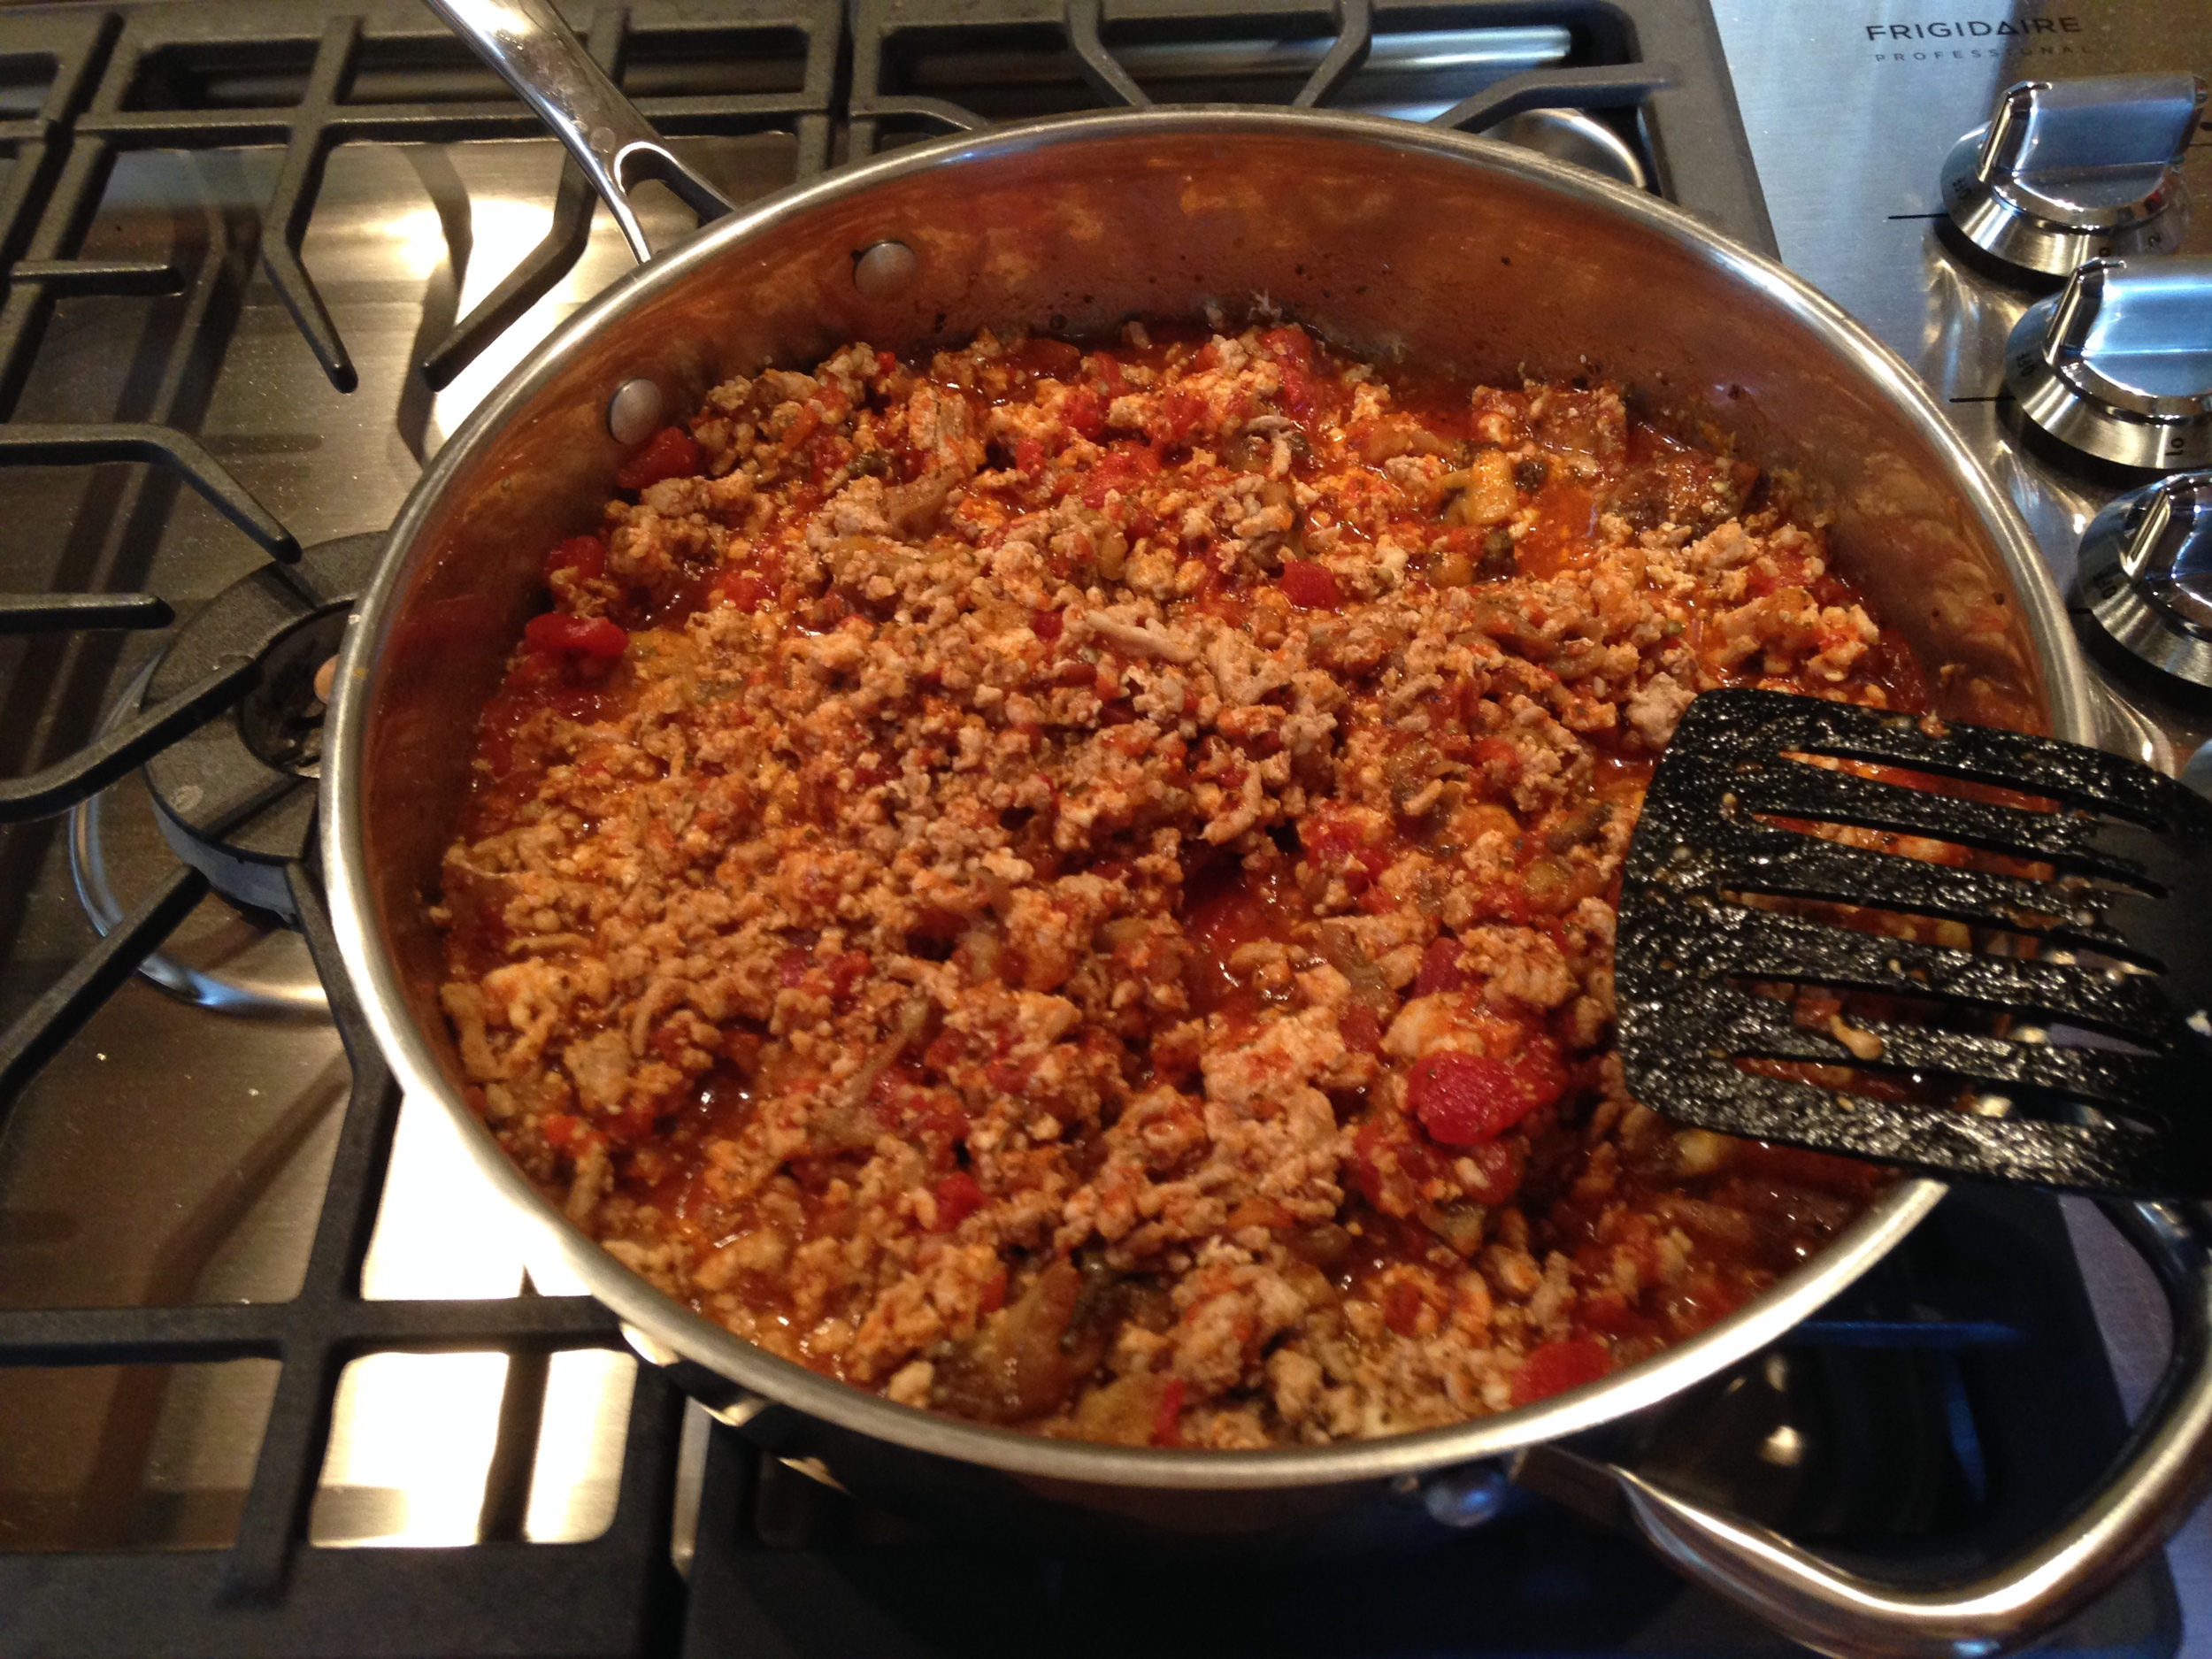
Eggplant Turkey Filling
(Cooked ground turkey with spices and sauce)

Eggplant filled
(Eggplant "boats" stuffed with turkey & eggplant mix and topped with cheese)

Eggplant done
(Eggplant "boats" baked and ready to eat!)
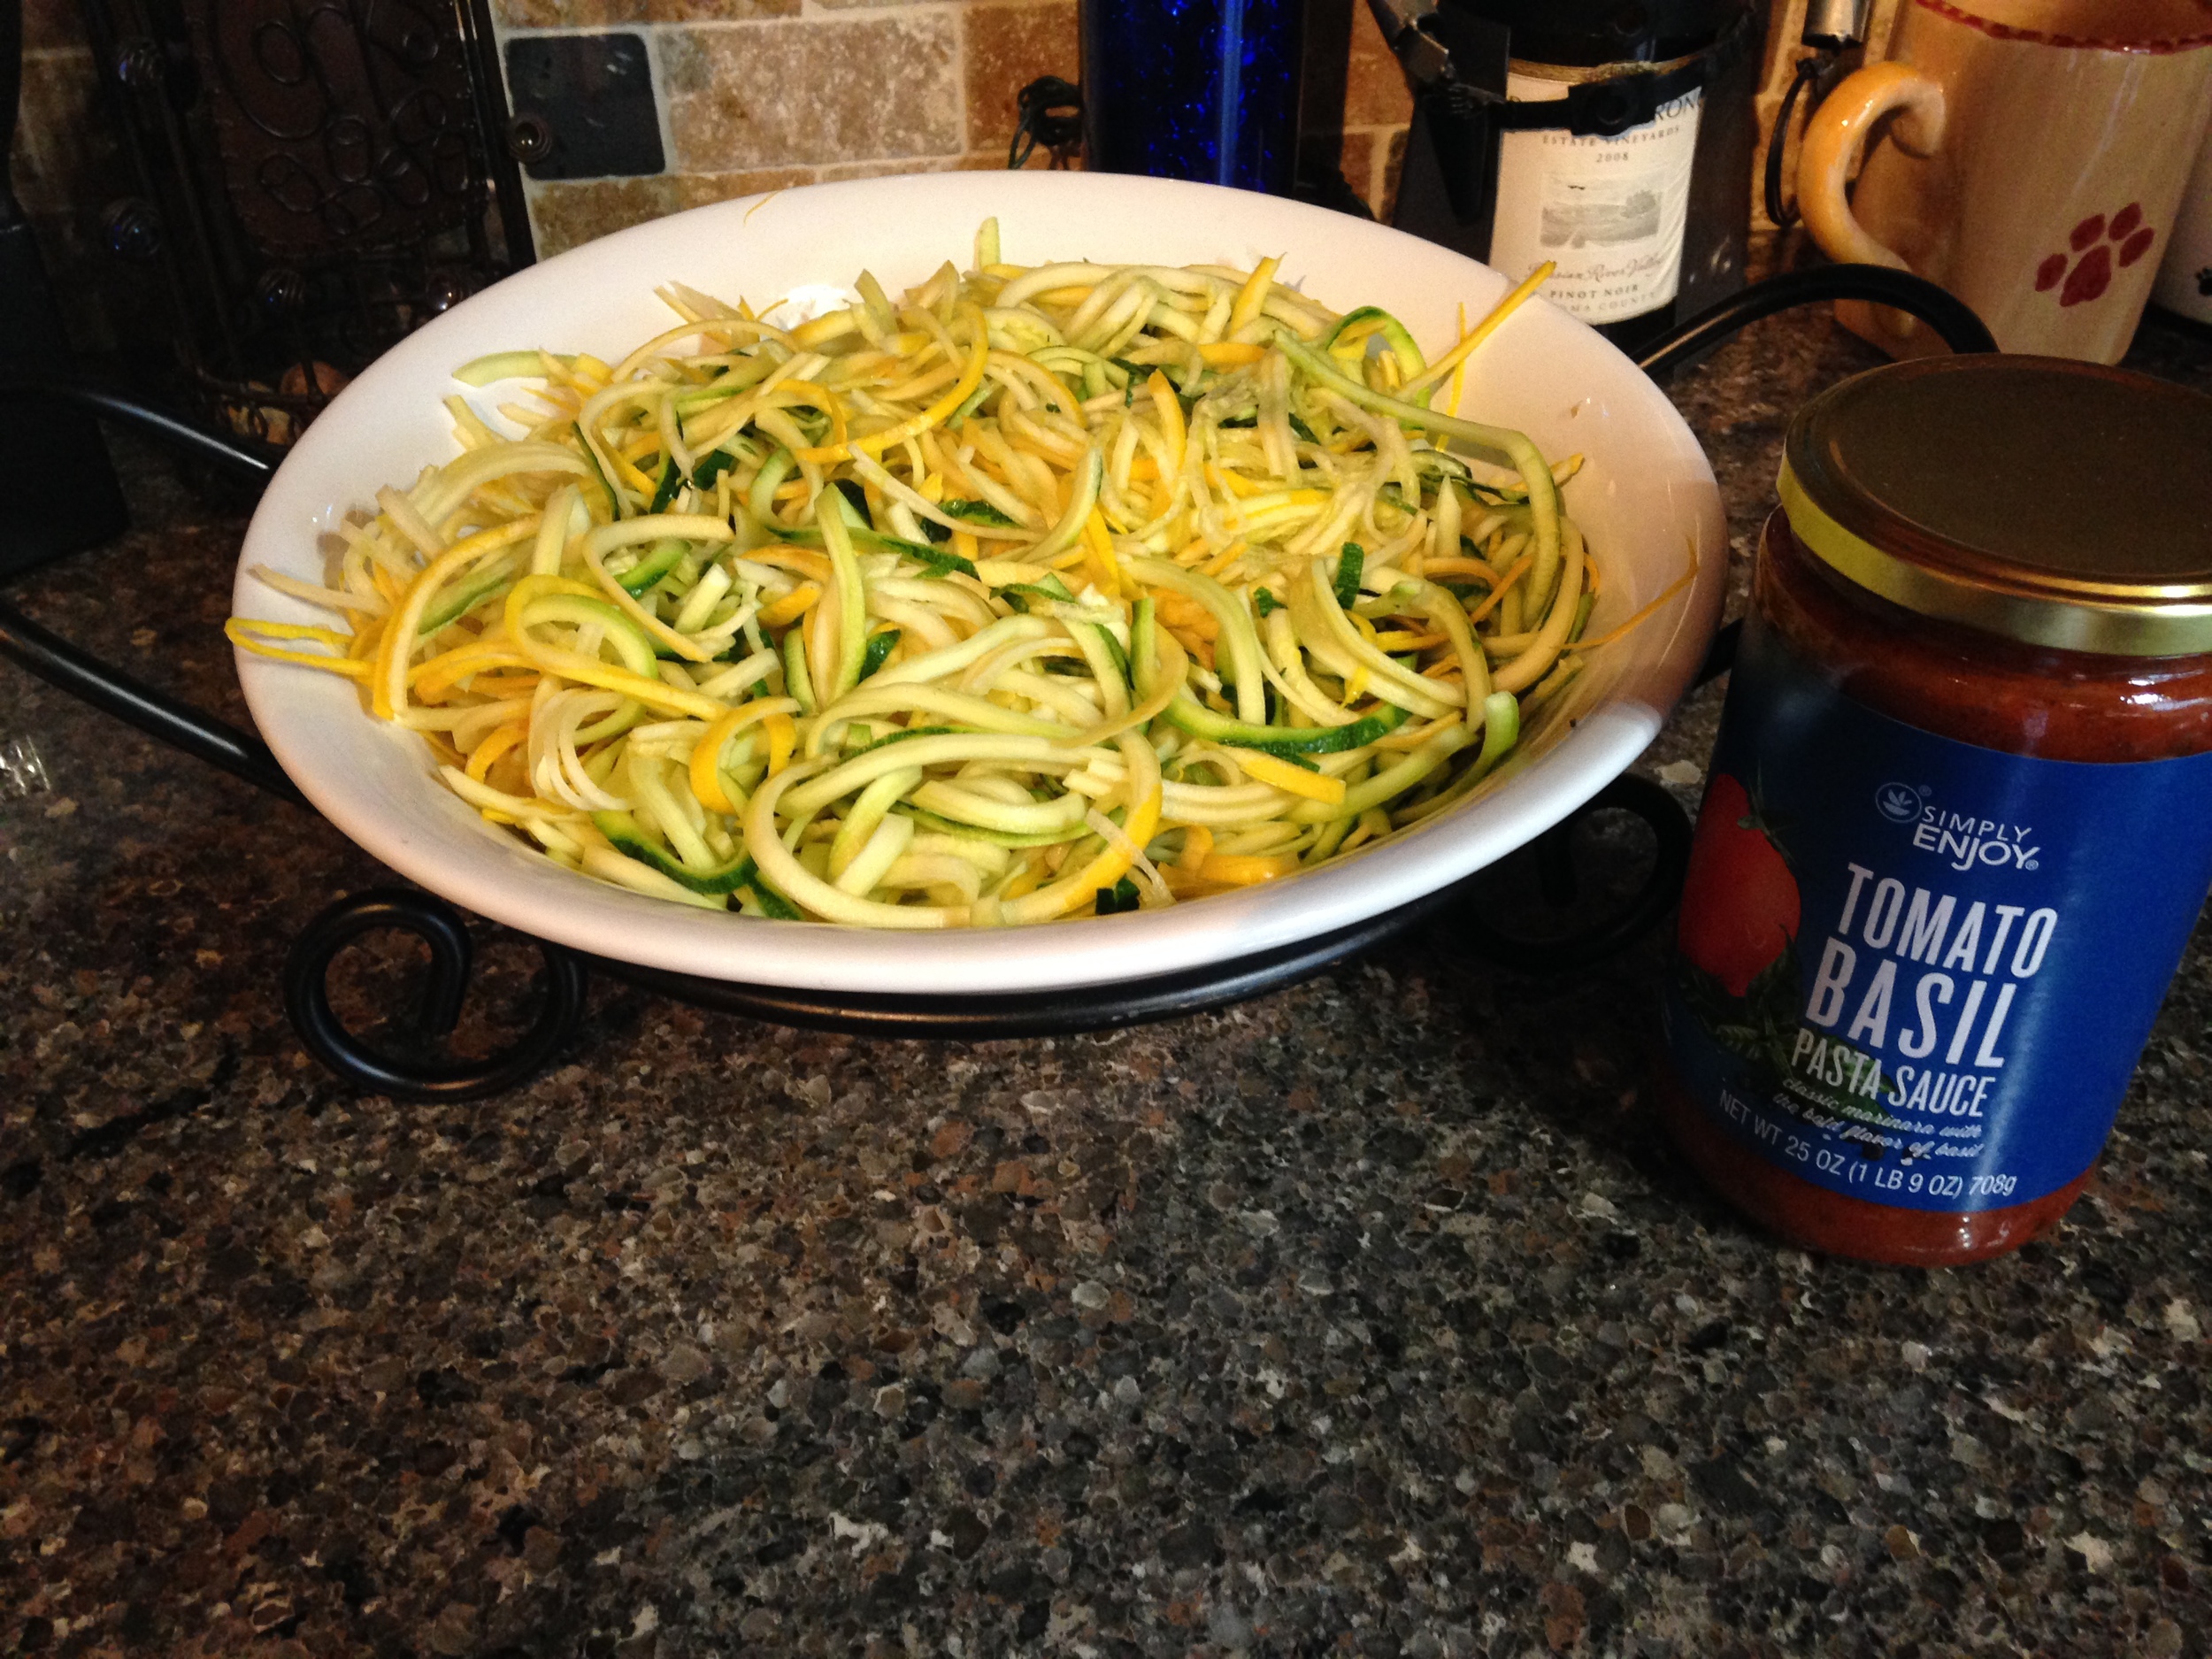
Zoodles
(All the zucchini and yellow squash spiralized into "noodles")
Eggplant plated
(One plated Eggplant Turkey Boat over a bed of zoodles!)
Now doesn't that look delicious!? The good news is that this dish was as delicious as it looks and my whole family was impressed - even my 21-year-old male cousin in college loved it!
The whole meal was prepared and served within 45 minutes (and consumed within 15 minutes!!) and kept us happy and full all night! Do yourself a favor and serve this meal at your next family dinner - trust me, you won't regret it :-)
Thirsty Thursday: Mamma Chia and Vanilla Smoothie
Recipe1 Comment
Ned's Point
One of my favorite things about being back in my home town (Mattapoisett, MA) is being able to run down to one of the most beautiful ocean-side parks called Ned's Point. Ned's Point is about 1.25 miles from my parents' house and most of the route is covered by huge, beautiful oak trees and surrounded by large beach houses. There is something about Ned's Point that makes me feel "at home" and sitting on the picnic tables and gazing past the lighthouse at the crashing waves against the rocks brings back childhood memories - it is truly my happy place :-)
(Ned's Point - Mattapoisett, MA - My "happy place")
I've started nearly every morning since I arrived back home with a nice jog down to Ned's Point and back to my parents' house and, while it is only 2.5 miles round trip, the "hazy hot and humid" temperatures this week have gotten the best of me and I could not wait to guzzle down an ice-cold smoothie as soon as I walked in the house! There is nothing quite as refreshing as an ice-cold post-workout protein smoothie and my food-shopping-savvy mother has introduced me to some great new smoothie ingredients that led me to create this week's Thirsty Thursday smoothie recipe - Mamma Chia Vanilla Protein Smoothie.
Chia smoothie 1
With only three main ingredients, this smoothie is by far the easiest one to make and easily the most delicious post-workout smoothie yet!
Ingredients:
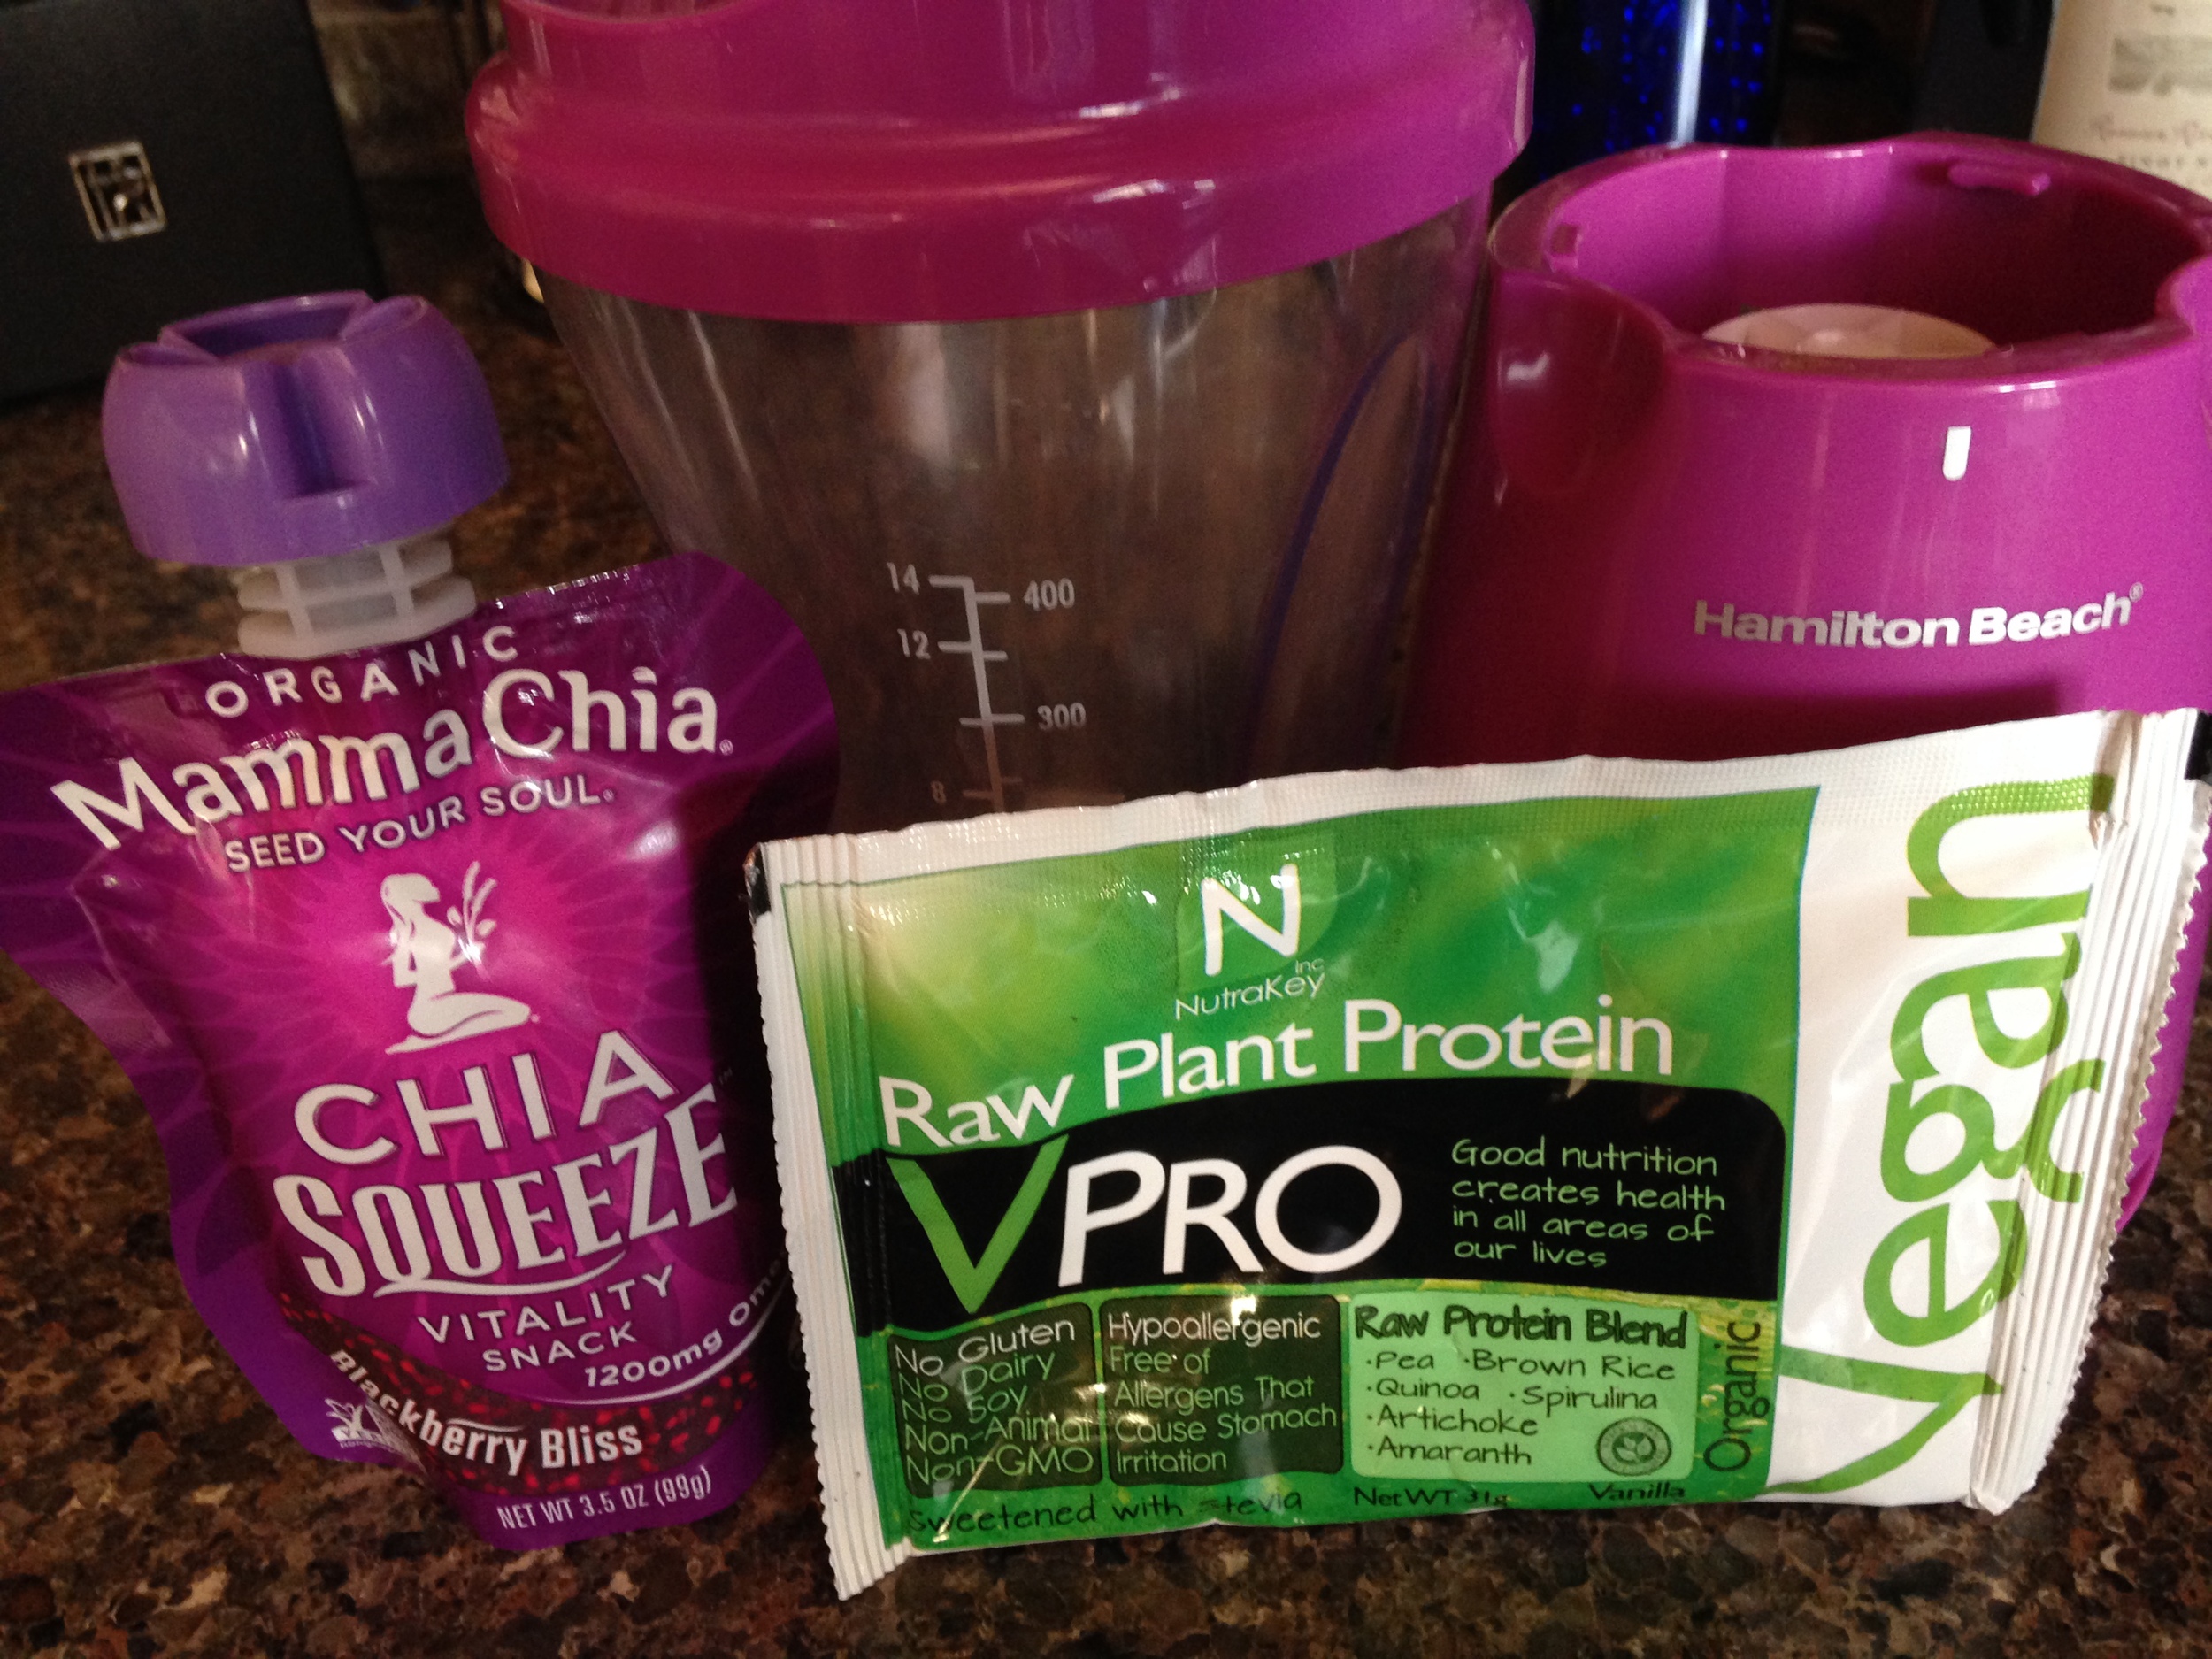
- 8 oz unsweetened vanilla almond milk
- 3.5-oz Mamma Chia Squeeze Vitality Snack packet
- 1 scoop (single-serve packet) of vanilla vegan protein powder
- 5-6 ice cubes
- Natural sweetener of choice (to taste, optional) - I used 1 Stevia packet
- Optional add-ins: 1/4th cup plain Greek yogurt (for more protein, carbohydrates, and creamier texture), 1/4th cup dry oats (for more complex carbohydrates, B vitamin, and thicker consistency), or 1/2 frozen banana (for more carbohydrates, potassium, and more slushy-like consistency).
* I usually travel with a packet or two of protein powder (just in case) and I am a big fan of NutraKey VPro, which is made of organic, non-GMO raw plant proteins and provides all the essential amino acids the body needs.
* My brilliant mother found the Mamma Chia snack packs at BJ's Wholesale Market (similar to Costco or Sam's Club) and these tasty little snack packs provide 1200 mg of Omega-3s and can be purchased in bulk for healthy snacking on-the-go!

Chia smoothie 2
Instructions:
- Pour almond milk into a blender with the ice cubes.
- Squeeze the Chia snack pack into the blender and blend on high for 30-60 seconds.
- Add in the scoop /packet of protein powder (and sweetener if desired) and blend on high again for 30-60 seconds (or until all ingredients are mixed well and the ice cubes are all broken up.
- And chug away (but not so quickly that you get brain freeze)!!
There you have it! A very easy way to combine simple ingredients with essential nutrients to refuel after a workout or hot run in the summer heat! Stay cool and refuel with lean protein and healthy fats :-)
Meal made in minutes: Turkey Wraps
RecipeCommentHappy Sunday! And yes, this Sunday is a very happy one since I am still visiting my family in Massachusetts and soaking up every last bit of vacation! The funny thing is that even though I am on vacation and relaxing, I still have a very busy schedule filled with morning workouts, lunch and dinner dates with friends, and spending quality time with my family. Take yesterday, for example - My parents and I made a last-minute decision to go out on the boat for a few hours (before going to the annual Portuguese Feast and then visiting with family friends) and I had less than 10 minutes to pack a lunch... thankfully I had my go-to quick lunch essentials in their kitchen and I made some delicious Turkey Wraps and packed some raw veggies and guacamole to create a quick, well-balanced meal in minutes.
This week's Meal Made in Minutes: Turkey Wraps

Turkey lettuce wraps 2
*Note: this particular lunch was not taken on the boat, but it was made at my parent's house the last time I was home and it depicts the perfect turkey wrap ensemble (for your viewing pleasure).
Ingredients:
- 4-6 slices No Salt-Added (NSA) all-natural / organic Turkey Breast (3-4 oz)
- 1 small cucumber (washed, peeled, and sliced)
- 1 single-serve Guacamole packet
- 1/2 cup grape or cherry tomatoes
Instructions:
- Lay out the turkey slices and spread about 1 tbsp of the guacamole on top.
- Peel the skin and slice the cucumber lengthwise into 4-6 slices (about 1/4th-in thick). Leave the rest of the cucumber half intact (or slice into thicker pieces) and put in a separate plastic bag or wrap in plastic wrap.
- Wrap each turkey, guacamole, and cucumber combination up in plastic wrap (like a roll) and place them all in larger plastic bag for easy transportation.
- Place the tomatoes in a separate plastic bag.
- Save the rest of the guacamole for dipping. Either cover the container with aluminum foil or put the remaining guacamole in a small Tupperware container for easy transportation.
- Place all items in a small cooler with a couple ice packs and you are all set! (I also packed a couple waters and homemade trail mix of raw nuts and seeds as a snack for later!)
*Note, you can mix and match any items in this meal to meet your preferences - swap the turkey breast for sliced chicken breast (all-natural / organic) or Tempeh / firm tofu (for a vegan / vegetarian option), swap the cucumber for raw zucchini slices or sliced bell pepper, and swap the tomatoes for baby carrots. You can also wrap your turkey wraps in large Bibb lettuce leaves / kale leaves (for a gluten-free, low carbohydrate option) or wrap them in small whole-grain tortillas (for an extra dose of complex carbohydrates and longer-lasting energy). You can also mix the guacamole with some plain Greek yogurt to add more protein and creaminess to your meal (see picture below).
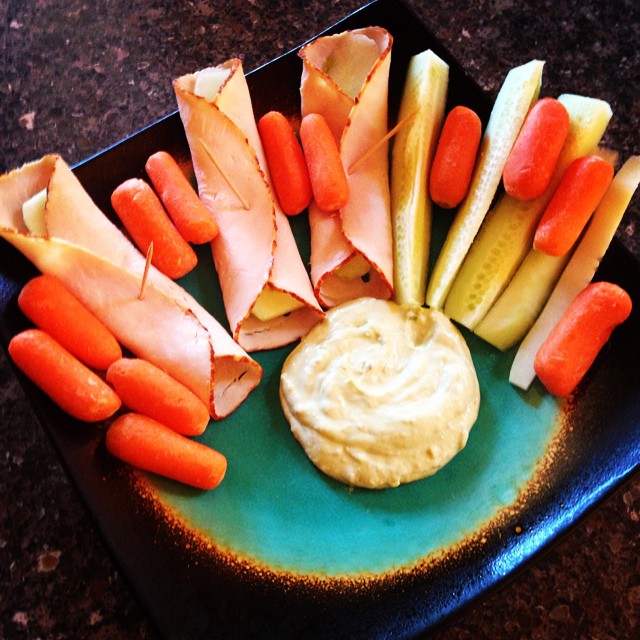
Turkey lettuce wraps 1
(Same meal, different ingredients: baby carrots and plain Greek yogurt)
And there you have it - a quick and delicious meal with lean protein, healthy fats, and colorful vegetables to fuel you for the day ahead! The best part is that you can make this meal in minutes and take it on the road with you wherever your plans may take you :-)
Thirsty Thursday: Super Green Matcha Tea Smoothie Bowl
Recipe2 CommentsIt's Thursday again! I don't know about you, but I am tired of all this rain we have been having in Tampa lately and I needed some brightness in my life today. The bad news is it looks like there's a 60-80% chance of rain for the next five days, but the good news is you can easily make this Super Green Matcha Tea smoothie bowl to brighten your day and load up on protein and antioxidants! I made this smoothie bowl for a power-packed post-workout lunch, but you can have this smoothie bowl whenever you need a pick-me-up meal!
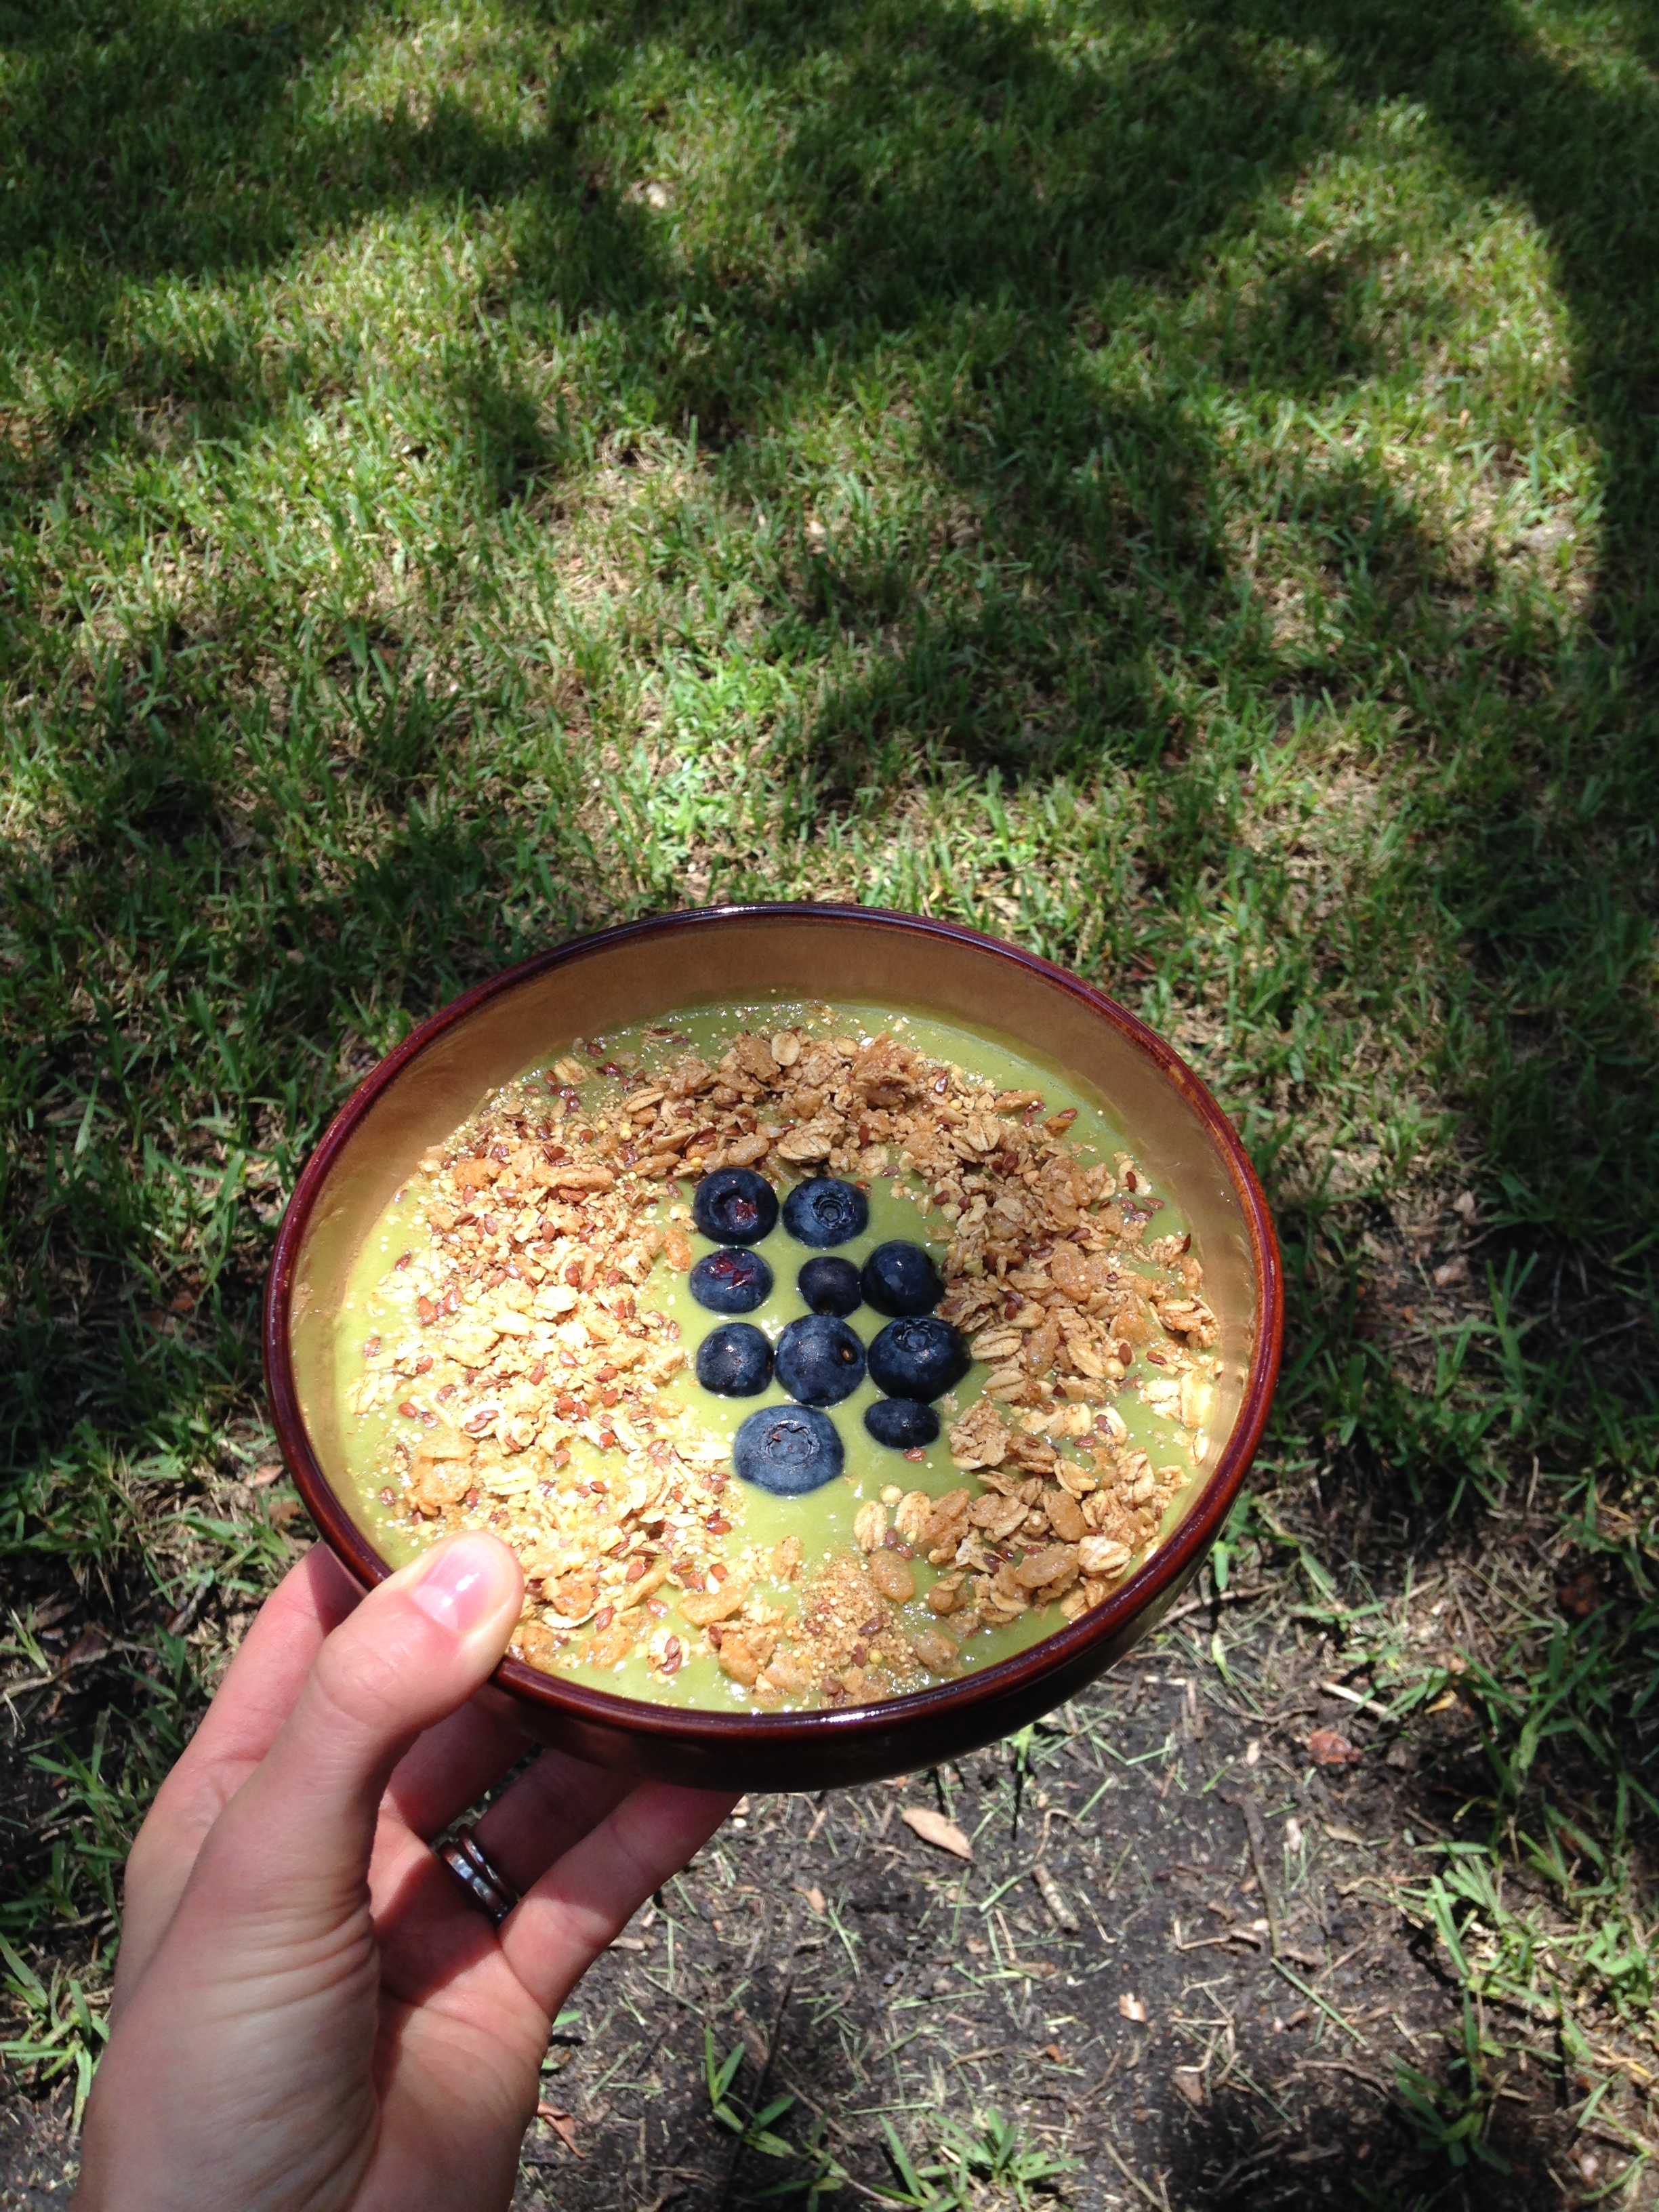
Super Green Matcha Tea Smoothie Bowl
(Took advantage of the break in the rain storm to enjoy my smoothie bowl outside :-) At least my grass is green thanks to the rain!)
Ingredients:
- 6 oz unsweetened iced green tea (I ordered mine from Starbucks on my way home from the gym, but you can brew your own green tea and chill it in the fridge for 30 minutes or so).
- 4 oz frozen banana
- 1 oz avocado (about 1/4th of an avocado, sliced)
- 1-2 cups baby spinach
- 1 scoop vegan protein powder (vanilla flavored is recommended)
- 2 t Organic Matcha Green Tea powder
- 1 packet Stevia (or more to taste)
- 4-5 ice cubes
- 3 tbsp KIND cinnamon oat with flaxseeds granola (for topping)
- about 10 fresh blueberries (for topping)

Green tea smoothis ingredients
Instructions:
- Pour iced green tea into a blender and add the frozen banana, avocado slices, and spinach leaves. Blend ingredients for about 30 seconds to mix well.
- Add in the protein powder, Matcha powder, Stevia, and ice cubes. Blend ingredients for about 60 seconds to mix well. You may need to scrape down the sides of the blender with a spoon or spatula and blend again to ensure all ingredients are mixed well and there are no clumps.
- Pour smoothie mixture into a large, wide-mouthed bowl and top with granola and blueberries.
- Devour smoothie bowl :-)
That's it! Simple as that and you have a super, power-packed Green Tea Smoothie bowl that will fill you up and leave you feeling rejuvenated and ready to take on the day (come rain or come shine)!
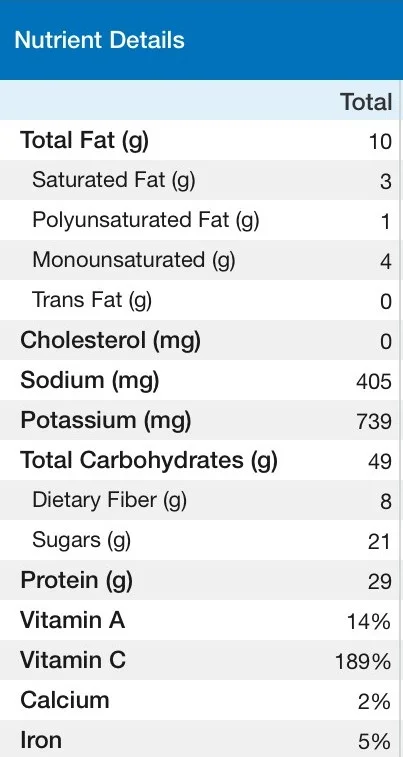
Green tea smoothie nutrition
Not to mention, this smoothie bowl provides you with nearly 190% of your daily calcium requirements and nearly 740mg of potassium; 30g of lean protein, 8g of fiber, and only 10g of fat; and doesn't break the calorie bank with around 350 calories total!
So go ahead, brighten your day with this Super Green Smoothie! I know it worked for me :-)
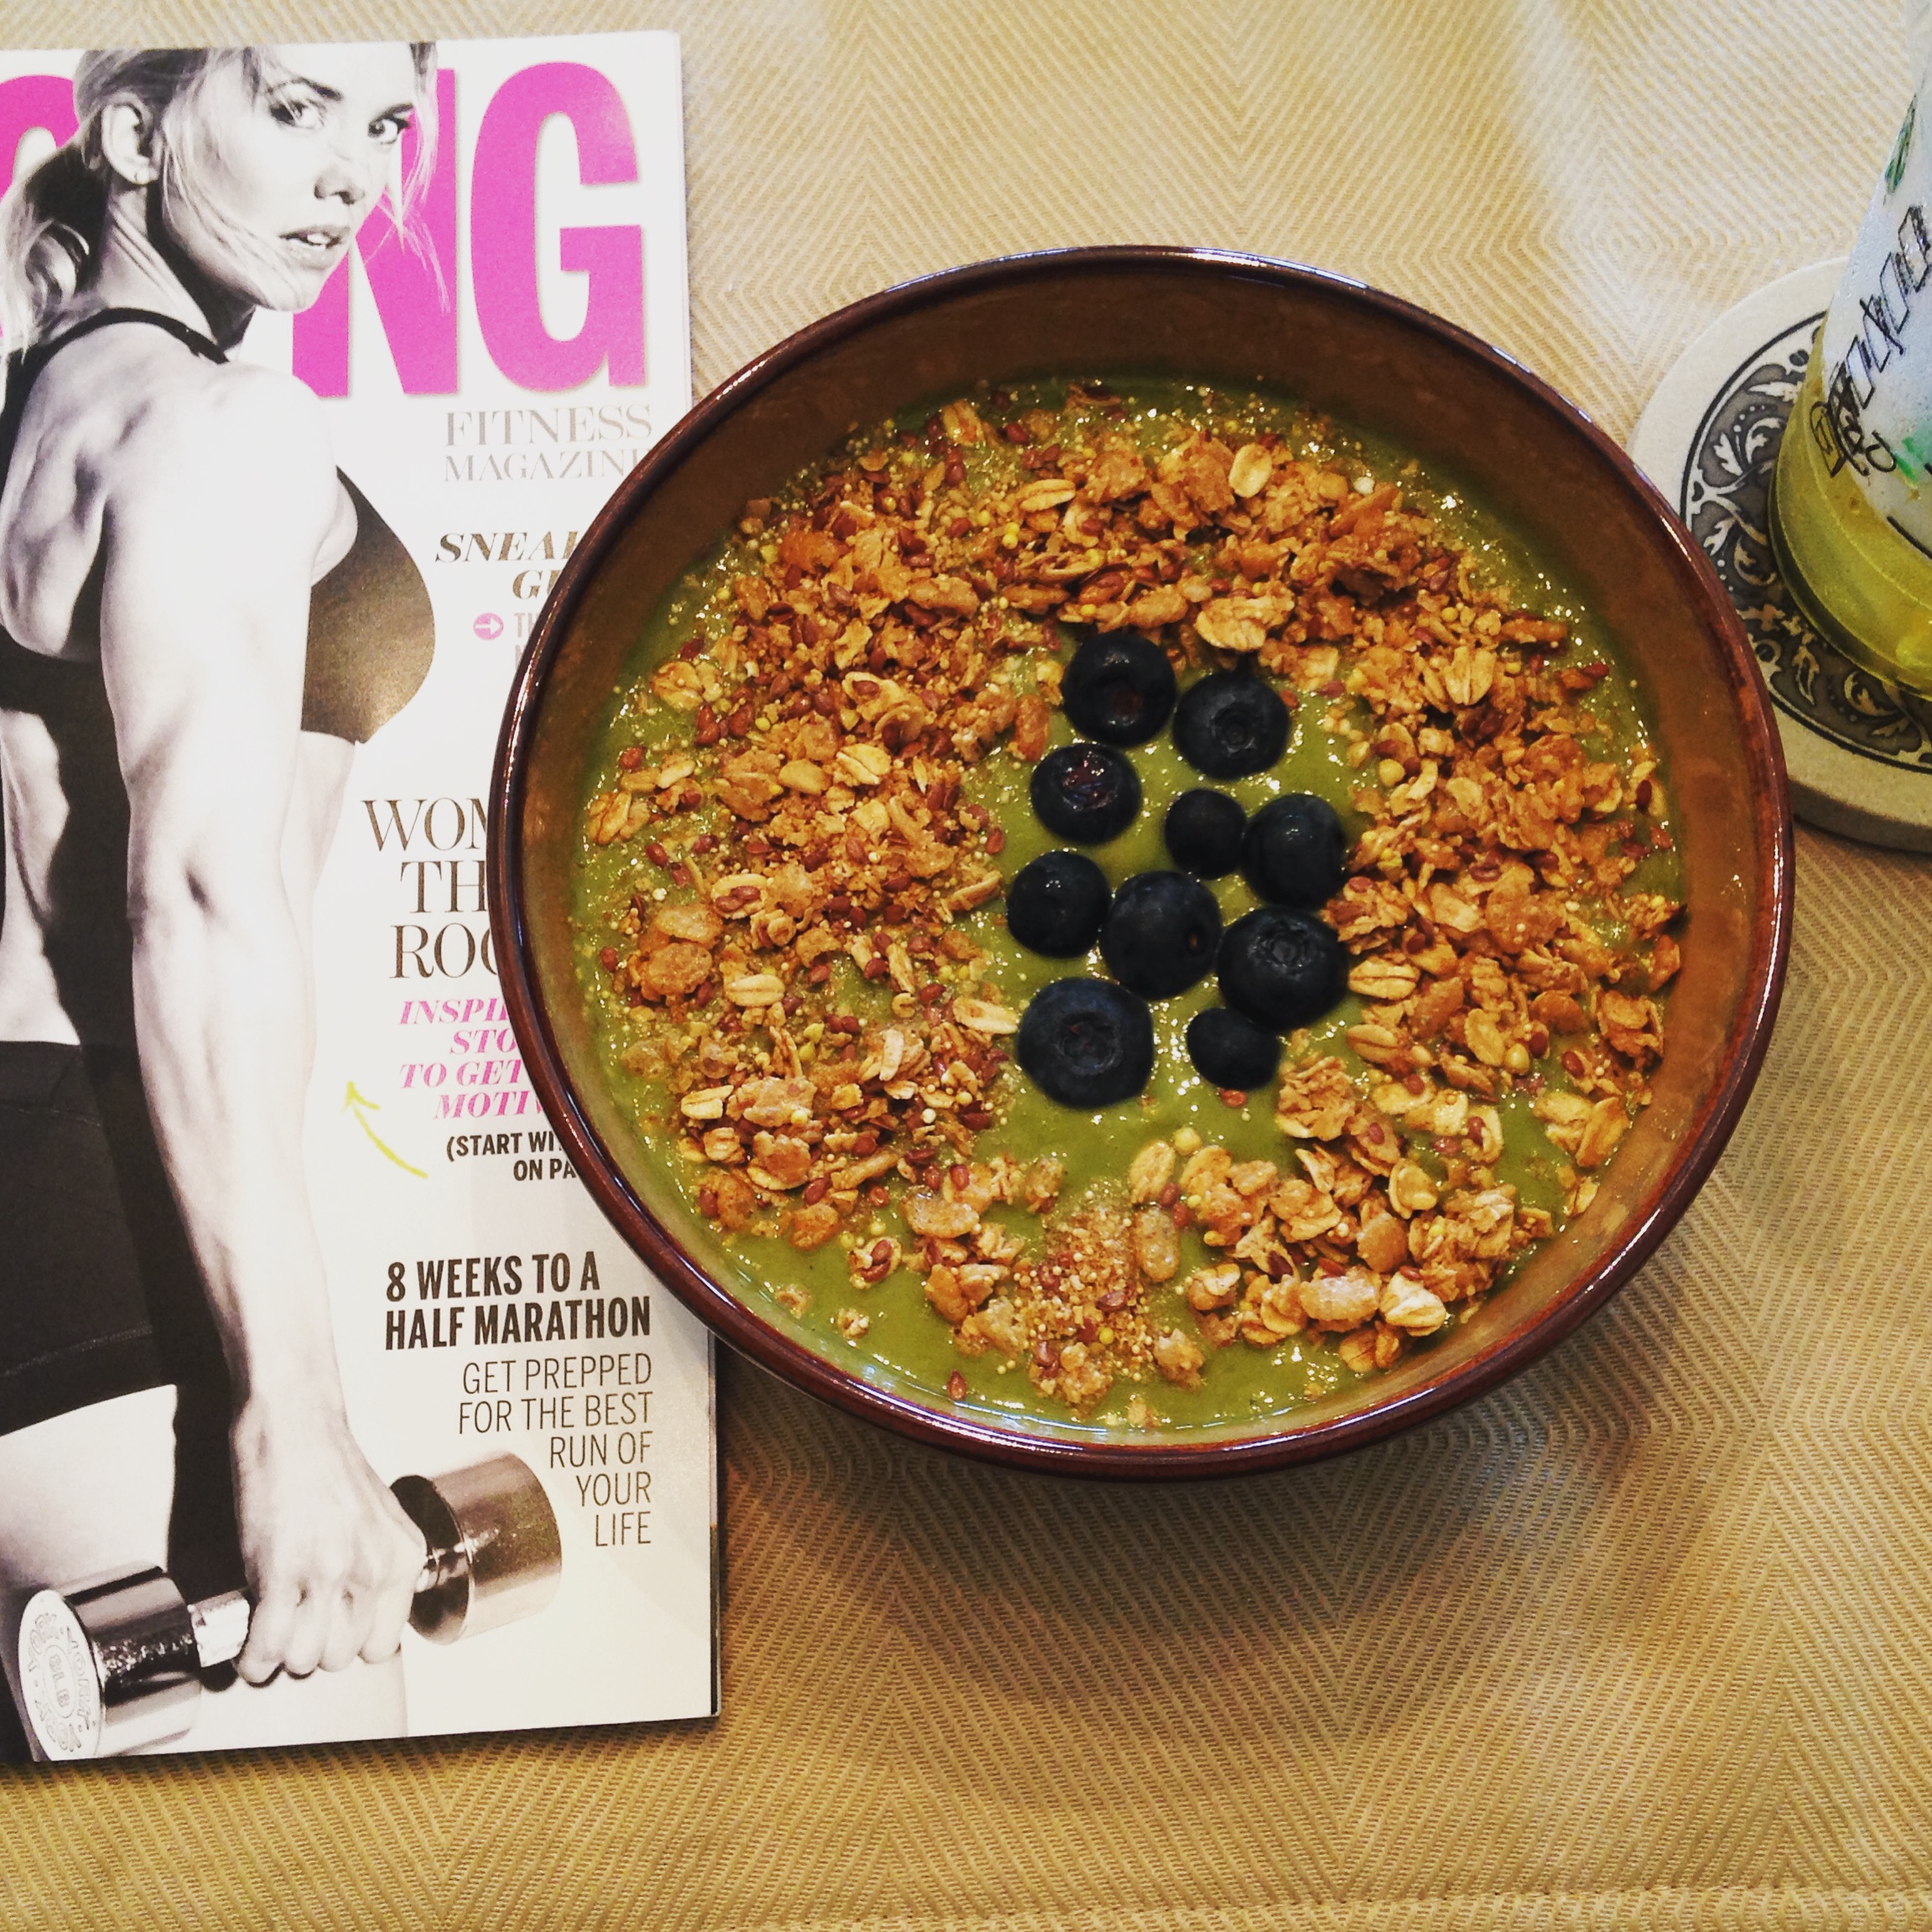
Green tea smoothis inside
(I enjoyed my smoothie bowl with a good read, thanks to Strong magazine!)
Meal Makeover: Zucchini Pizza Boats
Nutrition, RecipeCommentI had a lot of "me time" this past weekend (since my sweet husband was busy working at the office Saturday and Sunday) so I took advantage of my free time and tested out some new recipes! Not only did I have a blast making a mess of my kitchen, but I was able to play around with three new recipes and could not wait to share this week's meal makeover recipe with you all! If you are like me (and human) you may crave pizza nearly 365 days a year, but you may not want the high-carbohydrate and high-calorie content of the traditional pizza! Have no fear, the Zucchini Pizza Boat has come to your rescue!
This week's Meal Makeover: Zucchini Pizza Boat

Zucchini pizza complete

Zucchini pizza nutrition
This low-carb, high protein "pizza" is super easy to make and surprisingly delicious and filling (thanks to the water and fiber content of the almighty zucchini)! One serving (1 zucchini boat) provides you with nearly 36g of lean protein and a mere 13g carbohydrates and 6g total fat at only 245 calories.
The best part is that you can modify the ingredients to make this meal for yourself or for the whole family to enjoy and you can use any type of lean protein that you prefer (extra-lean ground turkey, chopped chicken breast, shrimp, tofu...)! I made this meal for my neighbor and myself with extra-lean ground turkey and used the leftover turkey in my meals for the next two days. (Meal-prepping at its finest!)
Ingredients: 2 servings (2 Zucchini Boats)
- 6 oz cooked extra-lean ground turkey (divided) (I cooked 1.25 lbs of Jennie-O Extra-lean Turkey and saved the rest for leftovers).
- 1 large zucchini (divided) (I found a very large, wide diameter zucchini that weighed about 12 oz)
- 1/2 cup pizza sauce (divided) (look for low-sodium, all-natural varieties or make your own)
- 1/2 cup 2% milk shredded mozzarella cheese (divided)
- 1 tsp cumin
- 1 tsp chili powder
- 1 tsp garlic salt
Intructions:
- Preheat oven to 400 deg. F. Wash the zucchini well and dry with a paper towel before cutting the vegetable in half (length wise). Cut the ends off as well. Carefully scoop out the zucchini flesh and seeds with a mini ice cream scoop or spoon, but be careful not to press too hard and break the core of the zucchini. You want to leave about 1/4th of the zucchini flesh intact to make the "boat" shape for the turkey filling. Discard the zucchini flesh and seeds or save for later use in another recipe.
- In a large sauce pan, cook the turkey completely (no pink pieces left) and then add in the spices (cumin, chili powder, and garlic salt), remove from heat and stir in spices well.
- Line a cookie sheet with aluminum foil and place the zucchini halves on top of the foil (flesh side up). Fill each boat with 2 tbsp pizza sauce, then 2 tbsp shredded cheese, then 3 oz of cooked turkey, followed by remaining 2 tbsp pizza sauce.
- Bake the zucchini boats at 400 deg. F for 20 minutes. Carefully remove the cookie sheet from the oven and top each boat with the remaining 2 tbsp shredded cheese.
- Reduce the oven temperature to 350 deg. F and return the cookie sheet back to the oven and bake for an addition 5-10 minutes (or until cheese is completely melted). Keep a close eye on the cheese so that it does not burn (like mine did in the picture above)! ...ooops....
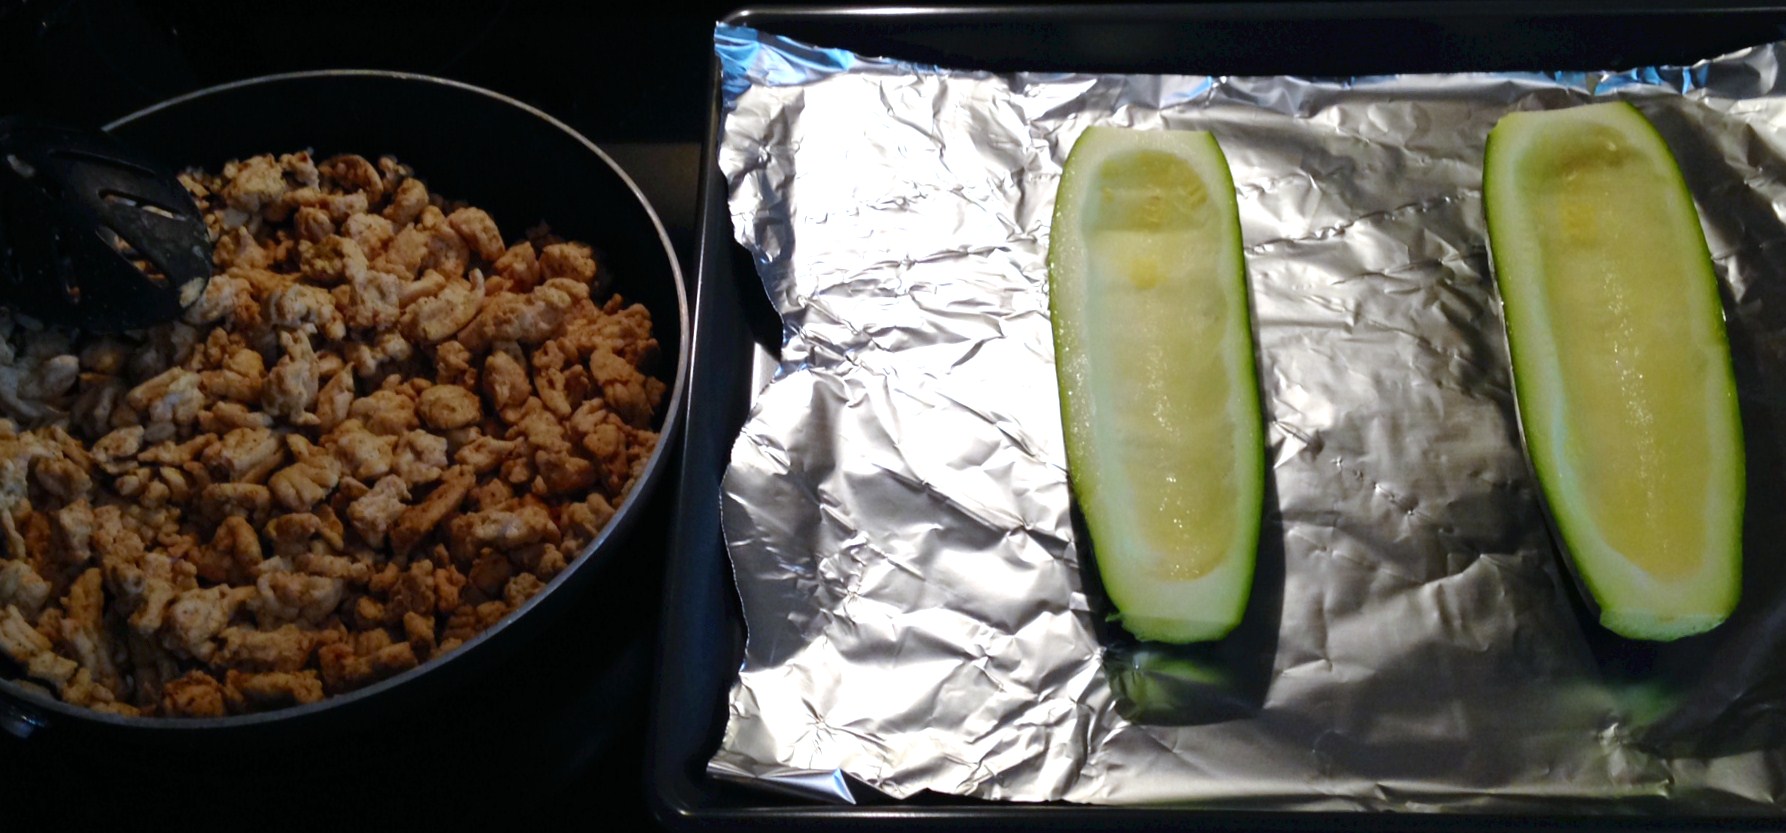
Zucchini pizza prep
(Cooked turkey with spices and hollowed-out zucchini boats)

Zucchini pizza filling
(Filled boats with pizza sauce and shredded cheese)
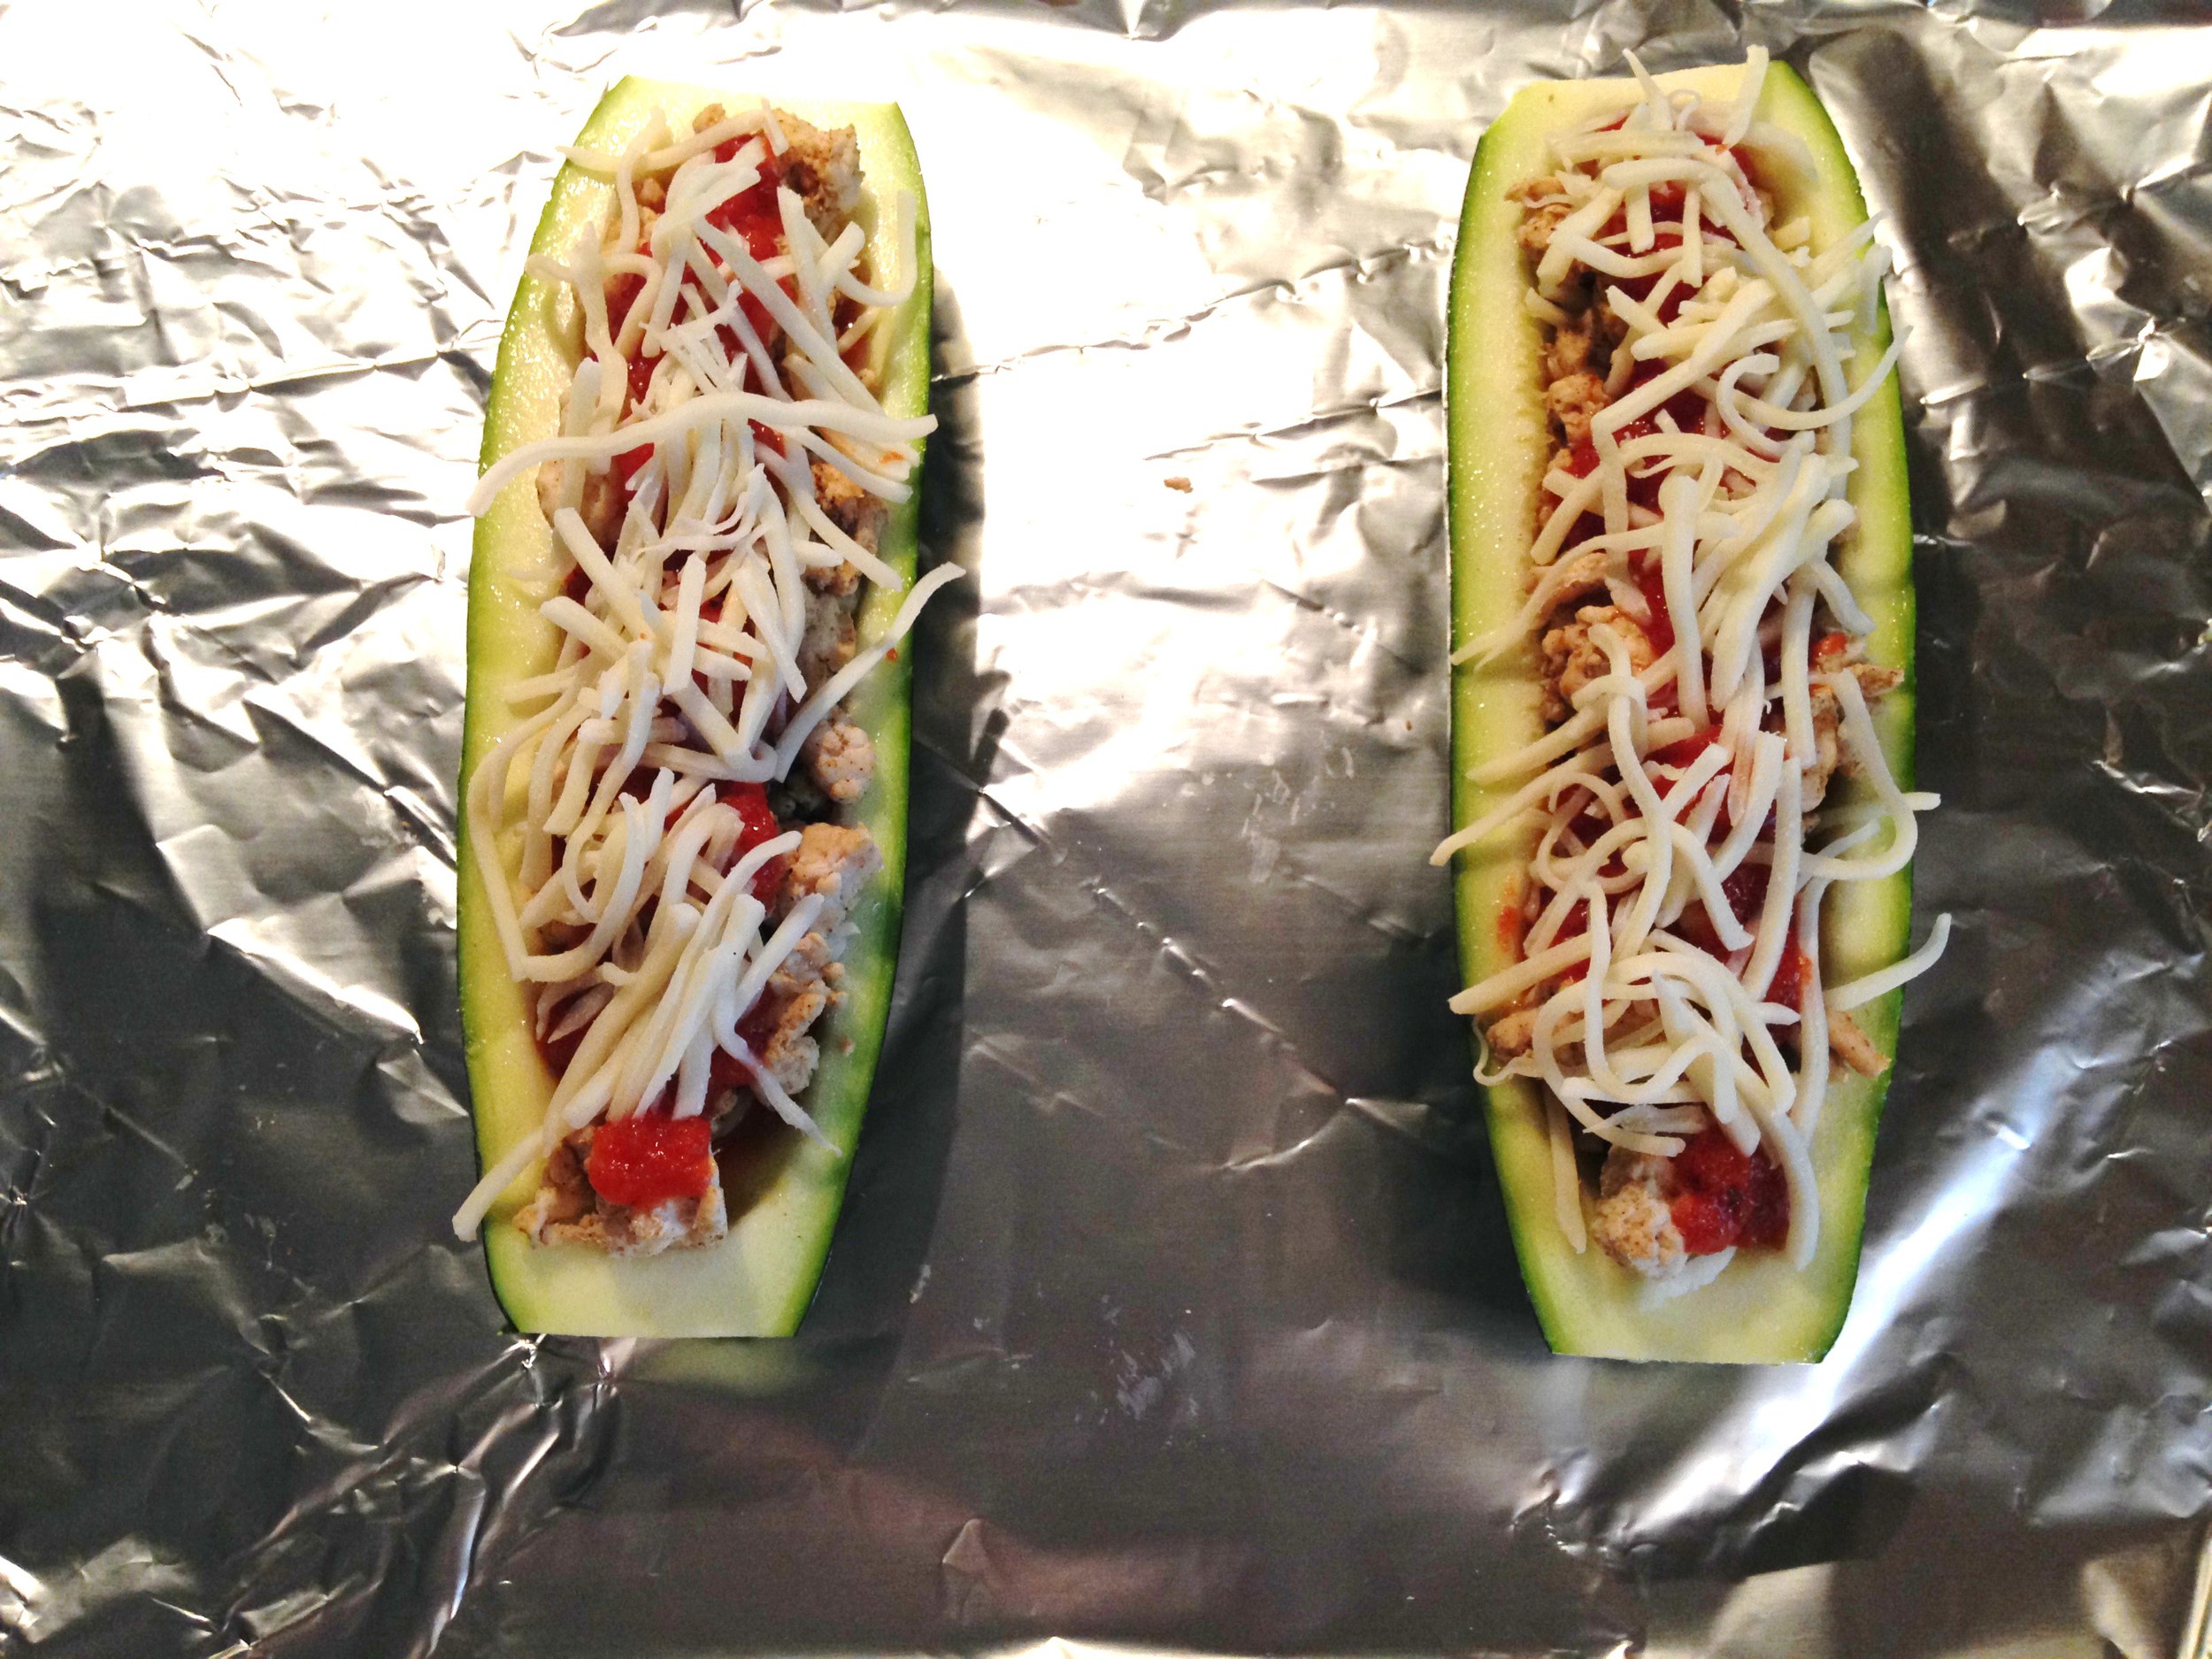
Zucchini pizza full
(Filled boats with ground turkey and shredded cheese)
And that's it! We paired our zucchini boats with a mixed greens salad for a well-balanced and nutritious meal. I enjoyed every last bite of my zucchini pizza boat and the great company of my sweet neighbor, Margie :-)
I hope you will try out this meal makeover recipe and share it with your family or friends. Let me know what you think!
Fuel for the Long Run
Fitness, Nutrition2 Comments

Pre-race Race Shirt
Part of my transformation into a “long-distance runner” was learning how to properly fuel my body before a long training run or on race day and how to refuel afterwards. The food you eat prior to a long run will significantly affect your performance and the food you eat after a long run will significantly affect your recovery and muscle mass overtime. After several trial and error attempts with pre-run and post-run meals, I was able to get my fuel and refueling down to a science and identify the most important aspects of fueling for the long run. Whether you are just starting out with long-distance running or are an avid runner, following these guidelines and tips will help you train and complete your first distance race or give you the competitive edge to get that PR you are working so hard to achieve.
(The night before my 2nd Women's Half, carb-loaded & ready to run!)
Pre-long-run: The main focus should be on consuming sufficient carbohydrates before a long run, since carbohydrates are the main source of energy during physical activity. According to the National Academy of Sports Medicine (NASM)
Strenuous exercise of all intensities makes great demands on the body’s carbohydrate stores and glycogen depletion will lead to fatigue. Because glycogen stores are limited, and because they provide a critical contribution to both anaerobic and aerobic energy production, one important objective of sports nutrition is to protect glycogen and enhance access to fat for long duration, moderate intensity activity"
and they recommend a relatively high daily carbohydrate (CHO) intake (> 6 g/kg/d) and CHO ingestion (30-60 g/h) prior to, and during, exercise in order to delay the onset of fatigue and increase long-distance performance.
For this reason, it is very important to consume a small meal or snack with a high concentration of carbohydrates prior to a long training run or race. These smaller meals or “snacks” should be consumed 30-120 minutes before a long run or race (depending on the size and contents of the meal and how hungry you feel as well as the duration of activity). These meals should be low in fat and fiber (for quicker, easier digestion), moderate in protein (10-20g), and moderate-to-high carbohydrates (30-60g easily digestible carbohydrates) for sufficient energy and optimal performance.
Examples:
- Power Oats (closer to 90 - 120 minutes beforehand due to higher fiber content)- ½ cup cooked plain oatmeal topped with half a banana and 1 tsp agave or honey
- Eggs and toast – 2 slices whole grain bread with 1-2 eggs (hard boiled, scrambled, over easy…)
- Banana toast – 1 whole grain bagel, English muffin, or 1/2 a Lavash wrap topped with 1 tbsp natural nut butter and ½ banana (sliced)
- “Last resort” options= A “clean” energy bar (like RXBar, Lara Bars, or GoMacro Bars) or homemade energy bars (click here for awesome energy bars you can make yourself!)

pre run meal
(My favorite pre-run meal: 1/2 a Lavash wrap with PB2 and banana slices)
Post-long-run: These meals should be consumed within 1 hour of exercise and the size and contents of the meal depend on the intensity and duration of the run. These meals are necessary to replenish the glycogen (energy) stores that were used up during the run and should consist of a 3:1 carbohydrate –to-protein ratio (3g of carbs for every 1g of protein) and low-to-moderate in fat. The carbohydrates are also important for more efficient delivery of protein to the damaged muscle tissue. As previously mentioned, low fat and fiber is important for quicker digestion and delivery of nutrients to the muscle tissue. The “window of opportunity” to replenish glycogen stores and rebuild skeletal muscle tissue is approximately 30-60 minutes following exercise, therefore it is important to consume this post-run meal within 1 hour of exercise.
Examples:
- Peanut butter and banana sandwich – 2 slices whole grain bread, 2 tbsp natural peanut butter, and ½ banana (slices)
- Veggie omelet and whole grain English muffin (breakfast)– 1 toasted whole grain English muffin (with 1 tbsp real fruit jam, optional) with a 1 egg + 2 egg white omelet with sautéed vegetables (spinach, tomatoes, mushrooms…)
- Chicken and rice bowl (lunch) – 4 oz white chicken breast and sautéed vegetables over ½ cup – 1 cup brown rice (or Quinoa!)
- Tuna salad wrap (lunch) – 4 oz chunk light tuna (in water) mixed with 1 tsp mustard and 2 tbsp plain Greek yogurt, wrapped in a small whole grain tortilla / pita with tomato slices and spinach
- Homemade “real food” protein shakes
Protein Shake ideas: Liquids are digested more quickly than solid foods, so post-workout shakes are an extremely effective way to deliver carbohydrates and protein to muscle tissue within the “window of opportunity” – especially when whole foods cannot be consumed within an hour of exercise.
- Chocolate milk shake – Blend 8 oz reduced-fat chocolate milk with 1 small banana and ice!
- Green Monster shake - Blend 2 cups spinach, ½ cup plain Greek yogurt, 8 oz unsweetened non-dairy milk, 1 banana, and 1 tablespoon peanut butter with ice
- Power Oats Shake – Blend 8 oz fat-free milk, 1 scoop protein powder, 1 cup frozen berries, 1 tbsp flaxseeds or chia seeds, and ¼ cup dry plain oats with ice
- Search through my Thirsty Thursday Smoothie recipes for more ideas on how to make the perfect post-workout smoothie!

post run meal
(My favorite post-run meal: Egg white omelet (with tomatoes, spinach, & avocado slices) with a side of dry Gluten-Free toast and fruit)
See!? Fueling and refueling are extremely important for long-distance running performance and can be a fun and delicious way to treat your body right :-)
Meal made in minutes: Easy egg white sandwich
Nutrition, RecipeCommentEggs are a very versatile lean protein and can really be eaten anytime of the day - breakfast, lunch, or dinner! This power-house of a super-food is nutrient dense, yet low in calories and contains several essential vitamins (B vitamins and vitamin A and vitamin D) and minerals (choline, selenium, and phosphorus) as well as the highest quality protein and amino acid profile that meets the needs of the human body. The whites alone contain only 16 calories (per large egg) and 4g of protein, without the saturated fat or cholesterol that is found in the yellow yolk. The best part is that egg whites can be prepared in minutes and easily incorporated into a perfect sandwich for a quick breakfast before work. Heck, you can even make this meal portable and eat it on your way into work (while driving as safely as possible, of course!)...

Quick Egg white sandwich
This week's Meal Made in Minutes: Easy Egg White Sandwich
Ingredients:
- 1/2 cup liquid egg whites (I used All Whites) or the egg whites of 3 large eggs
- 2 slices whole grain bread (I used Canyon Ranch 7-Grain gluten-free bread)
- 1 slice reduced-fat provolone cheese (I used Sargento)
- 1 cup baby spinach leaves
- 2 tbsp hummus (any flavor) (I used Tribe Sun-dried Tomato)
- Cherry tomatoes (optional)
- Black pepper or red chili flakes (to taste)
Tools needed:
- Toaster oven
- Microwaveable omelet maker (I bought mine at Amazon.com)

Egg white omelet
(All Whites egg whites with red chili flakes)
Directions:
- Toast bread in toaster oven
- While bread is toasting, prepare omelet - pour egg whites into omelet maker and season with black pepper or red chili flakes (to taste).
- Cook eggs in the microwave on high heat for 1 minute. Make sure whites are complete set and cooked through - if whites are still runny, place omelet maker back in the microwave for 15 seconds.
- Assemble egg white sandwich - spread 1 tbsp hummus on one slice of bread, then lay 1/2 cup spinach on top, then the egg whites, provolone cheese, remaining 1/2 cup spinach and the second slice of bread with remaining 1 tbsp hummus spread on top.
Viola! That's it, within 6-8 minutes you will have the perfect egg white breakfast sandwich! To take your breakfast to-go, wrap the sandwich in aluminum foil and hit the road!
This breakfast sandwich will beat any fast-food option and will fill you up with complex carbs, healthy fats, and lean protein to get you through the busy morning :-)
Feel free to play around with the ingredients. Some substitutions you can try:
- 1 egg + 2 whites instead of all whites
- 1/4th avocado (mashed or sliced) instead of hummus
- kale instead of spinach
- a whole-grain tortilla wrap instead of bread
Enjoy!
Thirsty Thursday: Easy Green & Lean Smoothie
Nutrition, Recipe3 CommentsThere is nothing more refreshing than an ice-cold smoothie after a hard workout and there's no faster method of re-fueling post-workout than by drinking a protein-packed, antioxidant-rich "Green & Lean" smoothie! I am often asked how I make my post-workout smoothies and many clients have asked me "what are the best ingredients to put into your smoothies to replenish the body's carbohydrate stores and provide sufficient protein for muscle tissue repair and growth?" These are great questions and today I am going to answer these questions and provide you all with my recipes for an Easy Green & Lean Smoothie!

Green Matcha Smoothie
Now doesn't that Green Smoothie look beautiful! This delicious smoothie was made at Village Health Market in South Tampa and, while it was packed with antioxidants, lean protein, and did not contain any added sugars, it cost me more than $6!! Now I don't know about you, but I can't justify paying a lot of money for something that I could easily make at home for less than half the price... so I decided to use this smoothie as inspiration for my homemade versions.
The main ingredients in this particular Green Smoothie are:
- Unsweetened Almond Milk
- Banana
- Spinach
- Vegan vanilla bean protein powder
- Matcha Green Tea powder
- 1 Stevia packet
- Ice cubes
See how simple it would be to buy these ingredients and make several smoothies at home! The important ingredients to include are a liquid of choice (water, unsweetened non-dairy milk or low-fat milk, and even leftover coffee or cold brew coffee), fruit (banana, berries, pineapple, peaches, mango...), super green leafy vegetables (spinach or kale), lean protein source (whey protein powder, vegan protein powder, Greek yogurt, or egg white protein), extra antioxidant boost (Match powder, Maca powder, raw cocoa powder...), a natural sweetener of choice (Stevia / Truvia, maple syrup, agave, or honey), and ice cubes to blend to desired consistency. You can add in or remove any ingredients that you'd like and you can mix match until you find your favorite blends! It really can be fun to experiment with your homemade smoothies!
Here are a few of my favorite concoctions to give you some ideas :-)
Smoothie ingredients - coffee
PB and Banana Mocha Smoothie:
- 1 cup chilled black coffee with 1/4th cup unsweetened vanilla almond milk
- 1 small banana
- 2 cups baby spinach
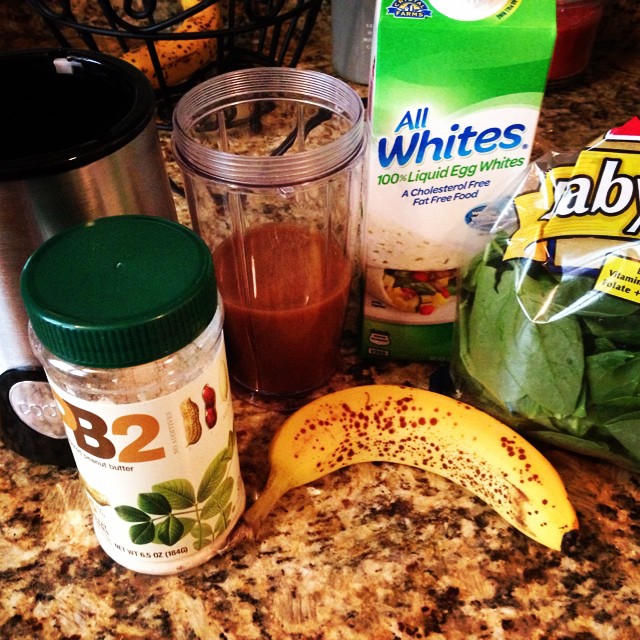
- 1/2 cup liquid egg whites (10g protein)
- 2 tbsp PB2
- 1 tsp Matcha Green Tea powder
- 1 packet Stevia
- 5 ice cubes
Smoothie ingredients - designer whey
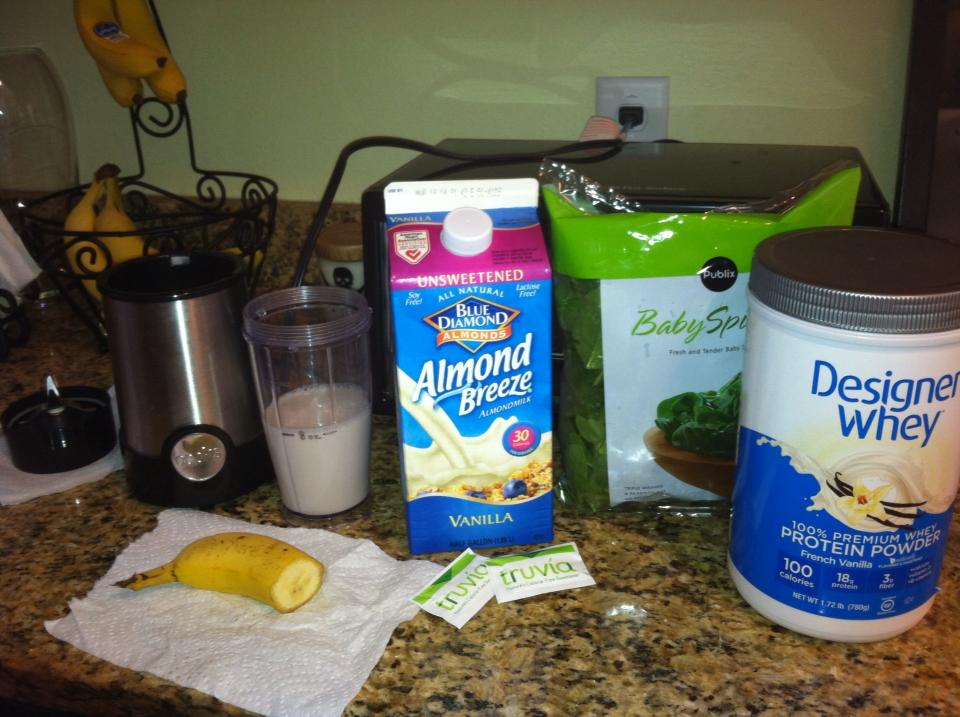
Spinach and Banana Smoothie:
- 1 cup unsweetened vanilla almond milk
- 1/2 banana
- 2 cups baby spinach
- 1 scoop 100% whey protein powder (vanilla) (22g protein)
- 1 tsp Matcha Green Tea powder
- 2 packets Truvia
- 5 ice cubes

Smoothie ingredients - Greek yogurt
Greek PB and Banana Smoothie:
- 1 cup unsweetened vanilla almond milk
- 1/2 banana
- 2 cups baby spinach
- 1 single-serve Oikos plain Greek yogurt (15g protein)
- 2 tbsp PB2
- 1 packet Stevia
- 5 ice cubes
Mix all ingredients together in a blender and voila - you have the perfect post-workout smoothie that will replenish and rejuvenate :-) Have fun mixing and matching the ingredients and coming up with your own favorite smoothies!
Stay tuned for more great Smoothie recipes every Thursday!
Meal Makeover: Shrimp and Avocado Pesto "Pasta"
Recipe3 CommentsThere is nothing more comforting to me than a big ol' plate of pasta, but there are few meals more calorically dense or higher in carbohydrates! One of my favorite meals is shrimp and spaghetti with pesto sauce and Parmesan cheese, but this meal can contain upwards of 1,000 - 1,300 calories and leaves me feeling bloated, sluggish, and curled up on the couch in the fetal position (thanks GLUTEN)! This terrible combination lead me to search for a recipe for a healthier version of my beloved Pesto Pasta that would provide me with the right combination of nutrients to leave me feeling energized and still give me that "comfort food" feel I so desperately miss. After a few trial and errors with different recipes, I decided to make my own version of a Pesto Pasta that is higher in protein, healthy fats, and antioxidants and lower in calories, saturated fat, and empty carbohydrates. I was quite surprised with the end result and could not believe how delicious my concoction was... not to mention it is naturally gluten-free, contains 2-3 servings of vegetables, and is surprisingly filling!
Let me introduce to you....
Shrimp and Avocado Pesto "Pasta"

Shrimp Pesto Zoodle Pasta
The big secret is I used zucchini and yellow squash for the "pasta" (also known as "zoodles") and avocado and spinach in the pesto sauce! I promise you won't miss the spaghetti and your taste buds will be blown away by the avocado pesto sauce!
So what are you waiting for!? Give this made-over recipe a try!
Ingredients: (Makes 4 servings)
* Avocado Pesto Sauce (About 30 calories per 2 tbsp - serving)
- 1/2 small Haas Avocado
- 3 tbsp fresh squeezed lemon juice (1/2 a lemon)
- 2 cups baby spinach leaves (stems removed)
- 10 Basil leaves (stems removed)
* Shrimp & Zoodles
- Olive oil spray
- Old bay spice (to taste)
- 12 oz pre-cooked, frozen shrimp (thawed)
- 2-3 medium zucchinis
- 2-3 medium yellow squash
- 1 cup grape tomatoes
- 1/2 cup reduced-fat Parmesan cheese (for topping)
- Red Chili flakes (to taste)
* Tools needed:
- Food Processor, like my Cusinart 8-cup
- Vegetable Spiralizer, like my Veggetti
- Large skillet / sauce pan
Instructions:
- Combine all the ingredients for the Avocado Spinach Pesto in a food processor and blend until well combined. You may need to scrape down the sides of the bowl periodically and add a tbsp or two of water to reach desired consistency. Once the pesto reaches your desired consistency and taste, set aside in the refrigerator while you prepare the shrimp and zoodles.
- Use a vegetable spiralizer or mandolin slicer to turn your zucchini and yellow squash into vegetable noodles. Once all vegetables are spiralized, set aside.
- Spray a large skillet / sauce pan with olive oil spray and saute the shrimp with the Old Bay (to taste) until the shrimp are heated through (about 2 minutes). Add the spiralized zucchini and yellow squash and heat for another 1-2 minutes until the vegetables are heated through and soften up a bit.
- Remove the skillet from the heat and add the avocado pesto sauce. Mix well!
- Divide the shrimp and zoodles among 4 plates and top each plate with 1/4 cup grape tomatoes, 2 tbsp Parmesan cheese, and chili flakes (to taste).
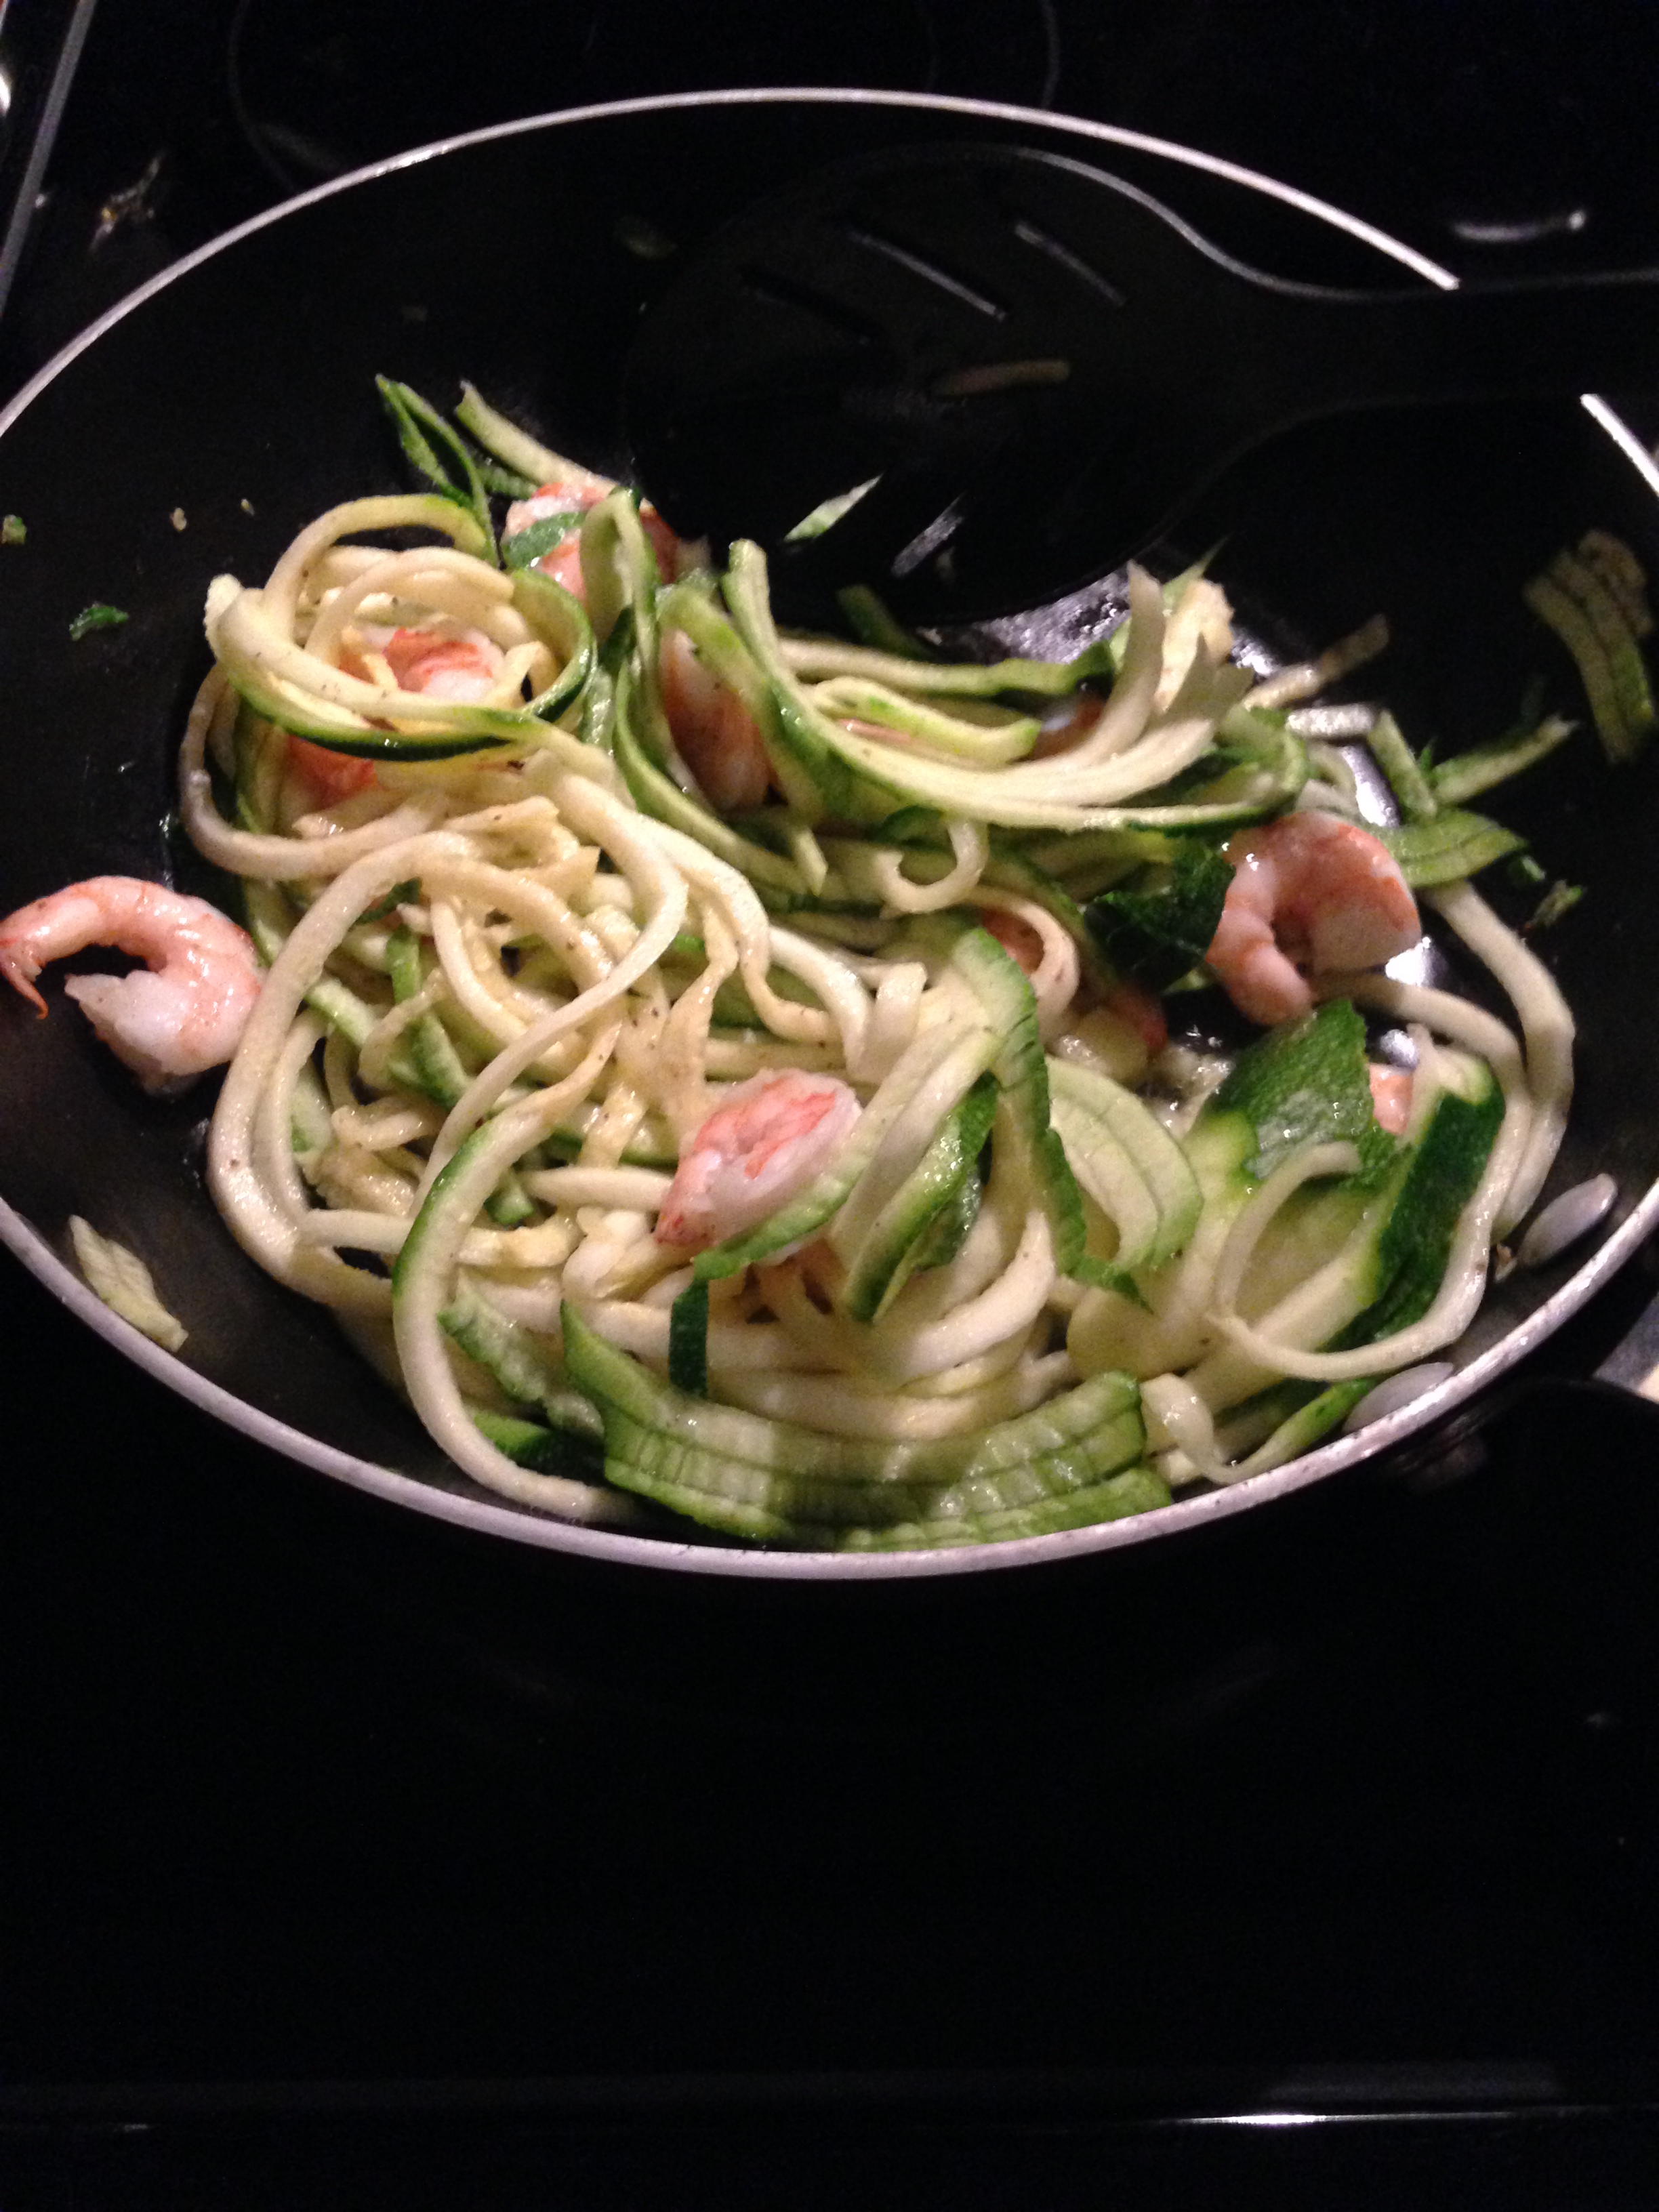
Shrimp & Zoodles
(Sauteing the Shrimp and Zoodles with Old Bay :-) )
And that's all there is to it! A quick and VERY healthy meal the whole family will love, without the carb-overload and bloating! You can switch up the ingredients to your liking and be creative with your very own concoctions! Some of my favorite versions of this Pesto Pasta include grilled chicken and ground turkey with canned diced tomatoes!

Grilled chicken zoodles
(Grilled chicken breast with "Pesto Pasta")
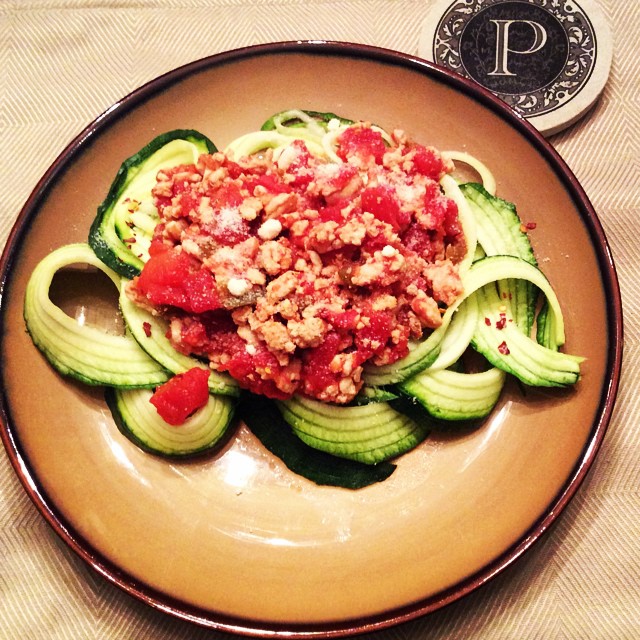
Turkey zoodles
(Ground turkey with "Pasta" Marinara)
Go ahead, have fun with your Pesto Pasta! You can thank me later :-)
Bon appetit!
Meal made in minutes: Chicken & Brown Rice Bowl
Nutrition, Recipe1 CommentI love Sundays! For many, it is a day to rest and recover from the busy week; to spend time with family and friends; and a day to enjoy some "me time." But for some, it is a day that is full of honey-do lists and endless errands; full of catching up on the list of things you left un-done from the previous week; and a day spent trying to get ahead of the game at home or at the office. For me, Sundays consist of a little bit of both - spending time with my husband and in-laws mixed in with endless chores around the house, running errands, and prepping for the week ahead. The day passes by so quickly and before I know it, it's nearing 9:00 pm and I still need to prepare my meals for the next few days. When I am short on time (which happens more often than not) my go-to meal is some variation of a Brown Rice Bowl - a super easy way to combine your favorite foods in one bowl to take to work with you for lunch or to have ready when you come home for dinner. On the menu for this Monday is one of my favorite bowls - the Chicken and Brown Rice Bowl - full of lean protein, healthy fats, complex carbohydrates, and colorful vegetables!

chicken bowl
This meal (inspired by one of our favorite South Tampa restaurants, Ciccio's) is not only super easy to make, but it is loaded with nutrients and long-lasting energy! All you have to do is a little prep work the night before and you will have a meal made in minutes that will be sure to satisfy :-)
Ingredients:
- 1/2 cup brown rice
- 1-2 cups mixed greens
- 4 oz cooked chicken breast meat (from a rotisserie chicken or grilled chicken breast)
- 1/4 cup guacamole (1 single-serve guacamole packet)
- 1-2 tbsp balsamic & olive oil dressing
Directions:
- Boil or steam brown rice (as instructed) I used Minute Rice and boiled 1 cup of rice for 5 minutes. I saved the rest for leftovers.
- While rice is cooking, remove (4 oz) chicken breast and chop into smaller pieces. I used a rotisserie chicken, but grilled or baked chicken breast is fine too).
- Once rice is cooked and cooled, place 1/2 cup into a Tupperware bowl and top with mixed greens, and chopped chicken breast.
- Add guacamole and dressing right before serving and enjoy!
I typically eat this quick meal for lunch and take the Tupperware with me on-the-go. I recommend waiting to add the guacamole and dressing until you are ready to eat to prevent the greens from getting soggy and the guacamole from turning brown.
This is such a quick and versatile meal! You can really use any lean protein and any other vegetable your heart desires for this bowl, you just need to do a little planning and prepping the night before!
Here are some variations of the Rice Bowl for substitution ideas and inspiration:

Chicken buritto bowl

Chicken green bean bowl
(Chicken Burrito Bowl: with brown rice, spinach, grilled chicken breast, grape tomatoes, salsa, avocado, and 1 hard-boiled egg)
(Lighter Chicken Bowl: with mixed greens, steamed green beans, grilled chicken breast, grape tomatoes, and balsamic dressing)
Here are some tips for the planning and prepping:
- Buy a rotisserie chicken from the grocery store when you do your weekly food shopping or bake a couple chicken breasts on Sunday evening for the beginning of the week.
- Use Minute brown rice, steam-able rice bags for the microwave, or boil a batch of rice on Sundays to use as leftovers for the next few days.
- Look for single-serve guacamole packets (such as Wholly Guacamole) and pour your salad dressing in small Tupperware container for on-the-go convenience.
Bon appetit!
Thirsty Thursday: Mocha-cado Smoothie Bowl
Recipe3 CommentsIntroducing my "Thirsty Thursday" recipe where I will share my smoothie of the week with you! I usually whip up a quick protein shake when I am in a rush after a morning workout, but today I took my time and planned out my FIRST EVER smoothie bowl concoction - The Mocha-cado Smoothie Bowl (I know, super clever of me, huh?) Smoothie bowls are all the new rage, but what is so special about being able to actually eat your smoothie with a spoon? I decided to find out and, boy, was I impressed!
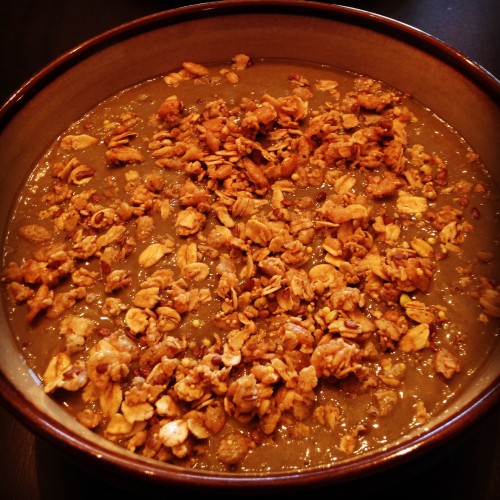
Smothie bowl edited
(Mocha-cado Smoothie Bowl)
Ingredients:
- 6 oz coffee (cooled to room temperature or chilled in the fridge)
- 1/3 cup unsweetened almond milk (I used Silk unsweetened vanilla)
- 1/2 frozen banana (2 oz)
- 1 handful baby spinach
- 1/5th avocado (about 1.8 oz)
- 1/2 single-serve plain Greek yogurt (I used Oikos)
- 1 packet (full scoop) NutraKey Vegan Protein Powder: Mochaccino)
- 4-5 ice cubes (to blend to preferred texture)
- 3 tbsp KIND Cinnamon Oat with Flaxseeds granola (for topping)
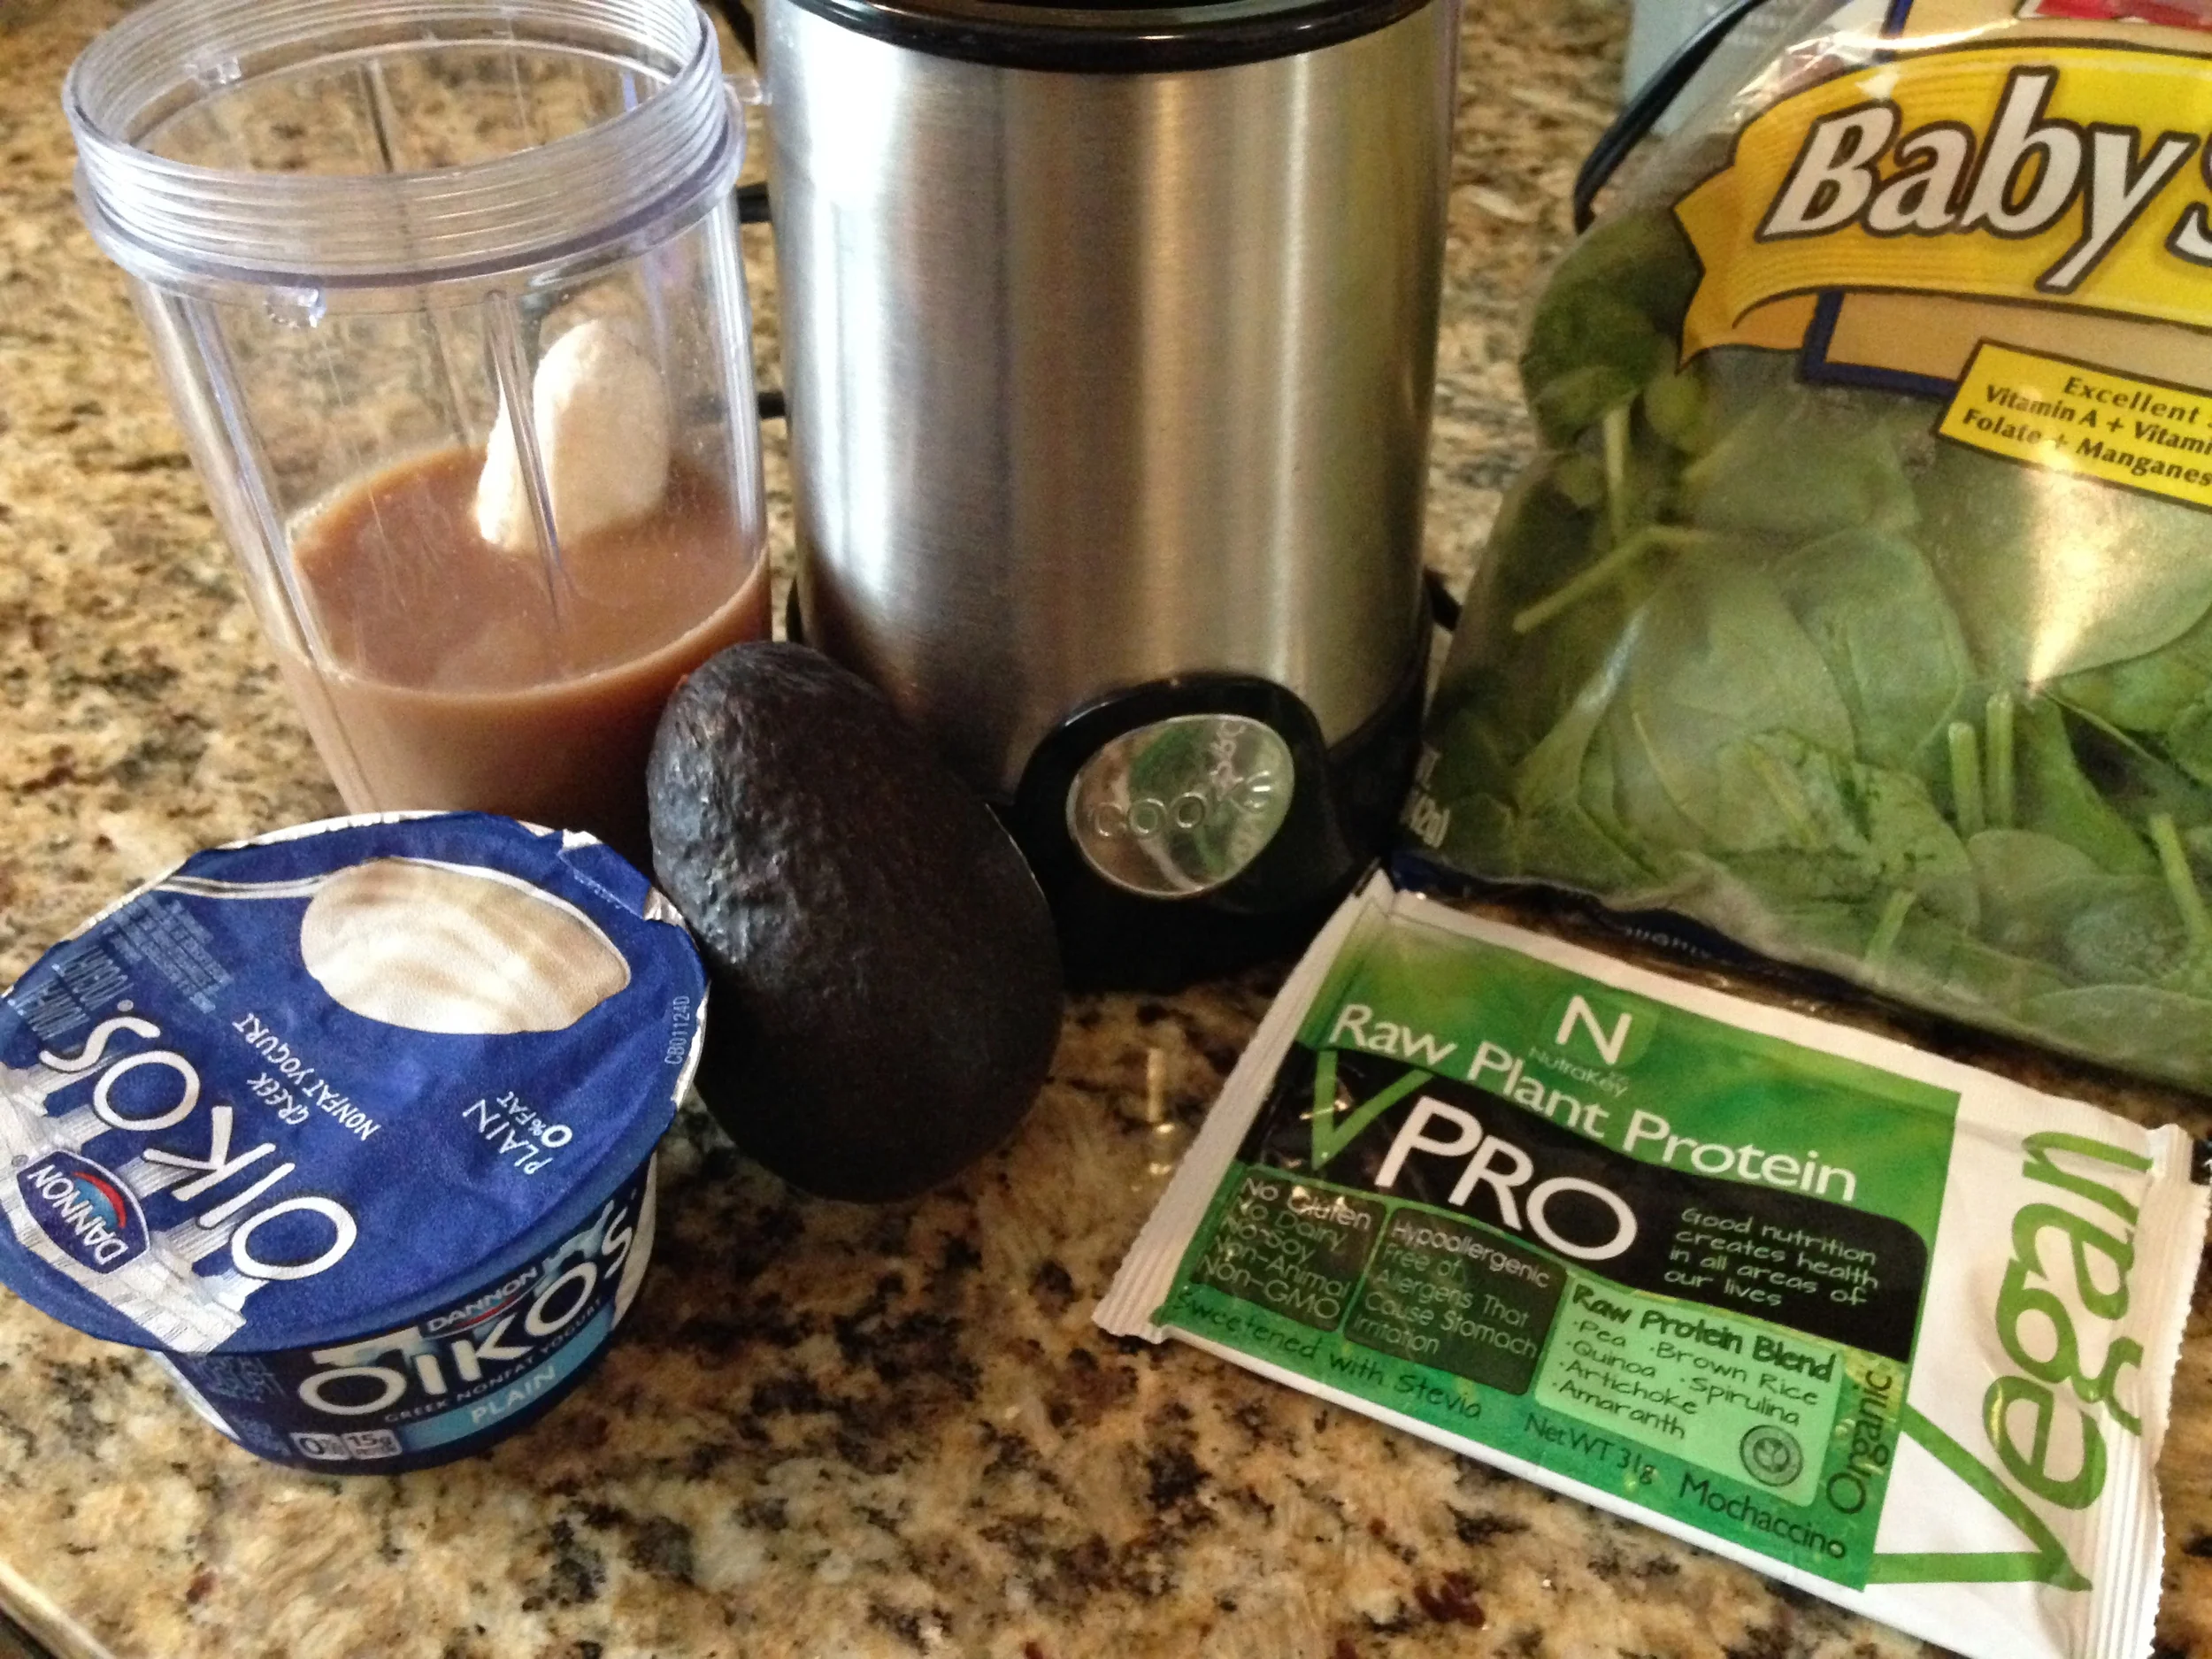
Smoothie ingredients
Instructions:
- Mix coffee with almond milk and pour into a blender
- Add the frozen banana, spinach, avocado, and Greek yogurt and blend (about 30 seconds). You may need to scrape down the sides of the blender to make room for the next ingredients and to make sure it all blends evenly!
- Add the protein powder and ice cubes and blend for 30-60 seconds. You may need to add more almond milk or ice cubes to reach your desired consistency (smoothie should be VERY thick!)
- Pour the smoothie into a wide-mouthed bowl and use a spoon to scrape out any remaining smoothie from the blender (trust me, you'll want to eat every last drop... and maybe lick the blender bottle too...)
- Top smoothie bowl with granola and a little cinnamon if you'd like
- Devour smoothie bowl!
It's seriously that simple and SUPER delicious! The nutritional content of this smoothie bowl is also out of this world! The entire bowl is 375 calories with a whopping 33g protein!
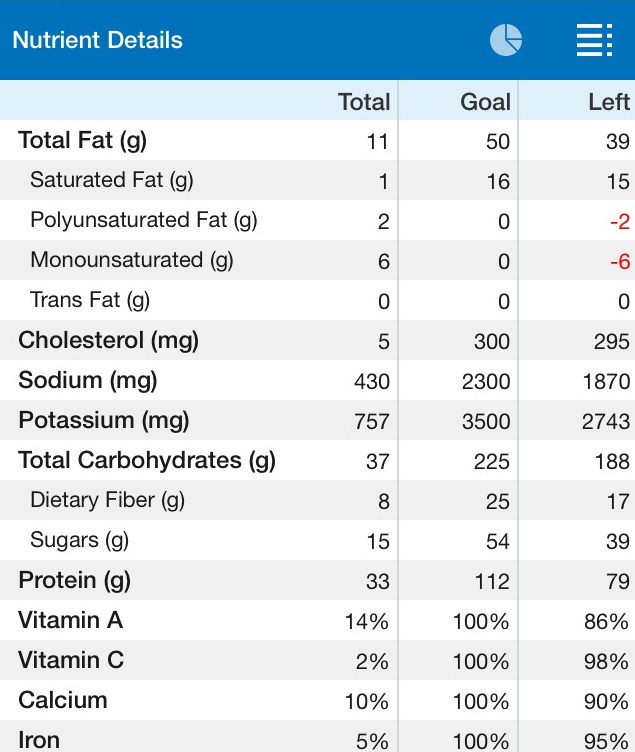
Smoothie 1 Nutrition
So next time you are craving a smoothie, try my Mocha-cado Smoothie Bowl! I promise you will not be disappointed :-)

Smoothie Bowl 1
Meal Makeover: Momma's Spinach and Tomato Quiche
Nutrition, RecipeCommentThere is nothing better than a home-cooked meal that is made with love, but these hearty home-cooked meals are usually high in fat, sugar, and sodium and overall high in calories. While these recipes "have been in the family for generations," there's nothing wrong with a little "makeover" action to make your favorite home-cooked meals hearty AND healthy! Take my mom's famous Spinach and Tomato Quiche recipe, for example - while it has been in the family for years, it is not the most waist-friendly OR heart-healthy meal for the family (sorry mom!).
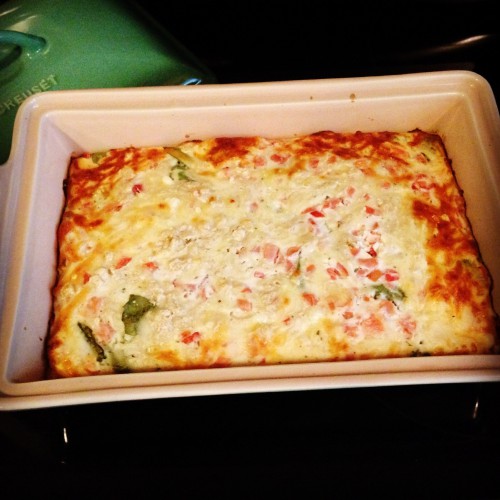
Quiched cooked
Today's Meal Makeover: Momma's Spinach and Tomato Quiche
Turned into Spinach and Tomato Egg White Quiche
With a simple swap of a few ingredients, I was able to turn my mother's famous (calorie-laden) Quiche into a low-fat, high-protein, Gluten-Free slim & trim Spinach and Tomato Egg White Quiche that the WHOLE family will love (and not feel guilty about having seconds)! The recipe make 6 generous servings and each serving has 180 calories, 5g fat (2g sat fat), 20g carbs, 3g sugar, and a whopping 16g protein! One serving also provides 34% of your daily Vitamin A and 45% of your daily Calcium requirements! Now that's a win, win, win situation!
So here's the recipe - super simple and ready in under 1 hour!
Ingredients:
- 1 cup non-fat plain Greek yogurt (I used Oikos)
- 1/2 a packet of Hidden Valley Ranch Dip (dry mix)
- 1 & 1/2 cups unsweetened almond milk (I used Silk original unsweetened)
- 1 cup Gluten-Free all purpose baking mix (I used Bob's Red Mill)
- 1 cup liquid egg whites (I used All Whites)
- 1 cup 2% (part-skim) shredded mozzarella cheese (I used Publix brand)
- 2 cups baby spinach (I used Fresh Express)
- 1 cup diced tomatoes
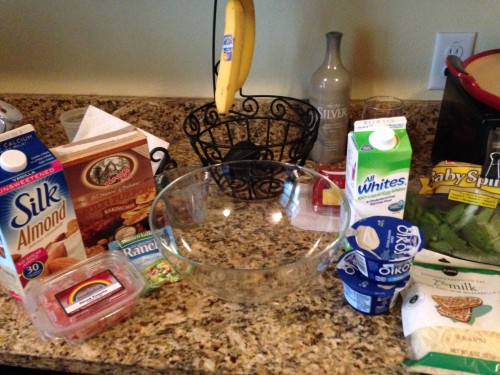
(The ingredients)
Instructions:
- Pre-heat oven to 400 deg. F and lightly spray a 9 X 13 baking dish with olive oil spray
- In a large mixing bowl, combine Greek yogurt with Ranch dip mix until it's evenly mixed in. Then add the almond milk and egg whites until completely combined
- Add the Gluten-free baking mix and mix very well, until all clumps are dissolved and mixture is completely blended
- In the prepared baking dish, layer the spinach to completely cover the entire bottom of the dish, then layer the diced tomatoes over the spinach, then layer the shredded cheese over the spinach and tomato layers
- Slowly pour the egg white mixture over the layers and push down any floating pieces of spinach with the back of a large spoon so that the egg white mixture completely covers the other ingredients
- Bake in the oven for 40-45 minutes or until the cheese slightly browns and the egg whites have completely set. (Feel free to stick a tooth pick or skewer stick to test that the egg whites have set completely and the tooth pick comes out clean)
- Let the dish cool for about 5-10 minutes, cut into 6 even pieces and serve
** You can store the Quiche in the fridge for about 3 days and reheat in the microwave to eat at anytime of the day (breakfast, lunch, dinner, or even for a hearty snack)!

Quiche uncooked
(The layers of spinach, tomatoes, and cheese - before adding egg white mixture)
If you are serving the Quiche for breakfast, I recommend adding a bowl of plain oatmeal with nuts and berries for added complex carbohydrates, healthy fats, and antioxidants to power your loved-ones (or yourself) up for the busy day ahead. If you plan to have the Quiche for lunch or dinner, I recommend adding in a slice of whole-grain bread and sliced avocado (i.e. avocado toast) or a side of brown rice or mashed sweet potato with a dash of brown sugar! YUM!
It's as easy as that! Now you have "tools" you need to serve up this delicious and healthy Quiche that the whole family will love! I am sure this recipe will stay in the family for generations to come :-)