Fuel for the Soul

Nourish the Body, Nourish the Soul

Meal Makeover: Momma's Spinach and Tomato Quiche

Nutrition, RecipekellypuryearComment

There is nothing better than a home-cooked meal that is made with love, but these hearty home-cooked meals are usually high in fat, sugar, and sodium and overall high in calories. While these recipes "have been in the family for generations," there's nothing wrong with a little "makeover" action to make your favorite home-cooked meals hearty AND healthy! Take my mom's famous Spinach and Tomato Quiche recipe, for example - while it has been in the family for years, it is not the most waist-friendly OR heart-healthy meal for the family (sorry mom!).

Quiched cooked
Quiched cooked

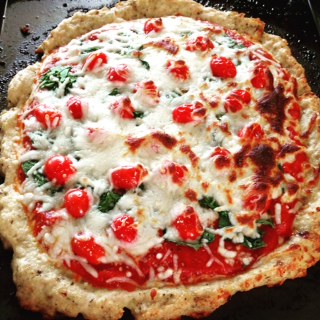
Today's Meal Makeover: Momma's Spinach and Tomato Quiche

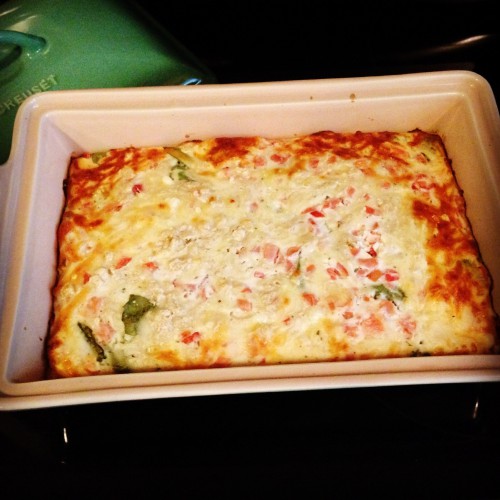
Turned into Spinach and Tomato Egg White Quiche

With a simple swap of a few ingredients, I was able to turn my mother's famous (calorie-laden) Quiche into a low-fat, high-protein, Gluten-Free slim & trim Spinach and Tomato Egg White Quiche that the WHOLE family will love (and not feel guilty about having seconds)! The recipe make 6 generous servings and each serving has 180 calories, 5g fat (2g sat fat), 20g carbs, 3g sugar, and a whopping 16g protein! One serving also provides 34% of your daily Vitamin A and 45% of your daily Calcium requirements! Now that's a win, win, win situation!

So here's the recipe - super simple and ready in under 1 hour!

Ingredients:

  • 1 cup non-fat plain Greek yogurt (I used Oikos)
  • 1/2 a packet of Hidden Valley Ranch Dip (dry mix)
  • 1 & 1/2 cups unsweetened almond milk (I used Silk original unsweetened)
  • 1 cup Gluten-Free all purpose baking mix (I used Bob's Red Mill)
  • 1 cup liquid egg whites (I used All Whites)
  • 1 cup 2% (part-skim) shredded mozzarella cheese (I used Publix brand)
  • 2 cups baby spinach (I used Fresh Express)
  • Quiche Set-up
  • 1 cup diced tomatoes
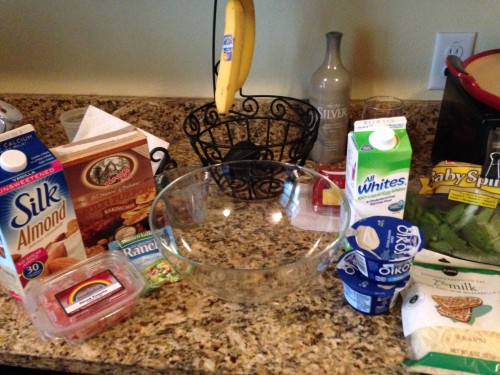
(The ingredients)

Instructions:

  1. Pre-heat oven to 400 deg. F and lightly spray a 9 X 13 baking dish with olive oil spray
  2. In a large mixing bowl, combine Greek yogurt with Ranch dip mix until it's evenly mixed in. Then add the almond milk and egg whites until completely combined
  3. Add the Gluten-free baking mix and mix very well, until all clumps are dissolved and mixture is completely blended
  4. In the prepared baking dish, layer the spinach to completely cover the entire bottom of the dish, then layer the diced tomatoes over the spinach, then layer the shredded cheese over the spinach and tomato layers
  5. Slowly pour the egg white mixture over the layers and push down any floating pieces of spinach with the back of a large spoon so that the egg white mixture completely covers the other ingredients
  6. Bake in the oven for 40-45 minutes or until the cheese slightly browns and the egg whites have completely set. (Feel free to stick a tooth pick or skewer stick to test that the egg whites have set completely and the tooth pick comes out clean)
  7. Let the dish cool for about 5-10 minutes, cut into 6 even pieces and serve

** You can store the Quiche in the fridge for about 3 days and reheat in the microwave to eat at anytime of the day (breakfast, lunch, dinner, or even for a hearty snack)!

Quiche uncooked
Quiche uncooked

(The layers of spinach, tomatoes, and cheese - before adding egg white mixture)

If you are serving the Quiche for breakfast, I recommend adding a bowl of plain oatmeal with nuts and berries for added complex carbohydrates, healthy fats, and antioxidants to power your loved-ones (or yourself) up for the busy day ahead. If you plan to have the Quiche for lunch or dinner, I recommend adding in a slice of whole-grain bread and sliced avocado (i.e. avocado toast) or a side of brown rice or mashed sweet potato with a dash of brown sugar! YUM!

It's as easy as that! Now you have "tools" you need to serve up this delicious and healthy Quiche that the whole family will love! I am sure this recipe will stay in the family for generations to come :-)

Transformation Tuesday: Long Distance Love

FitnesskellypuryearComment

"Transformations" can come in all shapes and sizes. For me, the biggest transformation took place in 2009 when I moved over 1,300 miles from Mattapoisett, Massachusetts to Tampa, Florida and had this CRAZY idea to run a HALF-MARATHON! For those of you who know me well, if you asked me to run more than 3 miles prior to 2009 .... I would have laughed at the ridiculousness of your request! I never even considered running more than 3 miles! Never say "never"....

Celebrate your achievements!

 (That's me - after I finished my FIRST Half-Marathon!)

I always thought the cross-country runners and distance athletes on my high school and college track teams were CRAZY to actually enjoy running for miles on end. My idea of "fun" was sprinting as fast as I could (for a very short duration) and I loved the adrenaline burst from a quick race - but that all changed after a season-ending injury during the winter of my Freshman year in college. My sprinting days were over, but that just meant that I had more time to find a new love - a LONG DISTANCE LOVE.

Bayshore Sunset
Bayshore Sunset

(Bayshore Boulevard - my new "happy place")

One of the first things I noticed when I moved to Tampa for graduate school was that nearly everyone was outside and exercising - no matter what time of the day or time of the year! The majority of the runners could be found on beautiful Bayshore Boulevard (a waterfront road with the longest continuous sidewalk) and I aspired to join those runners while training for my first half-marathon.

So now that I set a goal for myself - running a half-marathon - the next step was to figure out how to properly train for such a race! I researched "half-marathon training programs for a beginner" and found the highly-recommended Half-Marathon Training Guide from Hal Higdon and was immediately encouraged by his easy-to-follow guide and thought, Hey! Maybe I CAN actually do this! After downloading his 12-week novice 1 program guide, I researched "Half-Marathons in Tampa" and was unpleasantly surprised that there was an annual half-marathon IN TAMPA exactly 12 weeks away.... what a coincidence! I had no other choice but to "pull the trigger" and register for the 2010 Gasparilla Half-Marathon!

gasparilla-2010
gasparilla-2010

(Photo: Google Images)

The next step was to purchase a new pair of running shoes and to get my butt on Bayshore to begin my training. The training was NOT easy and it took every ounce of my will power to not quit. I suffered through many cramps, blisters, sun-burns, and got myself stuck in many torrential downpours - but I stuck it out and completed the training program and I was SO ready for race day!

100_1887
100_1887

(Morning of the race! I was so nervous, yet excited!)

The race came and went (in about 2 hours!) and I could not believe that I actually ran a half-marathon (without stopping once to walk)! The most important thing for me was the process - not my finishing time, but the fact that I actually accomplished a challenging goal that I set over 12 weeks ago! As I approached the finish line, I had to hold back tears of joy as I picked up my pace and "sprinted" across the FINISH. The adrenaline rush was like none other that I have ever experienced and I certainly got the "runner's high" that I heard so much about. At that moment, I was on top of the world - the highest I have ever been and I was hooked!

100_1895
100_1895

(Post-race - all smiles!)

Since 2009, I completed 5 half-marathons, 1 Tough Mudder 12-mile race, and 1 FULL MARATHON! After my first marathon in February of 2012, I retired from endurance running with many memories and vital lessons learned. I learned that once you put your mind to something and set a goal for yourself, you can and WILL achieve your goals if you stay focused and motivated; I learned that even when you feel like giving up, nothing feels better than crossing that "finish line" and achieving your goals; and I learned the importance of listening to your body and resting when you need to. I also learned that there is always room for change or growth ... you just need to figure out what you want in life, set realistic goals, and go after them!

100_2599
100_2599

(Before my 2nd Half, with my best friend Meg - my ultimate running buddy)

Post-race Pre&I
Post-race Pre&I

(After my 3rd Half - with my sweet husband, my #1 fan)

Tough Mudder
Tough Mudder

(After Tough Mudder - with my adventurous & fit friend Alex)

So there's my transformation. It was a long road, but I will never look back and regret the process (nor will I forget the feeling of success)! I want that for you! And I encourage you to look deep inside and decide what your main goal is - then go after it!

Thank you for reading my story! I would love to hear your "Transformation Story" or to help you write your own. Please send me a message and let me know how I can help :-)

Want more? Look for the Perfect Pre & Post - Race Meals  blog (COMING SOON) to learn how to properly fuel before a long run or race and what to eat after the long run to refuel!.

Meals made in minutes: Super Easy Tuna Salad

Nutrition, RecipekellypuryearComment

Monday means the beginning of the busy work-week and the beginning of "not having enough time" to prepare a healthy meal during the day! For those of you who feel the same way, have no fear! Come HERE every Monday to find a super easy and nutritious recipe for a meal made in minutes!  That's right, every Sunday evening I will post a new recipe for one of my favorite meals that can be made in minutes! Make this meal Sunday night to take into work with you on Monday for a healthy lunch or wait until you come home from work and whip up this meal for a super easy dinner!

Today's Meal Made in Minutes: Super Easy Tuna Salad

Winning Combo Tuna Salad

(Proof that even a "novice chef" can make this meal!)

What you will need:

  • Two cups of your favorite mixed greens (I used Fresh Express Mixed Greens)
  • 1 single serve pouch of StarKist Low Sodium Chunk Light Tuna (2.6 oz)
  • 1 single serve Wholly Guacamole mini cup
  • 2 Tbsp plain non-fat Greek Yogurt (I used Oikos Greek Yogurt)
  • 1/4th cup cherry tomatoes (sliced in half)
  • 1/2 whole wheat tortilla wrap or Lavash bread (I used Sami's Bakery Millet & Flax Lavash)
  • 2 tbsp Balsamic Vinaigrette salad dressing
  • Red chili flakes and black pepper to taste

How to prepare it:

  • Mix the tuna with the guacamole and Greek yogurt in a small bowl, add in the chili flakes and pepper (to taste) and stir to completely combine all ingredients
  • In a serving bowl, place mixed greens and tomatoes in the bottom of the bowl and pour 1 tbsp balsmic vinaigrette on top
  • Top the mixed greens with tuna salad and pour remaining 1 tbsp dressing over the tuna
  • Serve with 1/2 tortilla or Lavash and dig in!

This meal provides all three macro-nutrients - complex carbohydrates, lean protein, and healthy fats (known as "the winning combos") - with tons of antioxidants for long lasting energy to get you through the long work day!

For a variation of this Super Easy Tuna Salad, try adding in some baby carrots for extra antioxidants! Go ahead, have fun with your food!

Tuna Salad w carrots

That's really all there is to it! A healthy meal made in minutes that doesn't skimp out on nutrients or taste!

Enjoy!

Free Fitness Friday: Quick 20-minute calorie-blasting workout

Fitnesskellypuryear4 Comments
Gym-Life
Gym-Life

That's right! Your eyes are not deceiving you... I did say "FREE"! Every Friday I will post a FREE workout that you can do nearly any where, any time - especially when you are short on time.

I know how difficult it may be to find the time to work out during the work-week (especially on a Friday) but there's no better way to de-stress from the hectic week at work than to exercise! With these quick and effective workouts, you will be able to reduce your stress, blast some calories, and set yourself up for the weekend ahead! Seriously, these workouts are only 20-30 minutes long and can be completed nearly anywhere at any time!

So.... what are you waiting for? Let's get to work!

HITT Tabata Workout 1

Today's workout - 7/10/15

So here is how you complete the workout:

Start with a 5-10 minute warm-up. This can be done by walking, jogging, biking, the elliptical, the rower machine, the stairmaster... whatever your heart desires as long as you warm up your entire body and get your heart-rate up for at lease 5 minutes. Today I chose to jog for 1 mile on the treadmill :-)

Then you start your timer - I was introduced to the Interval Timer app by a dear friend (Lindsey) and absolutely love it! The timer is so easy to use and you can download it on your smart phone to use during your workout. If you don't have a smart phone, you can easily use a stop watch.

Complete each exercise (1-5) for 20 seconds of high-intensity work with a 10-second rest between each exercise until you complete the 5th exercise - that is one (Tabata) cycle. For example, do the kettle bell swing for 20 seconds, rest for 10 seconds, then move onto the ring pull-ups (TRX pull-ups) for 20 seconds, rest for 10 seconds, then move onto the wall ball for 20 seconds, rest for 10 seconds, then move onto the plie' squat for 20 seconds, rest for 20 seconds, then finish with the plank and pike for 20 seconds. Rest 10 more seconds before moving onto the next cycle. Repeat the cycle 5 more times (for a total of 6 cycles) and then cool down for another 5-10 minutes (depending on how much time you have).  I had extra time this morning and chose to do the stairmaster for 10 minutes, but you can choose any form of cardiovascular exercise to cool down. Don't skimp out on the cool down! It's important to allow your heart-rate to come back down to near-resting levels AND stretch after a high-intensity workout!!

Motivation pic
Motivation pic

If you are not sure how to perform each exercise that is listed in the workout, simply click the links to see the proper form for each exercise. Or please feel free to ask me in the "comments" section below - I am happy to help answer any questions that you may have :-) 

(Photo: Robolikes)

And that's all there is for today, folks! Short and sweet (yet super effective)! I bet you feel better already! :-)

Meal Makeover: Meet the Meatza Pizza!

Recipe, Nutritionkellypuryear3 Comments

Hey there! Welcome to my FIRST EVER blog post! For those of you who know me well, you are very familiar with my never-ending "meal makeovers" and healthy(er) recipe posts on my Pinterest, Instagram, and Facebook pages, but now you will be able to come to one site to see all of my creative meals and recipes! I hope you enjoy what you see... make...and EAT! I figured there was no better way to start my first Recipe Blog Post than to introduce you all to the greatest thing since sliced GLUTEN-FREE bread!! Allow me to introduce the amazing "Meatza" Pizza - which just happens to be NATURALLY gluten-free and SURPRISINGLY delicious!

Meatza Pizza
Meatza Pizza

(Yes folks, it truly looks that beautiful and delicious! I took this picture right after the Meatza came out of the oven!)

When I first discovered this recipe on Pinterest, I was very intrigued to try it out myself (but was very skeptical at the same time). Now, I will admit that I am not the best cook (yet), so I enlisted the help of my (very talented and sweet) neighbor who just happens to be a pro in the kitchen. My neighbor, Margie, and I (along with the help of her 10-year old grandson) made two Meatza Pizzas earlier this afternoon and we were all surprised by how easy it was to make them (and by how much fun we had while doing it)! Within an hour, the Meatzas were done and we couldn't believe the final product. Our Meatza Pizzas looks like regular pizzas! We could hardly wait to slice up one of the Meatza Pizzas and I for one was blown away by the amazing taste and texture! Even the 10-year old boy LOVED it!

Now if you don't believe me... try it yourself! Here is the recipe that started this whole "crazy" Meatza Pizza idea (from the talented Baker By Nature).

Marg. Meatza Pizza
Marg. Meatza Pizza

(Photo: BakerByNature)

As always, I made some minor modifications to her recipe, but you could really use any toppings you would like! Here are the modified ingredients that I used to make the Spinach and Tomato Meatza:

Ingredients

  • 1 teaspoon salt
  • 1 teaspoon dried oregano
  • 1 teaspoon garlic salt
  • 1 teaspoon onion powder
  • 1 teaspoon ground black pepper
  • 1/2 teaspoon crushed red pepper flakes
  • 1.25pounds extra-lean ground turkey meat
  • 1 teaspoon worcestershire sauce
  • 2 large eggs
  • 1/2 cup grated Parmesan cheese
  • 8 ounces shredded 2% mozzarella cheese
  • 1 cup tomato sauce
  • 10 Grape Tomatoessliced in half length-wise
  • 1/4 cup baby spinach, chopped

It's truly that simple! We baked the "crusts" for 15 minutes, put our toppings on, and put the Meatzas under the broiler for 5 minutes. Once they were cooled a bit, we sliced one Meatza into 8 slices and entered "Meatza Bliss" with our first bite!

Meatza Crust
Meatza Crust

(The Meatza "crust" after baking for 15 minutes)

Slice of Meatza
Slice of Meatza

(The first bite of the first slice...mmmm)

Don't just take my word for it - try it out yourself. Like.....NOW! You're welcome :-)